
AI Feedback API using Grafbase, Contentful and OpenAI API
Redefining Blog Content and Empowering Creators Through Seamless AI-Generated Feedback

Software Engineer excited at building real live cloud-native applications using Python. MSc Cybernetics and Communications Engineering from Nottingham Trent University.
Introduction 📶
AI Feedback API is a GraphQL API project that is masterfully built and deployed on Grafbase. This project harnesses OpenAI API to provide feedback for blog post content sourced from Contentful, serving as the project's Content Management System (CMS).
The AI Feedback API enhances the traditional approach to content assessment by automating the intricate process of scrutinizing blog posts and providing intelligent, structured, and clear feedback devoid of direct human bias.
The project provides direct support for editors, reviewers and other assessors of written comms by optimizing the time taken for them to grasp the essence of the blog post's content.
Video Demo 📹
Inspiration & Development Method 🙏
Currently, many of the software tools for leveraging AI in the writing sector are more focused on using AI as a copywriter to generate content or as a bot to check for grammatical errors within a blog post. This was the foundation for inspiration in creating the project. AI Feedback API amalgamates text-generation AI features with AI text analysis features to give a review of text-based content that has been created by an author.

The project uses Contentful as the primary data source for the GraphQL API. The details for each of the blog posts that we want to get feedback on are stored on Contentful. This includes the author, title and body of the blog post. The GraphQL API is deployed on Grafbase. It uses a GraphQL resolver to extend its functionality and include a field for feedback in the response to a POST request to the API. The resolver is customized to include a function where blog posts from Contentful pass through the OpenAI GPT-3.5 model for generating natural language to provide detailed feedback for the body of each blog post.
The project backend was configured using the Typescript SDK.
Prerequisites 👂
GitHub account for signing up on Grafbase and for hosting the project repo remotely.
Postman for testing the remote API.
Contentful for Data Sourcing 👜
Contentful is a Content Management System (CMS) that uses an API-first architecture to enable the orchestration of digital content. By using Contentful in this project, we are able to have a platform where blog posts can be conveniently uploaded on. This will act as the primary data source in the project. We will create a model for the blog post on Contentful that we will use to further create a number of blog posts which will receive feedback using a query to the Grafbase AI Feedback API.

To get started with Contentful, log in or signup to Contentful using your personal credentials.
Creating data using the Content Model
Open a new project space.
From the Content model menu within the project space, add a new content type. Contentful uses a structure called "Content Type" to define a piece of content. Each Content Type consists of various fields, which represent different properties of that content.

Create a model for
Blogin Contentful.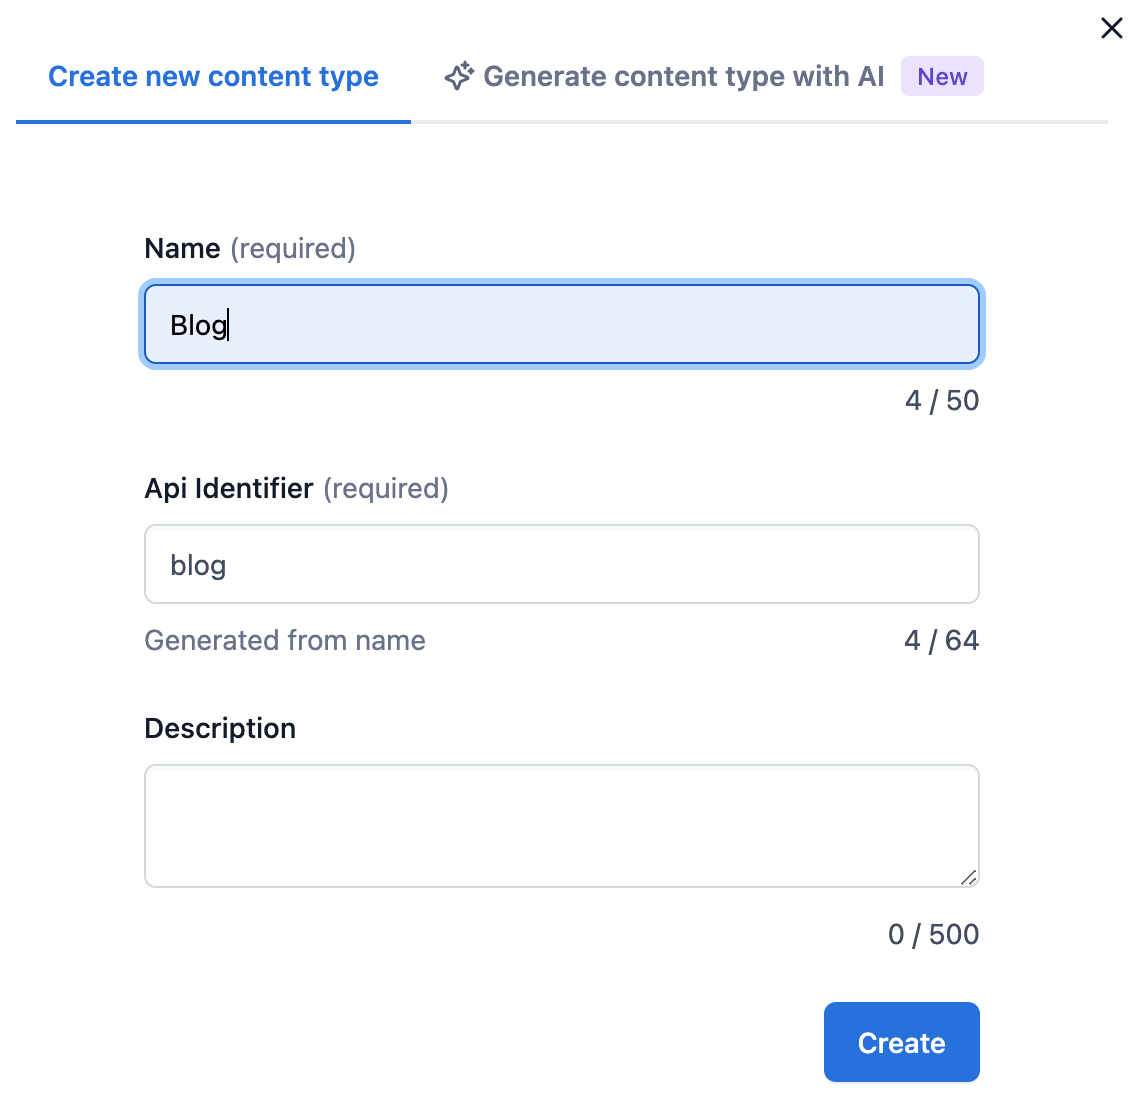
Add fields for:
Title- short text fieldAuthor- short text fieldPost- long text field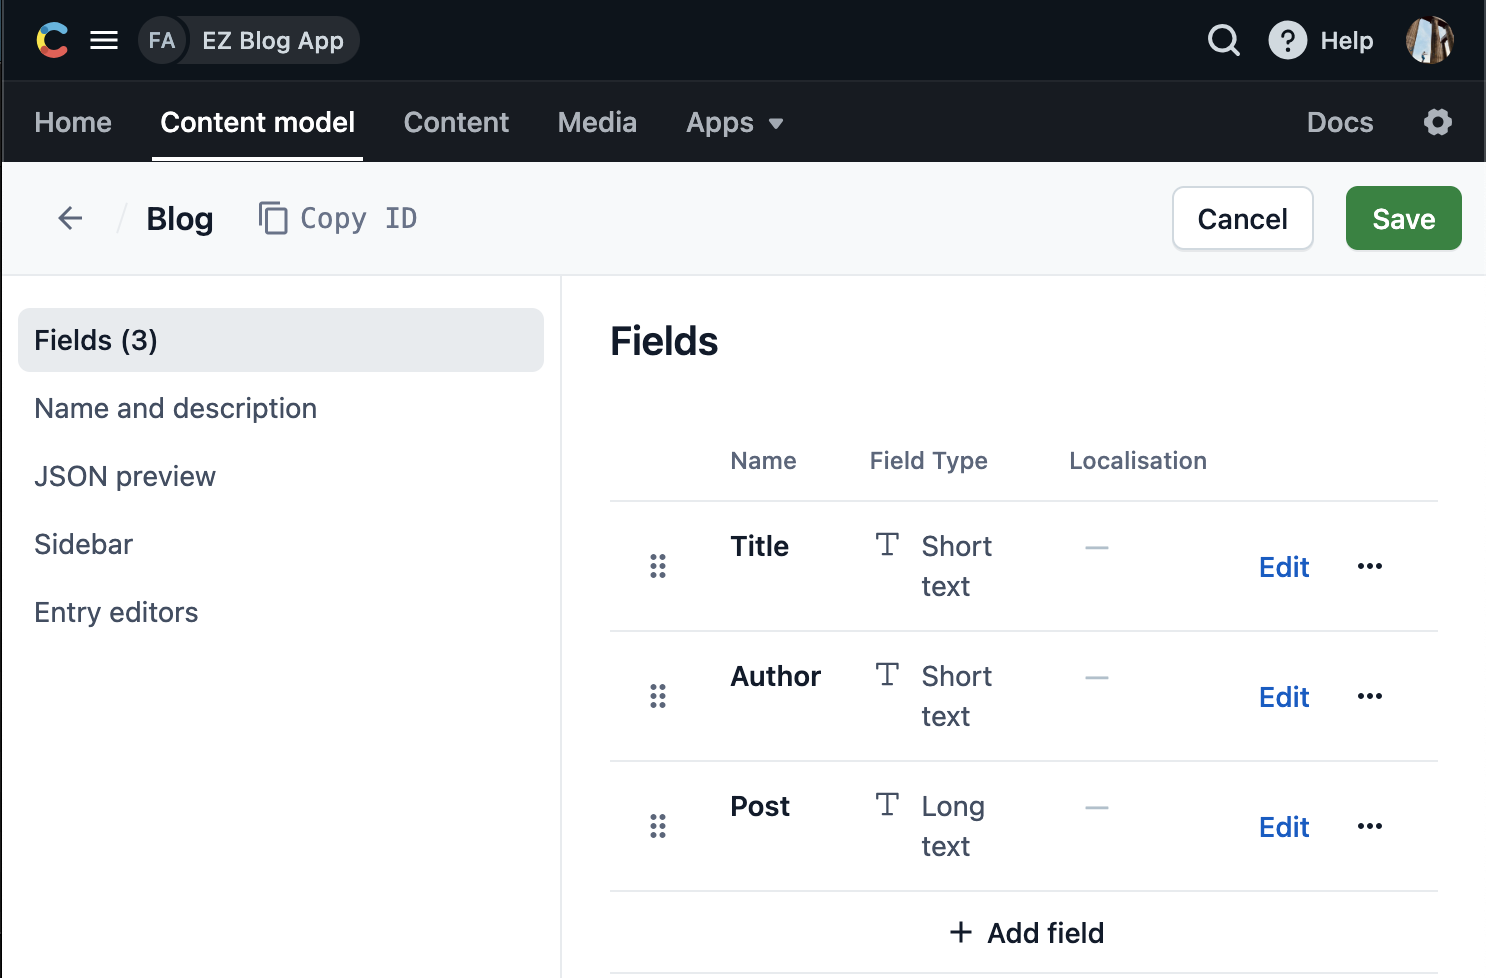
Save the model
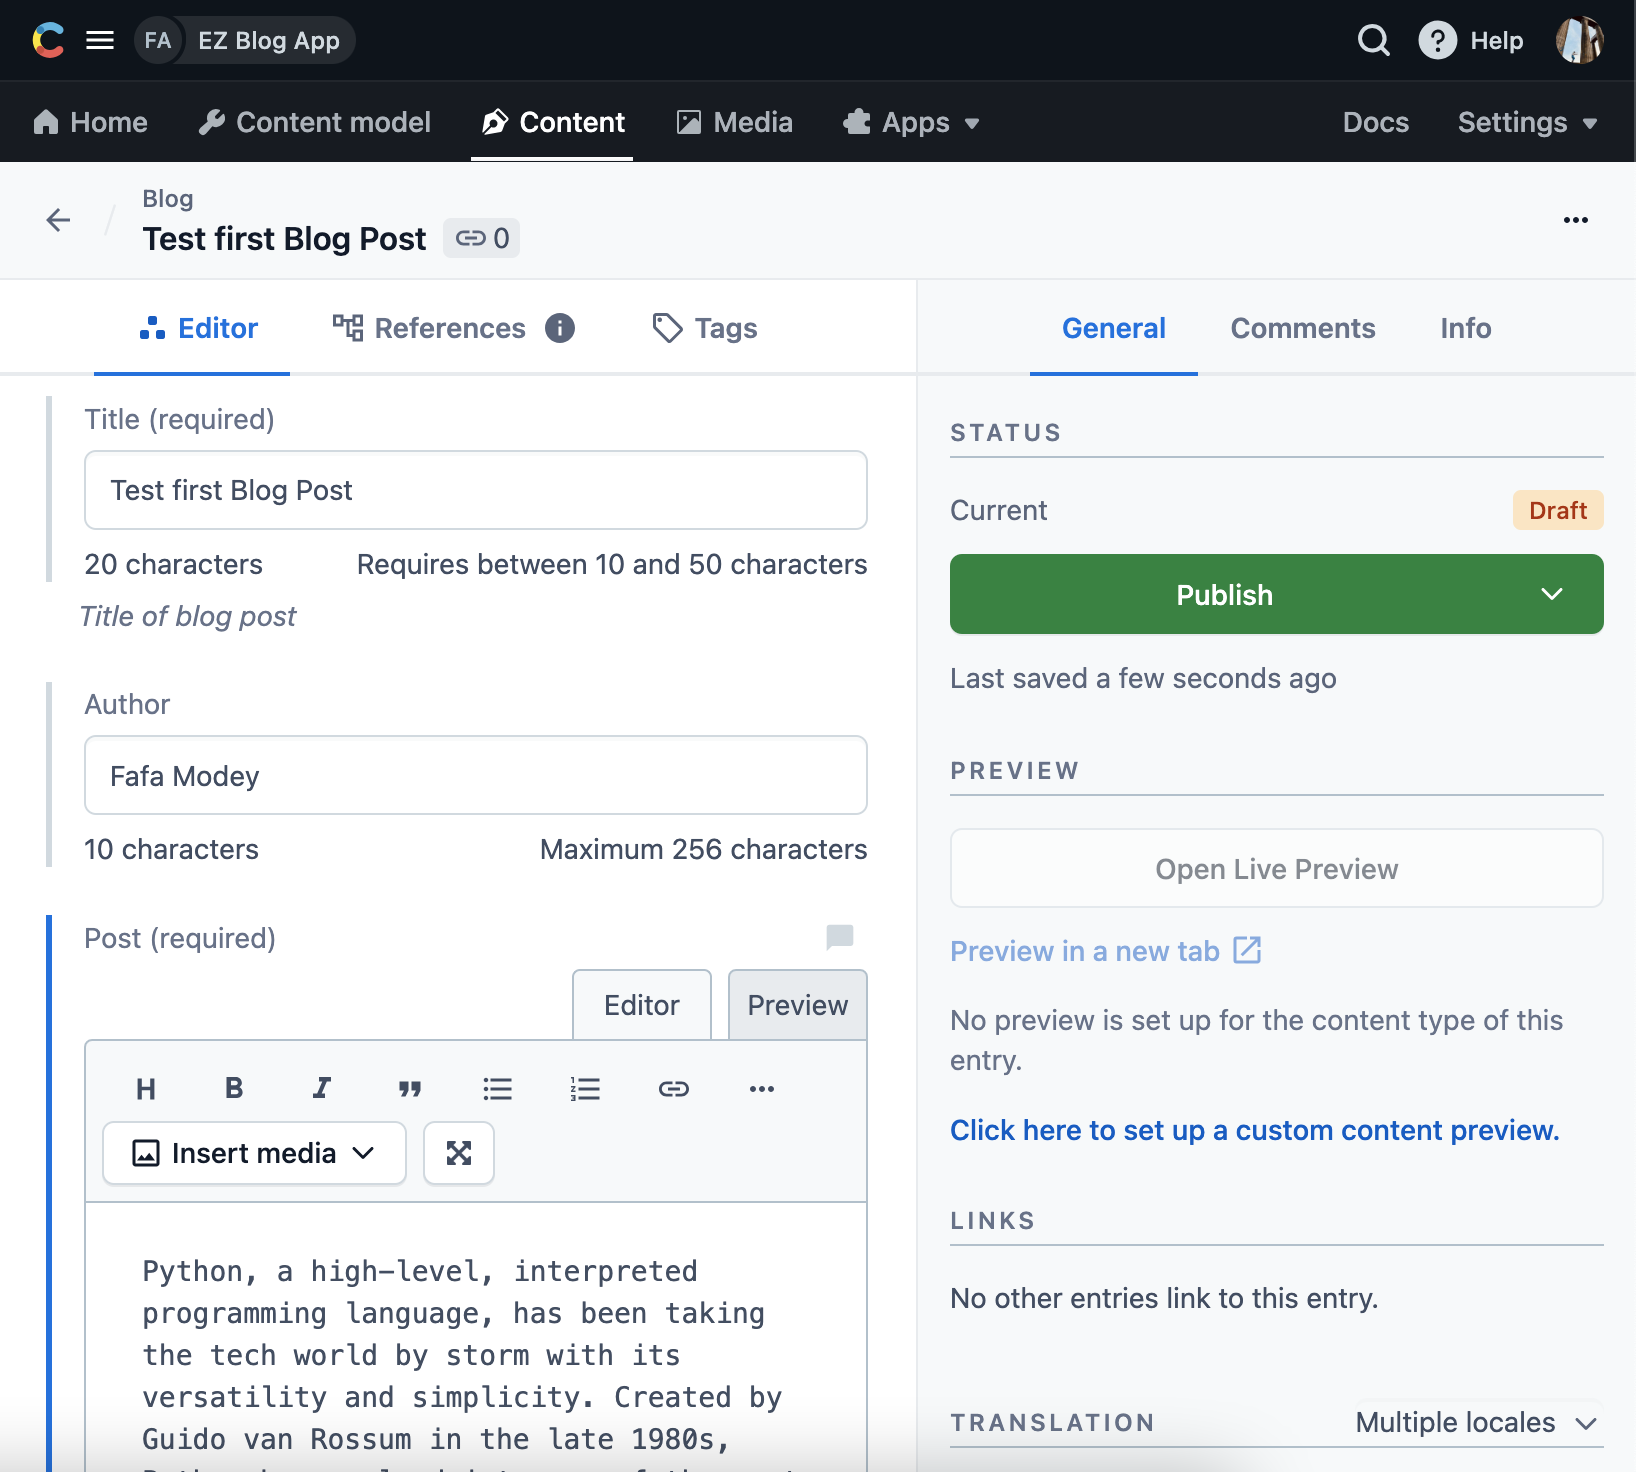
Create content for the newly set up model. This will be the first Blog entry. Click on Content and click on Add entry. Ensure that the Content type is set to
Blog

Fill in data values for the fields in the model and click Publish once done.
Connecting to Contentful API using API Keys
Next, we have to obtain the Contentful API URL and the API Key.
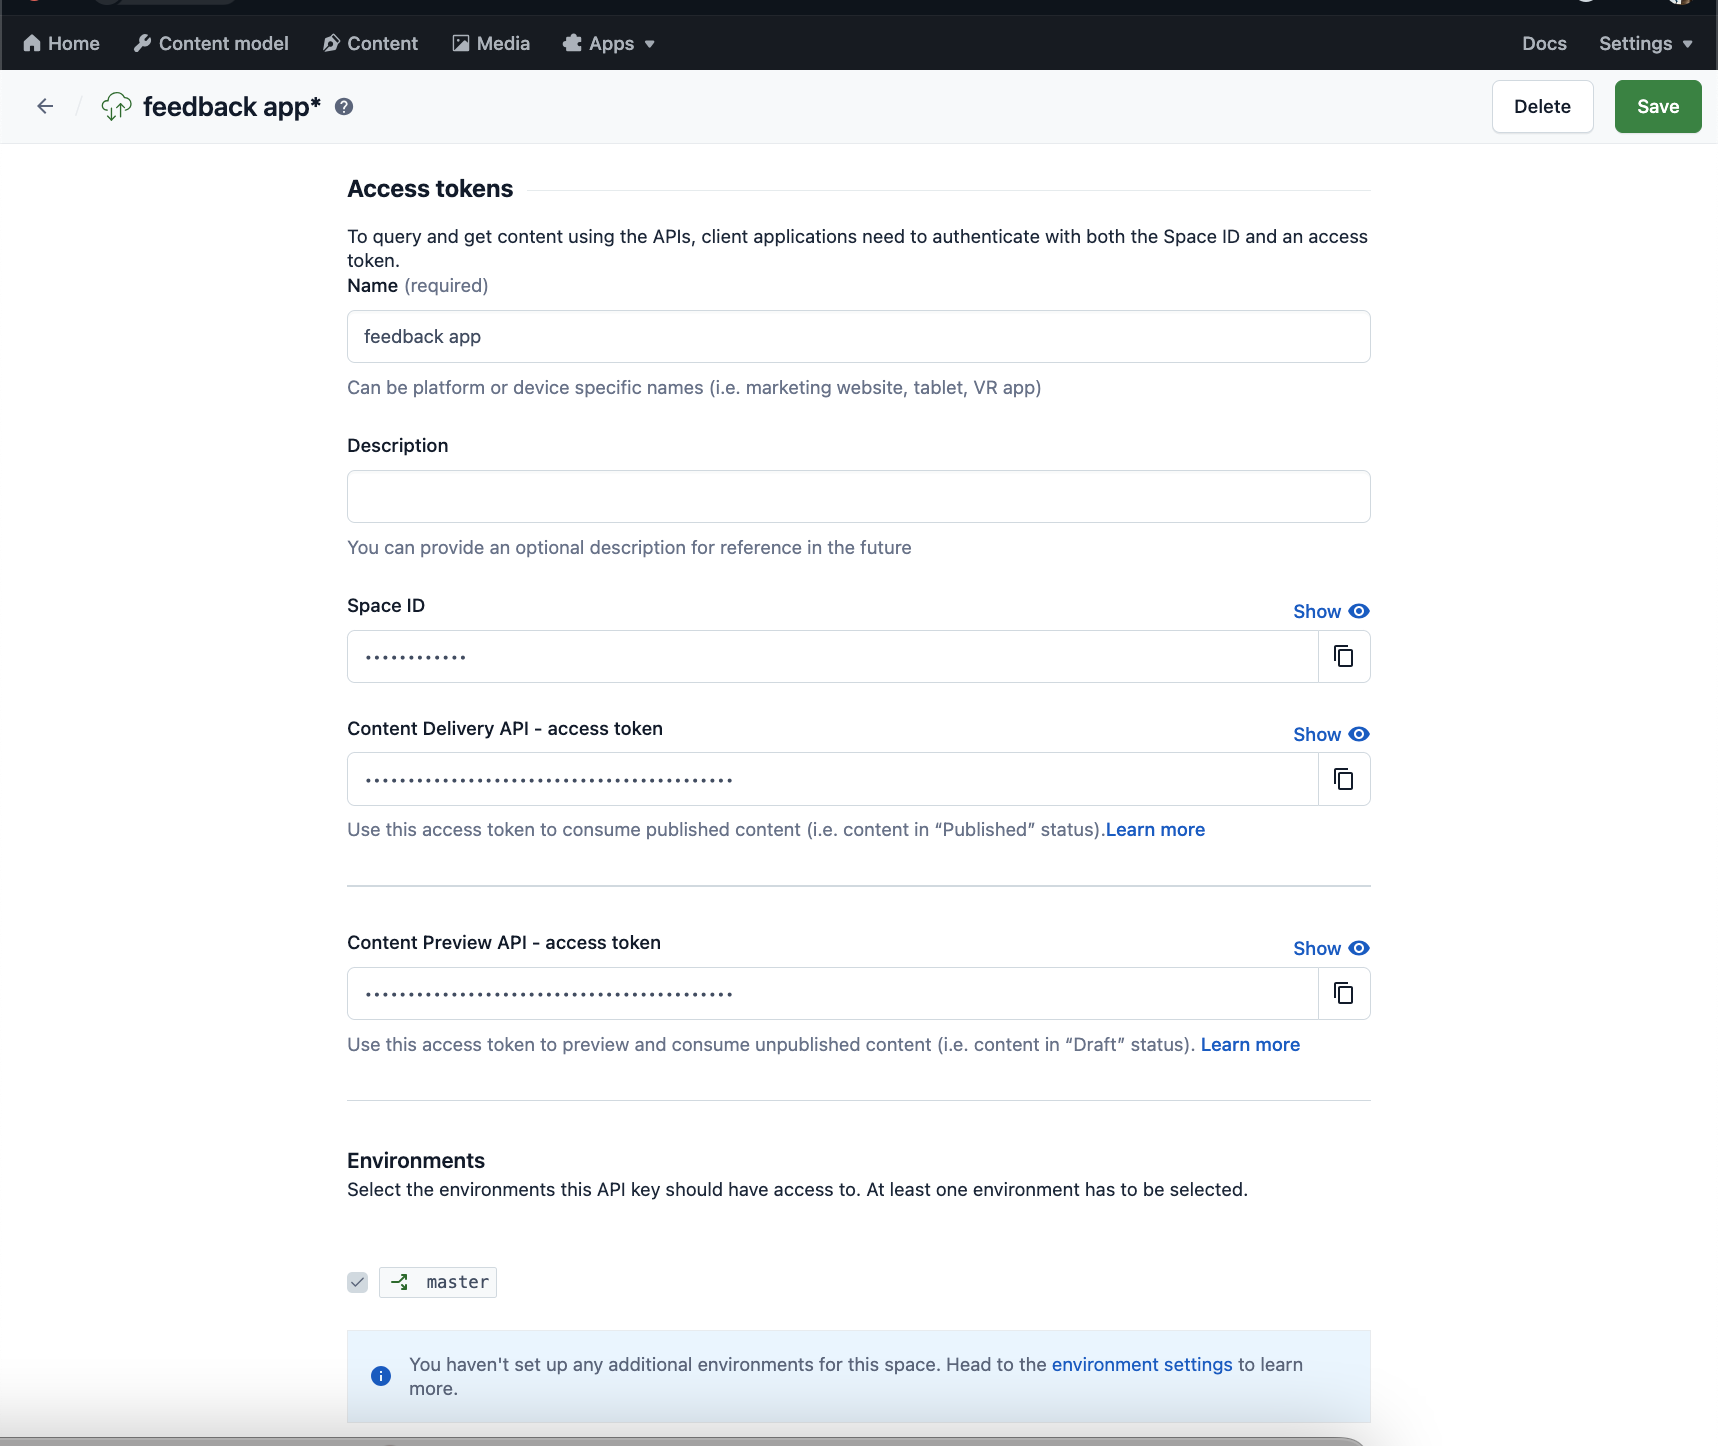
From the Contentful space homepage, go to Settings and click on API Keys.
Add a New API Key for this project. Give it a name.
Click save.
Show the Space ID and the Content Delivery API access token. Copy these and save them in a secure place for future reference.
Using Grafbase for the Backend 🔗
Grafbase allows users to create and deploy their own GraphQL API securely. It offers features like integrating various data sources using resolvers and connectors, setting up edge caching, implementing authentication and permission rules, and enabling serverless search.
Grafbase provides a CLI tool for local development, and each Git branch has a dedicated preview deployment for testing and collaboration purposes.
Visit the Grafbase home page to create an account. I signed up using my GitHub account.
Creating Grafbase Edge Gateway
The project backend is developed using a Grafbase Edge Gateway which will run locally and can be deployed later to the edge.
Run the command below from the project directory on your CLI to install the @grafbase/sdk and then create a new project in the directory with the next command. Agree to install the
grafbase@0.29.0package if you are prompted to do so.npm install @grafbase/sdk --save-devnpx grafbase init blog-feedback --template graphql-contentful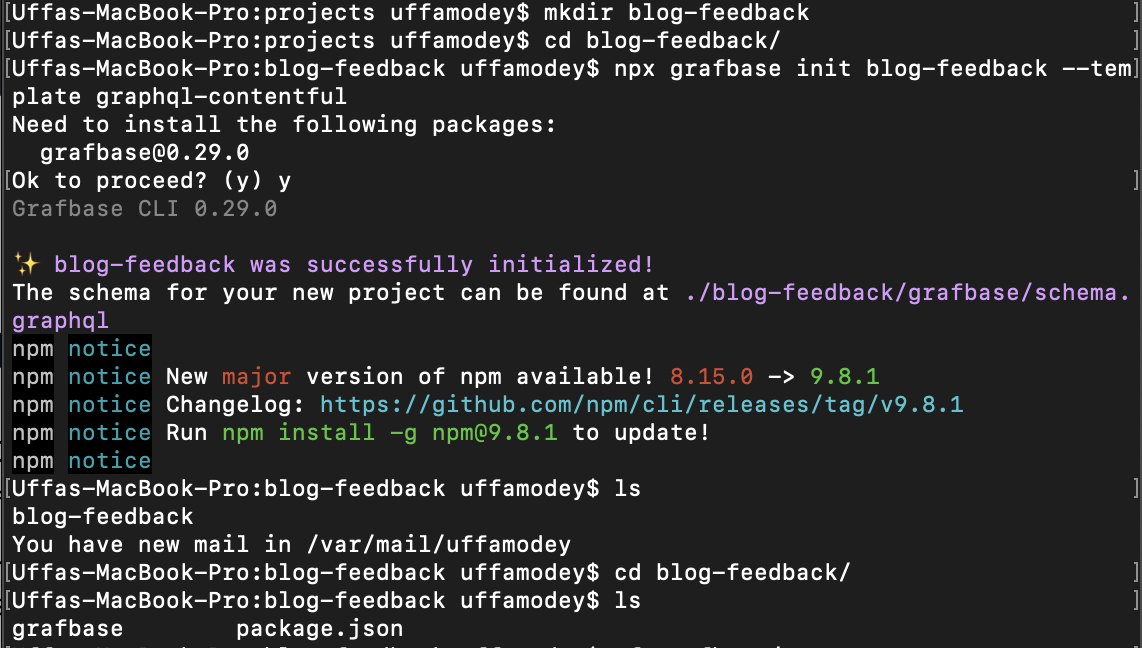
From your programming IDE of choice (I am using PyCharm), open up the project folder and view the
grafbase/grafbase.config.tsfile.The
grafbase/grafbase.config.tsfile is used to configure the backend for this project. It generates information for deployment to the GraphQL Edge Gateway. Here we will configure the edge resolvers used for the inputting control, flexibility and logic to the API.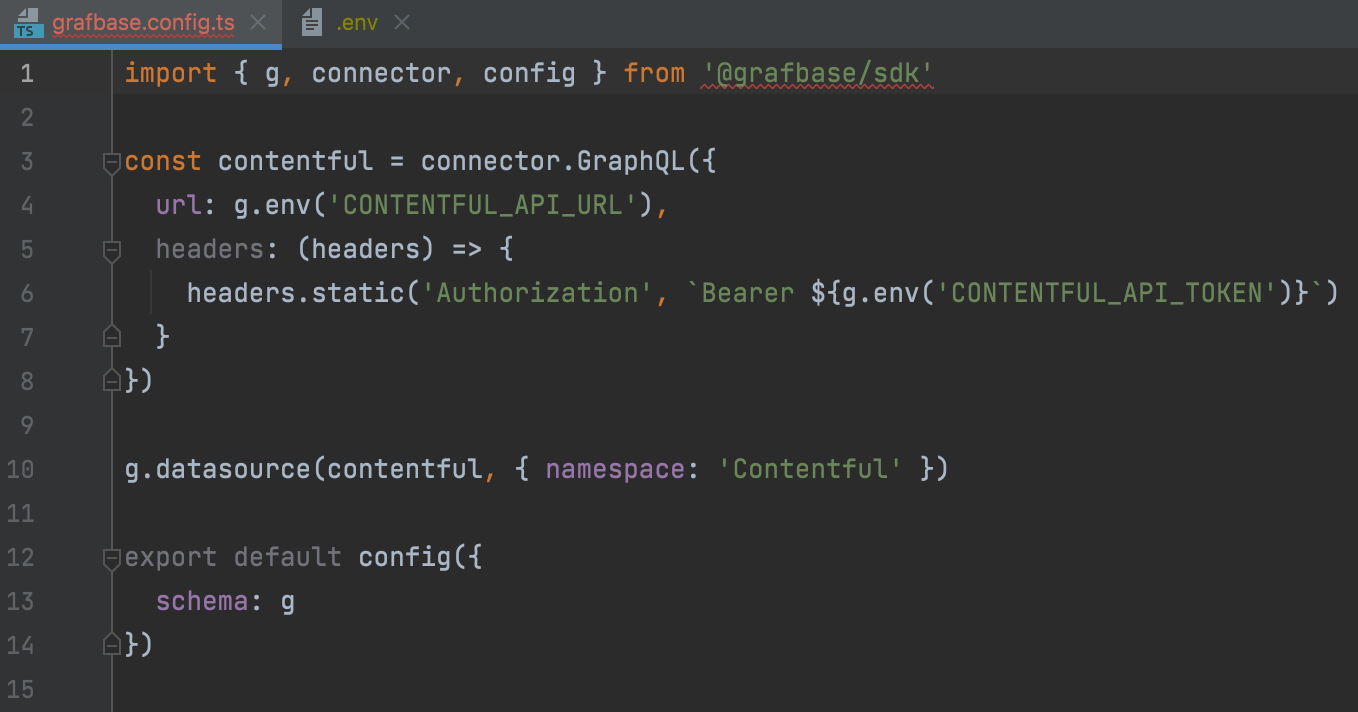
Open the
.envfile and update the field below with the details saved from creating the Contentful API Keys.CONTENTFUL_API_URL=https://graphql.contentful.com/content/v1/spaces/SPACE_IDCONTENTFUL_API_TOKEN=
Connecting Grafbase to Contentful Data
- Run the command below to use the Grafbase CLI to run your GraphQL API locally. Ensure that you are running Node.js version
v18.0.0or higher on your PC.
npx grafbase dev
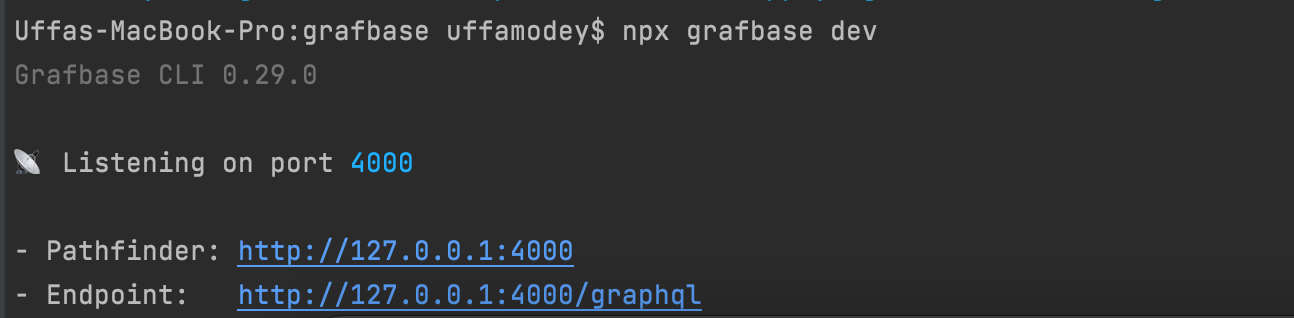
Click on http://127.0.0.1:4000/ to open up your web browser and execute a query for fetching the blog data from Contentful.
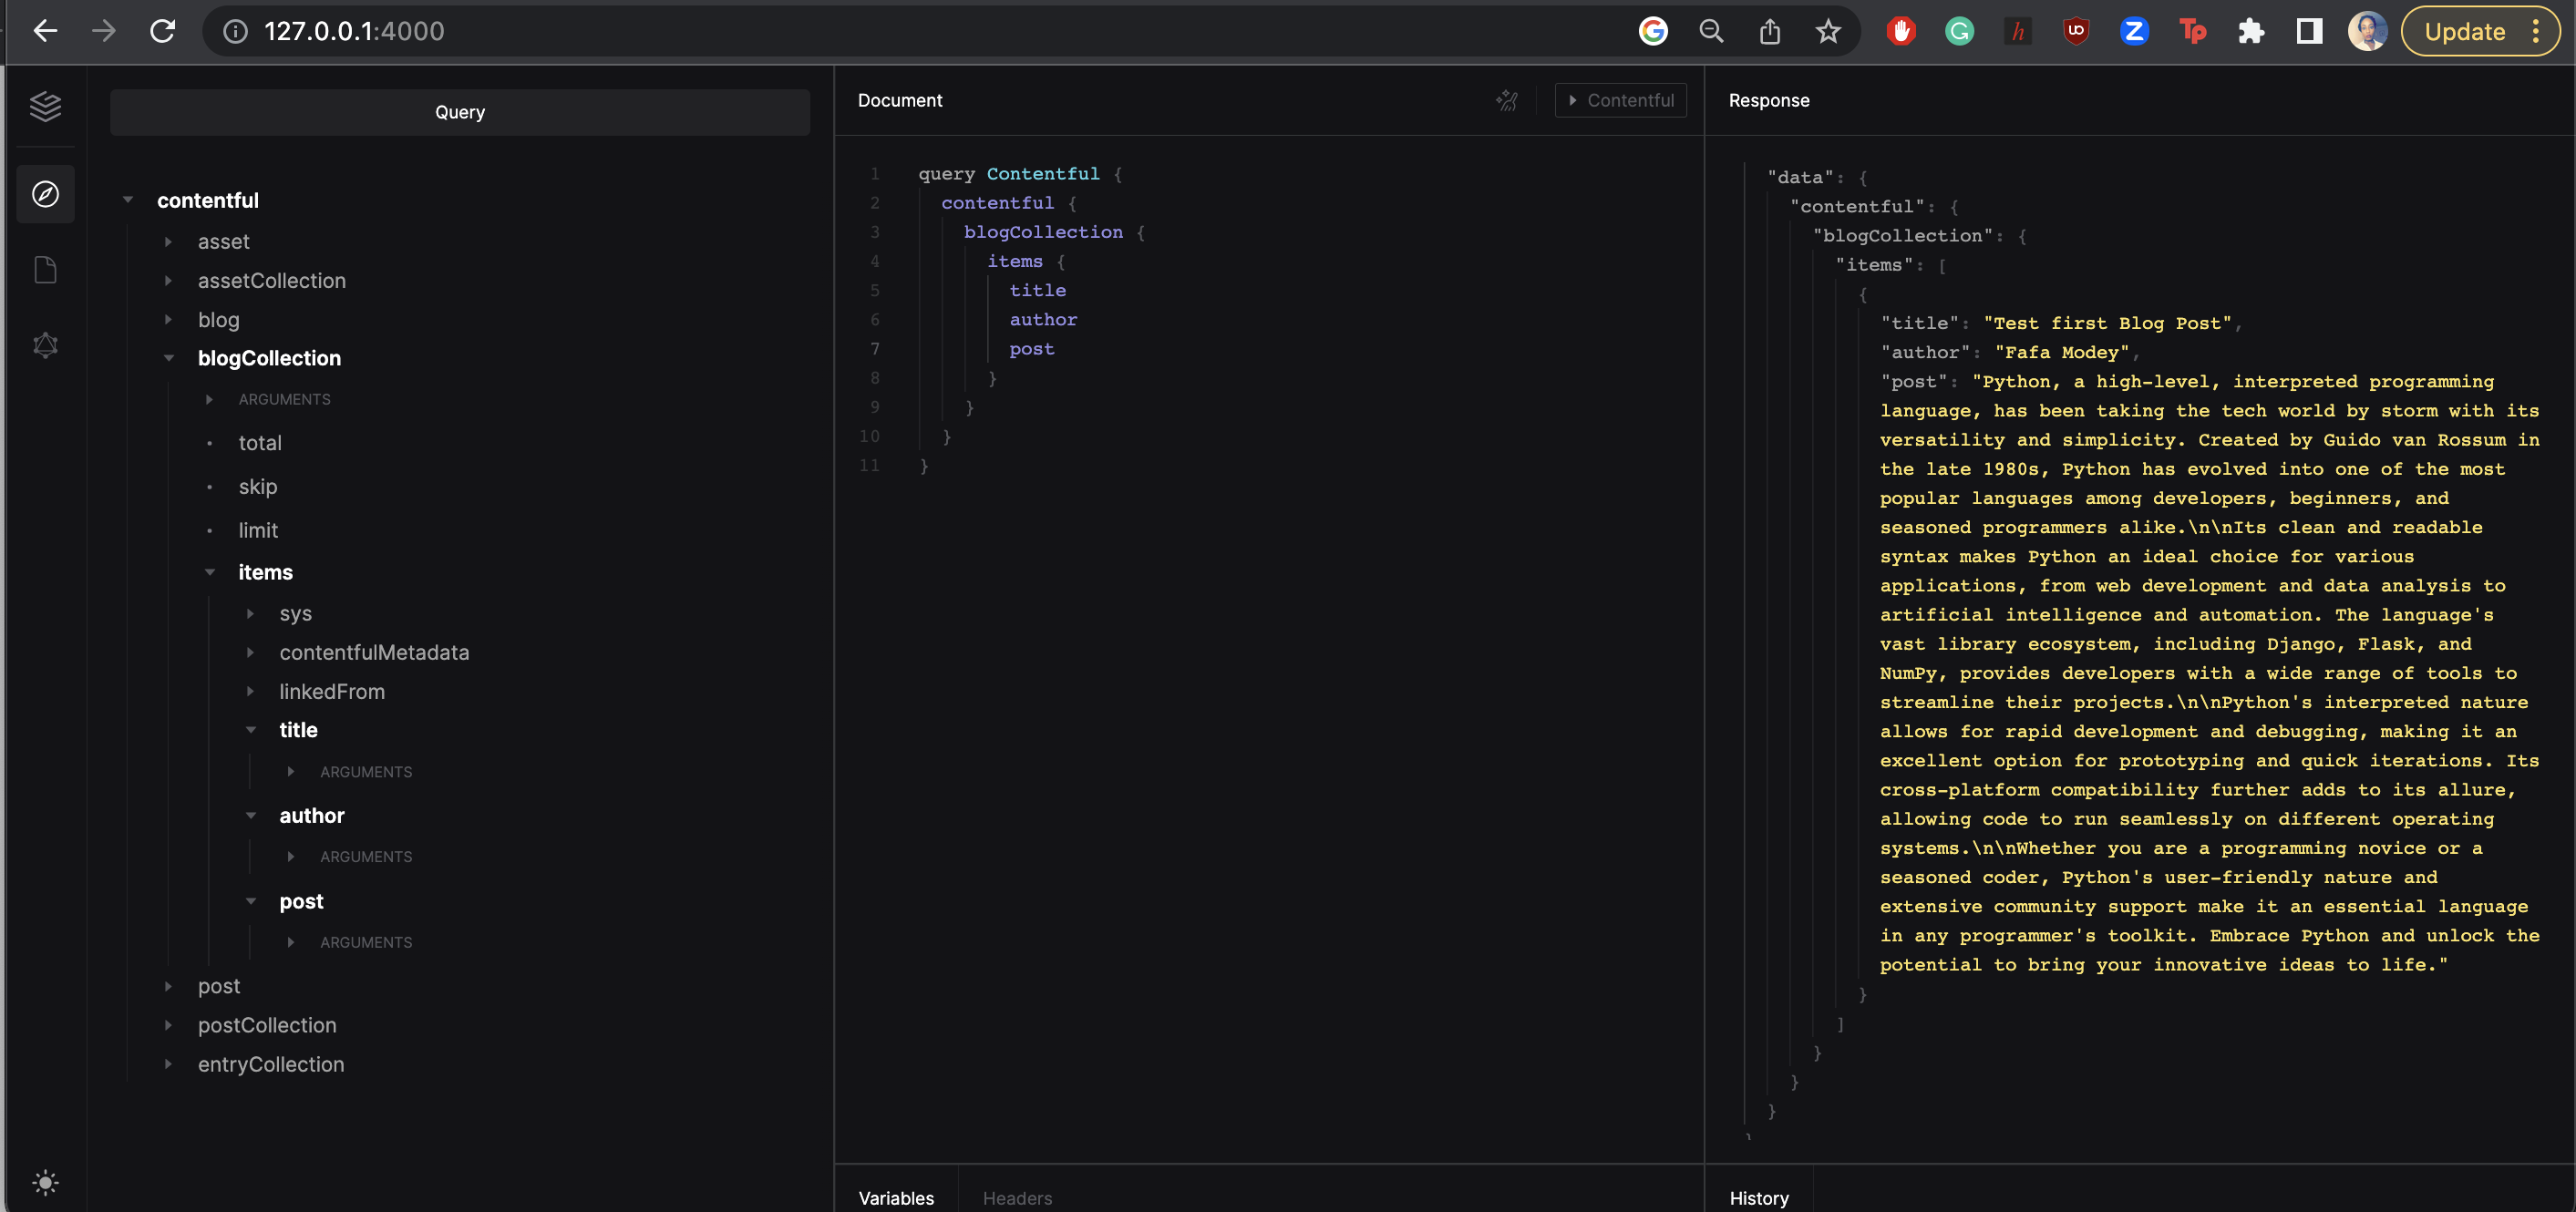
From the View Pathfinder page, we can see three columns Query, Document and Response.
The Query section is a collapsable menu where we can select the content from the Contentful account which we want to include in the query.
The selected query is highlighted in bold and is automatically updated in the Document column.
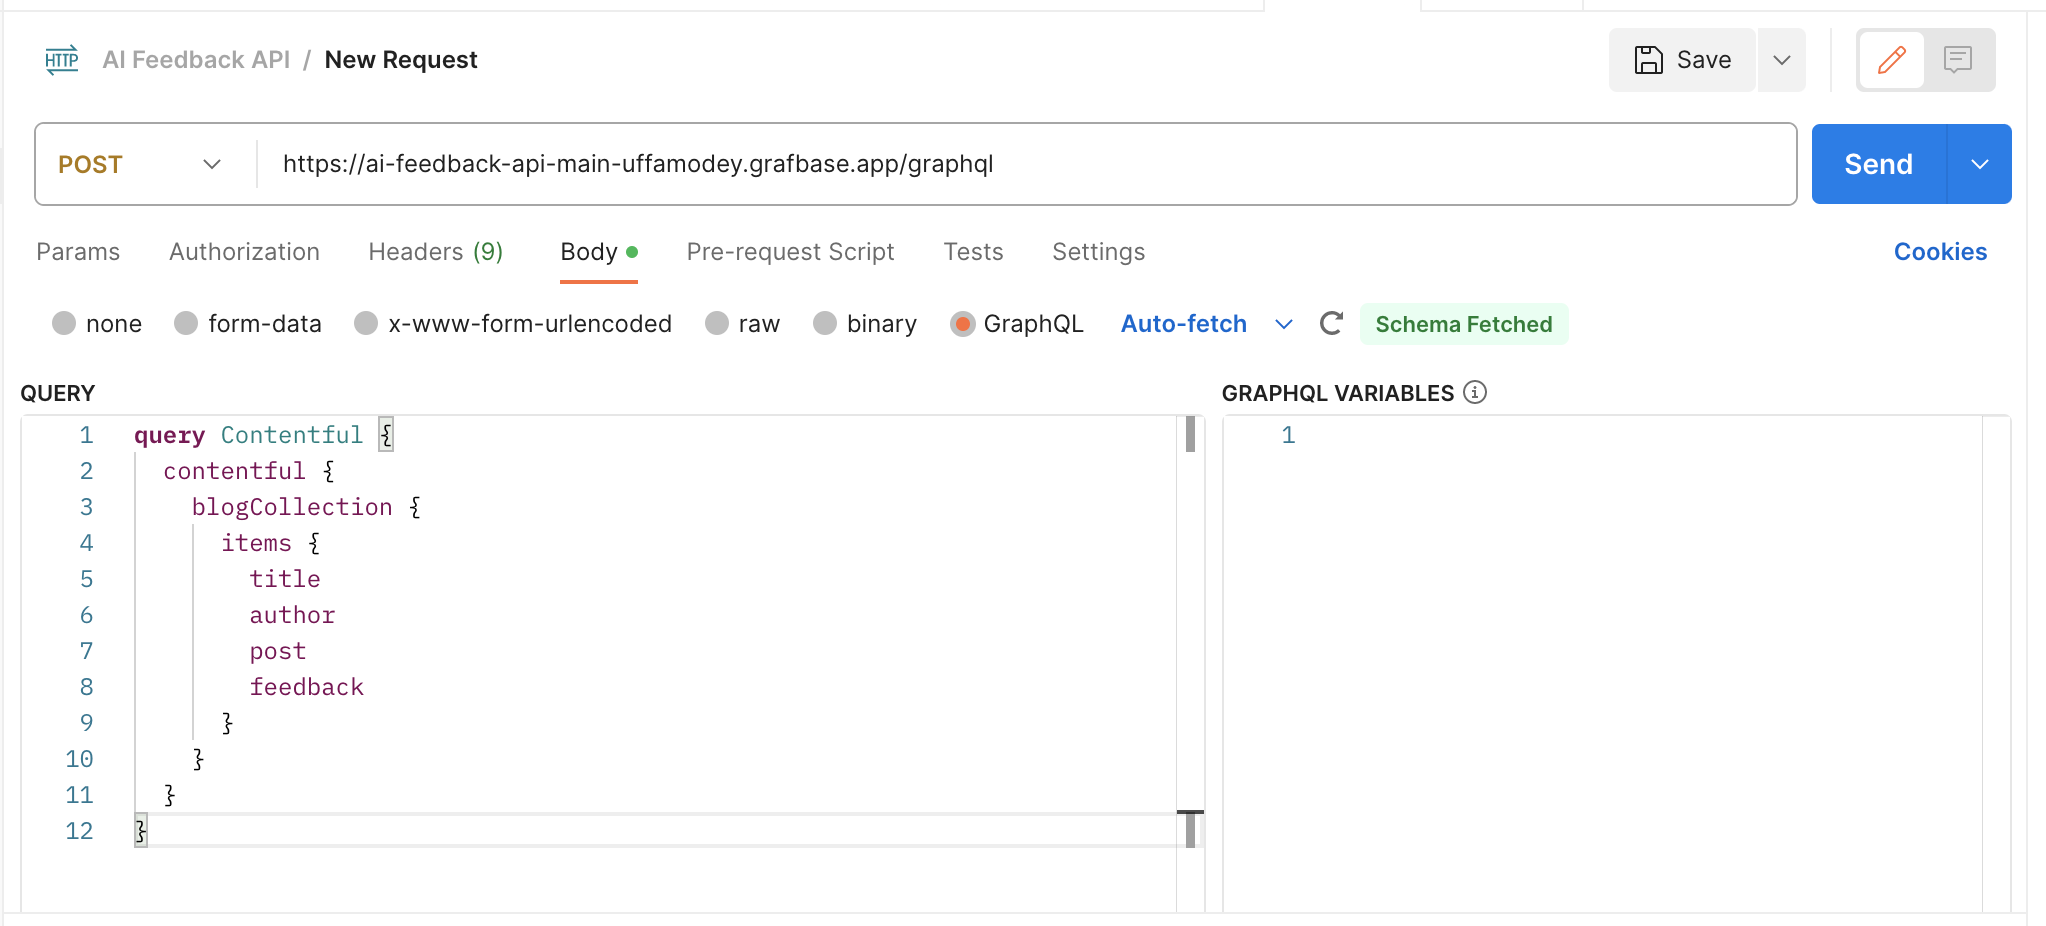
      query Contentful {
        contentful {
          blogCollection {
            items {
              title
              author
              post
            }
          }
        }
      }
The Document column enables the use of code as the command for the query. The command in the screenshot is to fetch the data from the Blog content model from Contentful. This has been named as
blogCollection. The fields that are to be included in the query are specified using theitemscurly brackets.Click on the Run Contentful button on the Document header to run the query and view the response in the Response column.
      {
        "data": {
          "contentful": {
            "blogCollection": {
              "items": [
                {
                  "title": "Test first Blog Post",
                  "author": "Fafa Modey",
                  "post": "Python, a high-level, interpreted programming language, has been taking the tech world by storm with its versatility and simplicity.
                           Created by Guido van Rossum in the late 1980s, Python has evolved into one of the most popular languages among developers, beginners, and seasoned programmers alike.
                           \n\nIts clean and readable syntax makes Python an ideal choice for various applications, from web development and data analysis to artificial intelligence and automation.
                           The language's vast library ecosystem, including Django, Flask, and NumPy, provides developers with a wide range of tools to streamline their projects.
                           \n\nPython's interpreted nature allows for rapid development and debugging, making it an excellent option for prototyping and quick iterations.
                           Its cross-platform compatibility further adds to its allure, allowing code to run seamlessly on different operating systems.
                           \n\nWhether you are a programming novice or a seasoned coder, Python's user-friendly nature and extensive community support make it an essential language in any programmer's toolkit.
                           Embrace Python and unlock the potential to bring your innovative ideas to life.",
                }
              ]
            }
          }
        }
      }
Integrating OpenAI API to Grafbase using Resolvers 💎
This project leverages GPT-3.5 (gpt-3.5-turbo) by OpenAI which is a powerful set of models to generate natural language. It has been optimized for chat and use cases that are suitable for text completion tasks. This AI model is used to provide feedback for the blog posts that are contained within the project.
Create an OpenAI account here. I created one using my Google account for SSO login.
Grafbase uses a resolver to extend the Grafbase backend and include the functionality of obtaining data from other data sources. For this project, we will extend the Contentful blog Grafbase API app to include feedback for each blog post through the gpt-3.5-turbo language model by OpenAI.

Resolvers are used to integrate custom business logic into the Grafbase backend.
Creating a Field Resolver for Getting the Post from the root
The field resolver feedback will return feedback on the blog post from the OpenAI GPT-3.5 model.
Update
grafbase/grafbase.config.tsto extend the Contentful type with a newfeedback: JSONfield.
Create a new file
grafbase/resolvers/contentful/blog/feedback.tsand update it with the snippet below.
Update the
feedback.tsfile to get the post for theBlogentry in order to make a request for fetching the feedback.Set the first arg name as
rootin the resolver to allow the value for the post to be restructured from the root.
export default function Resolver(root) {
  const { post } = root
}
Create OpenAI API Key for Fetching the Feedback for a Post
Log into your OpenAI account and navigate to the API Keys page.
Click Create new secret key and give it a name.

Copy the new secret key displayed and save it in a secure location as you will be unable to view this again.
Add the newly created OpenAI API key to the
grafbase/.envfile.
OPENAI_API_KEY=
- Update the resolver to assess the environment variable using
process.env
export default function Resolver(root) {
  const { post } = root
  const apiKey = process.env.OPENAI_API_KEY
}
- The next step is to apply the
postvalues from Contentful as the prompt to an API request to OpenAI.
Using OpenAI GPT-3.5 Model to Generate Feedback
GPT-3.5 is an OpenAI model that is able to understand and generate natural language. This project uses the text-davinci-003 model. Update the feedback.ts file with the code below to include AI-generated feedback for every blog post that is returned by that Grafbase API request to Contentful.
export default async function Resolver(root){
  let instruction: string = "Give feedback on this blog post: ";
  const { post } = root

  if (!post) return null

  return fetch('https://api.openai.com/v1/completions', {
    method: 'POST',
    headers: {
      'Content-Type': 'application/json',
      Authorization: `Bearer ${process.env.OPENAI_API_KEY}`
    },
    body: JSON.stringify({
      model: 'text-davinci-003',
      prompt: instruction + post,
      max_tokens: 200,
      temperature: 0.7
    })
  })
    .then(res => res.json())
}
The headers of the request contain the
Authorizationand theContent-Typefields.The request body contains the model, prompt, max_tokens and temperature fields.
model: Specifies the language model to be used for generating the text; in this case, "text-davinci-003" refers to OpenAI's "Davinci" GPT-3.5 model variant.prompt: Provides the initial input or context for the model to start generating text. It sets the initial context for the text generation.max_tokens: Defines the maximum number of tokens (words or subwords) that the model should generate in its response. It limits the length of the generated text.temperature: Controls the randomness of the model's output; a higher value like 1.0 makes the output more diverse and creative, while a lower value like 0.2 makes it more focused and deterministic.
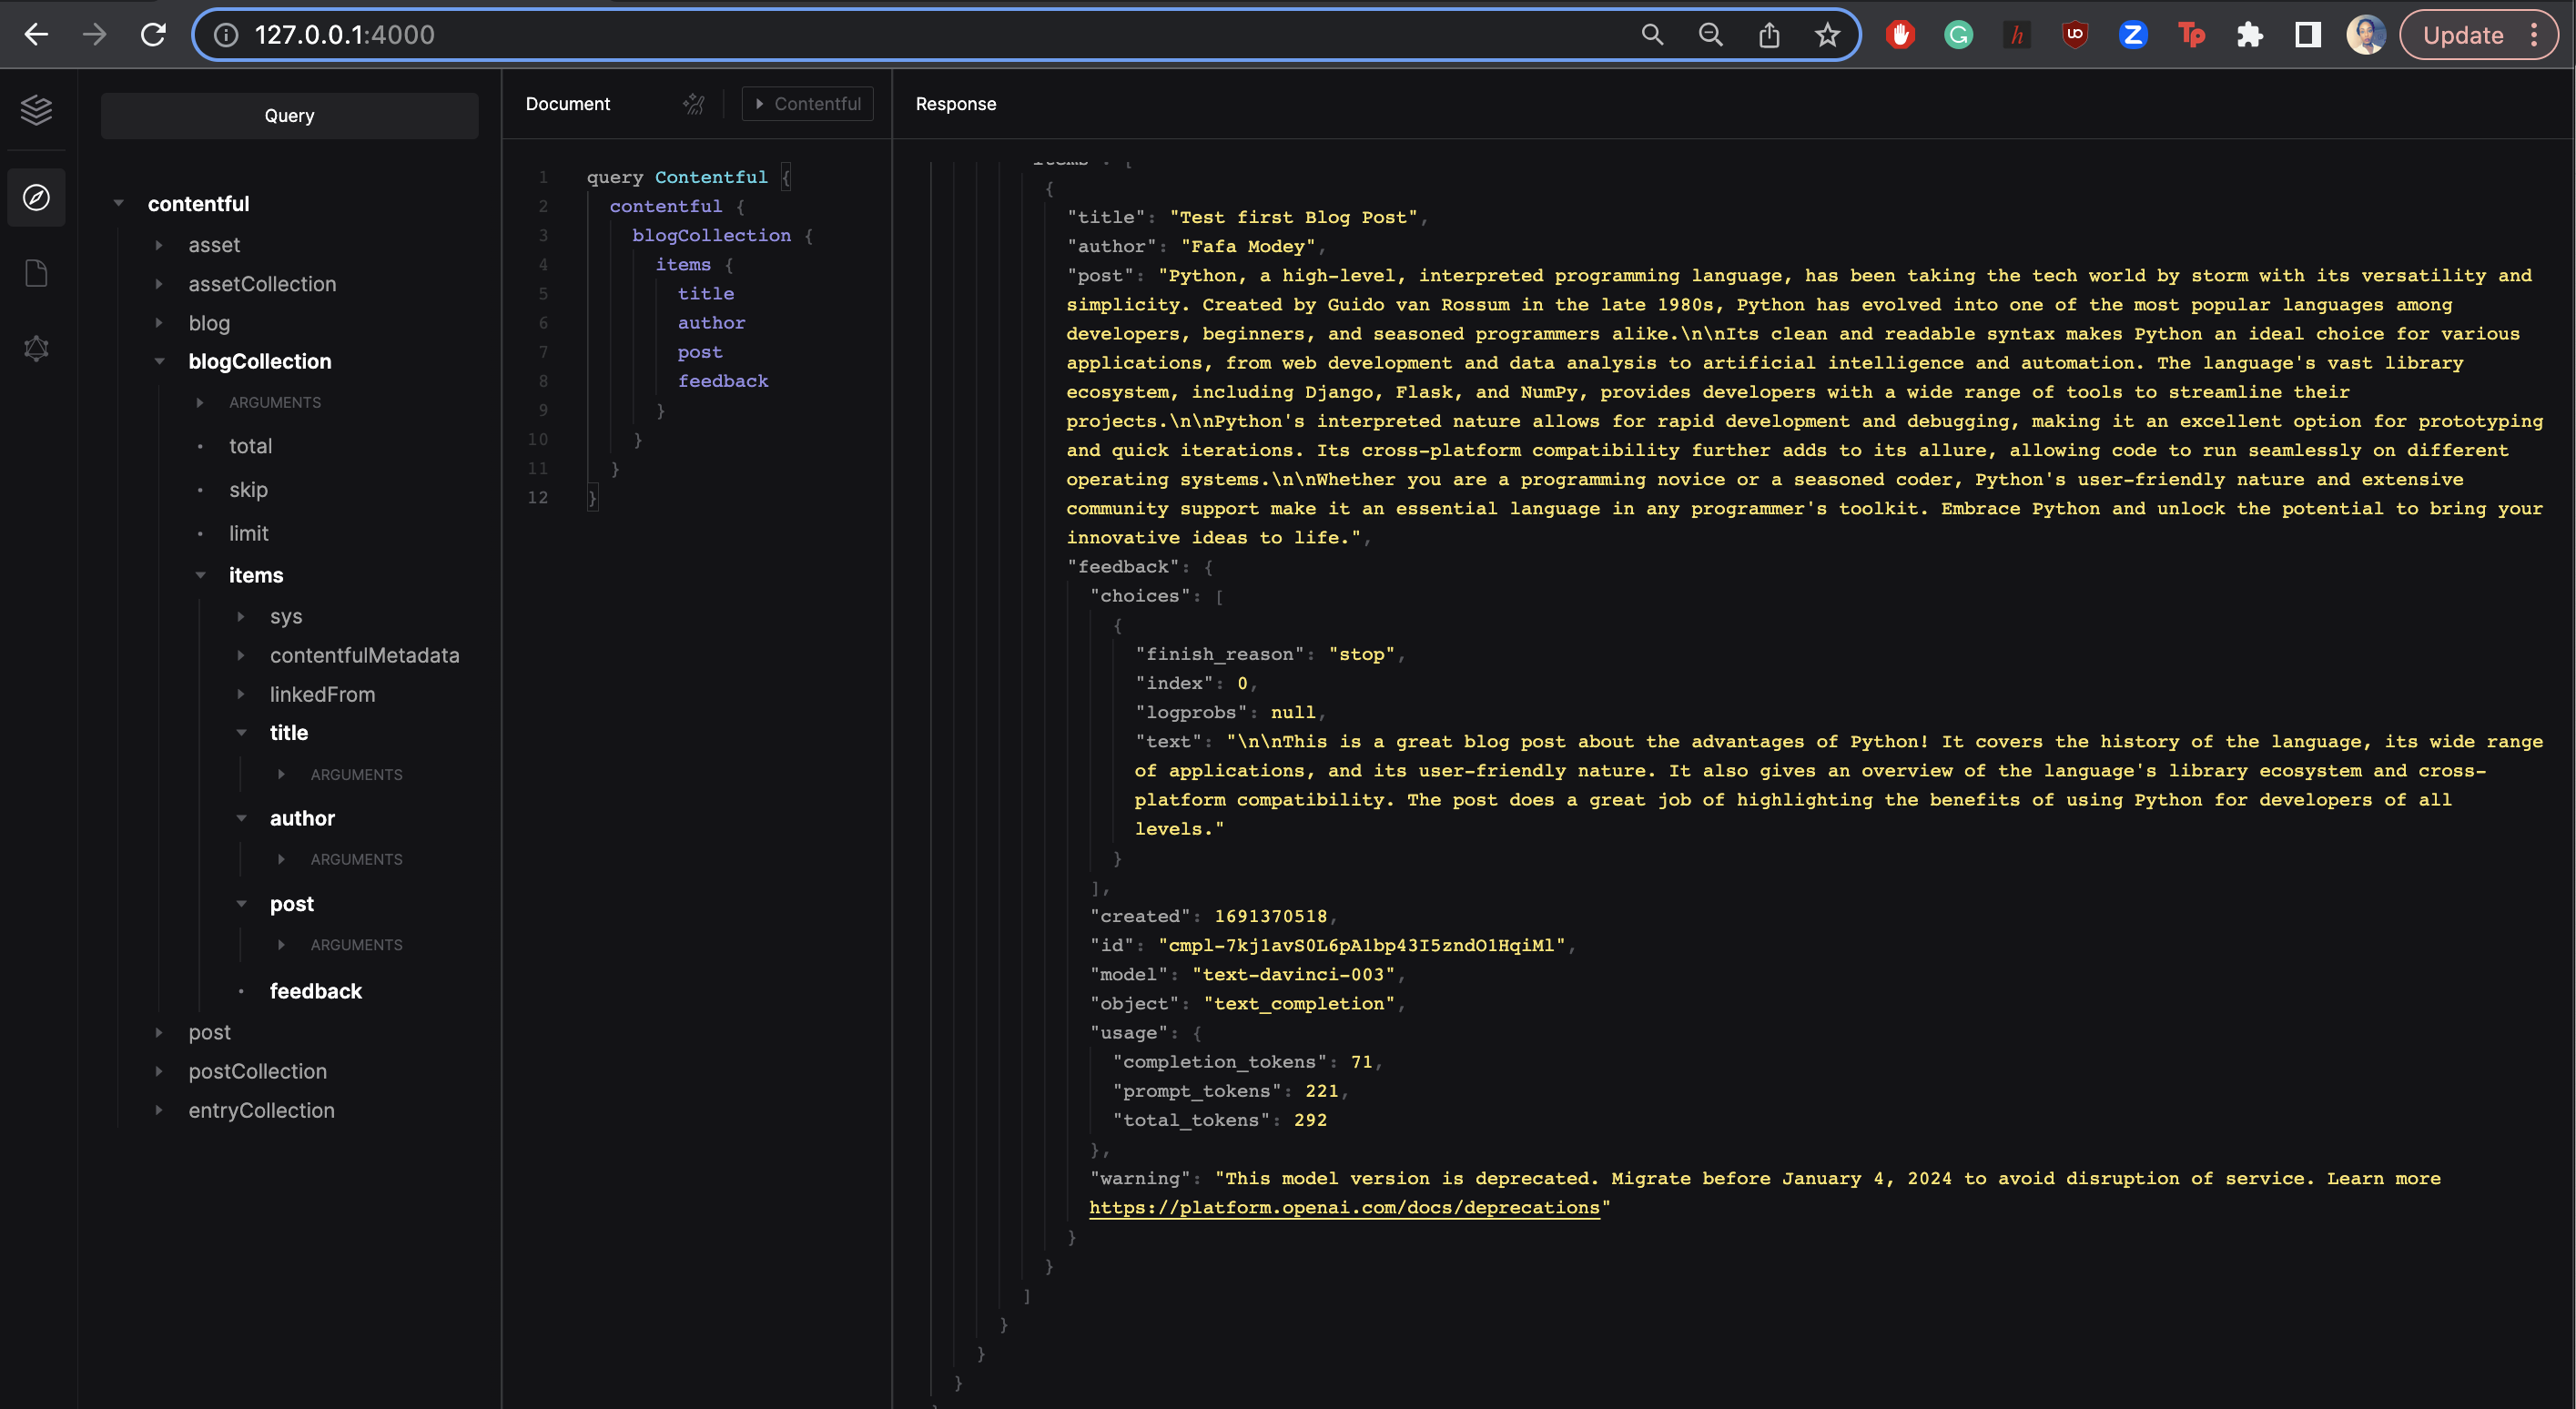
The response to the Grafbase API, when it is run from http://127.0.0.1:4000/, is shown in the screenshot above. The response now includes a field called feedback which contains a text subfield where the AI-generated feedback for the blog post is showcased.
"feedback": {
    "choices": [{
        "finish_reason": "stop",
        "index": 0,
        "logprobs": null,
        "text": "\n\nThis is a great blog post about the advantages of Python!
                It covers the history of the language, its wide range of applications, and its user-friendly nature.
                It also gives an overview of the language's library ecosystem and cross-platform compatibility.
                The post does a great job of highlighting the benefits of using Python for developers of all levels."}],
    "created": 1691370518,
    "id": "cmpl-7kj1avS0L6pA1bp43I5zndO1HqiMl",
    "model": "text-davinci-003",
    "object": "text_completion",
    "usage": {
        "completion_tokens": 71,
        "prompt_tokens": 221,
        "total_tokens": 292
},
Deploying Grafbase Backend 📤
The Grafbase API needs to be deployed publicly for it to be accessed from outside of the local environment where we have been working so far. Grafbase uses the grafbase/grafbase.config.ts file to deploy and distribute the Blog Feedback Grafbase API to the Edge through GitHub.

Pushing Local Code to a GitHub Repository
Login into your personal GitHub account a create a new repository.
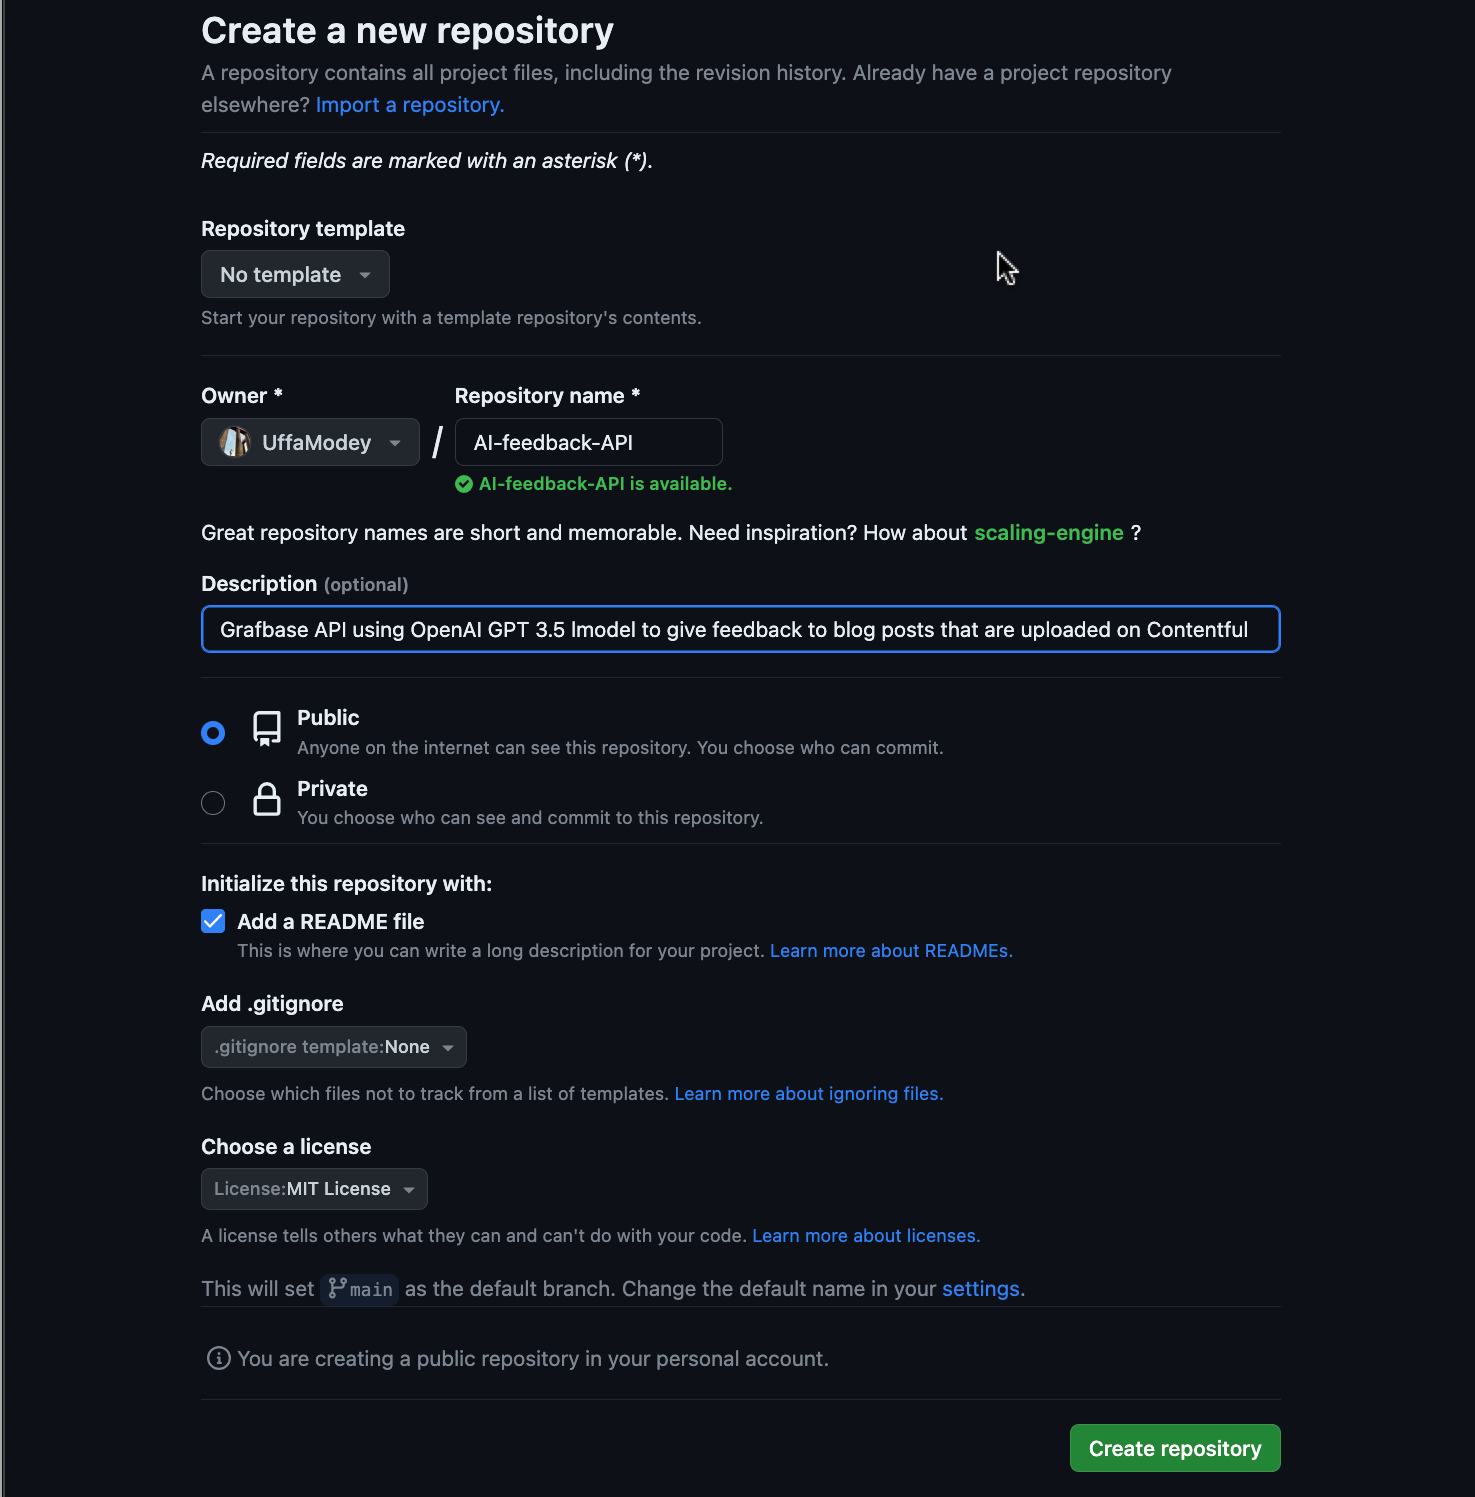
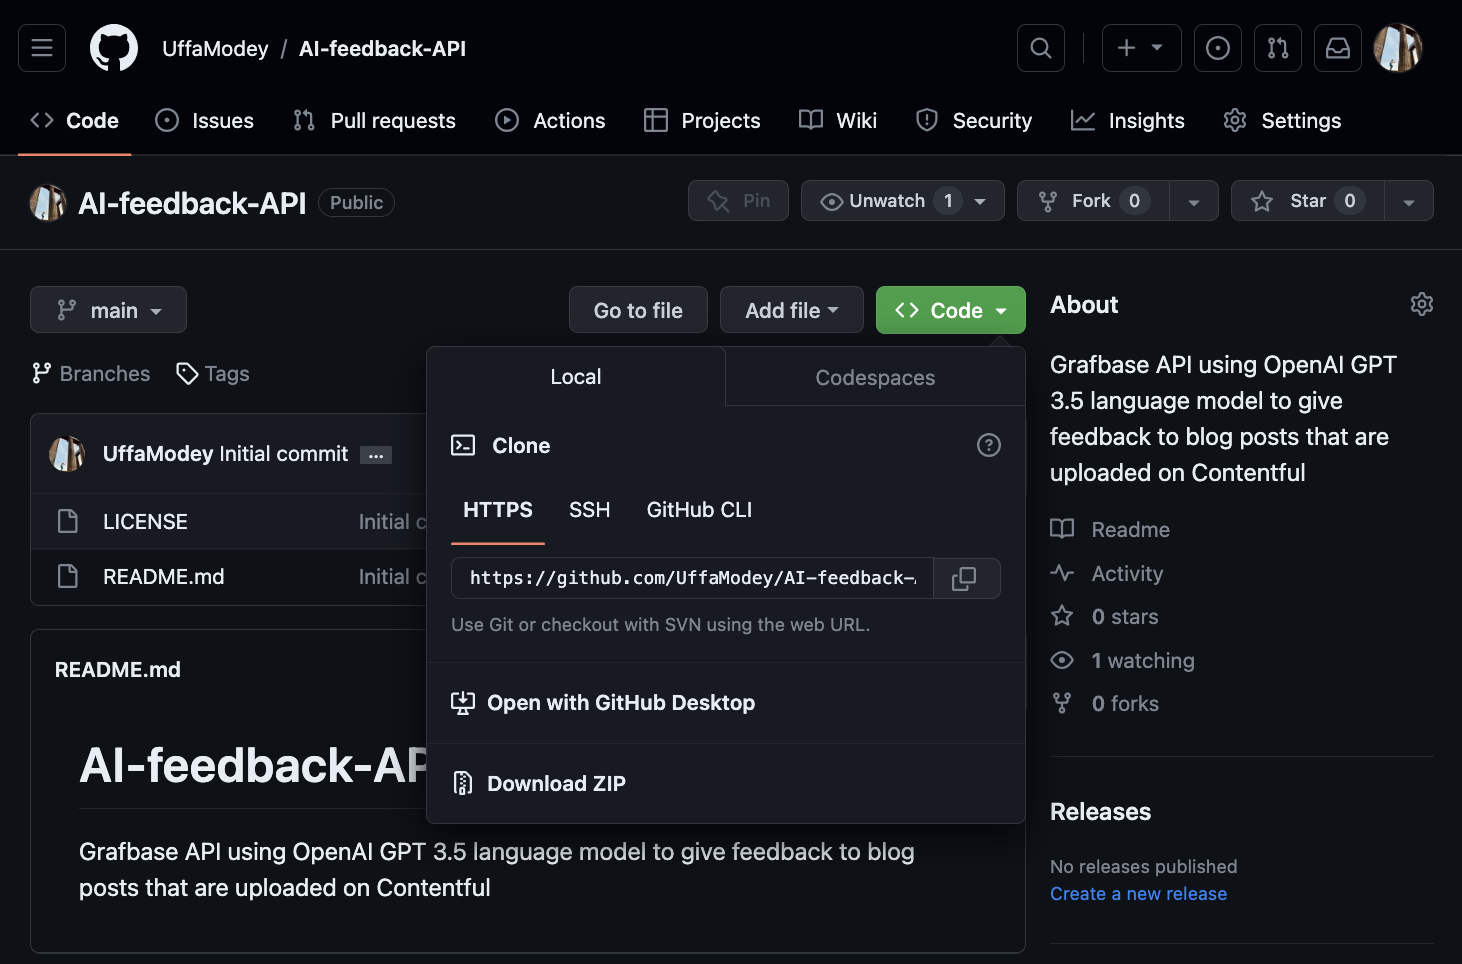
Copy the origin URL for the newly created repo.
- On your terminal, initialise the project base folder in Git and commit the
grafbase/grafbase.config.tsfile,grafbase/resolversfile and thepackage.json.
git init
git add grafbase/grafbase.config.ts
git add grafbase/resolvers
git add package.json
git commit -m "initial schema"
- Add a remote origin that matches the origin URL for the repo we created
git branch -M main
git remote add origin (enter the URL we copied two steps above here)
git checkout -b develop
git commit -m "Initial commit"
git push -u origin develop
- Click on the URL provided to open GitHub on the web browser to create a pull request and approve and merge it.
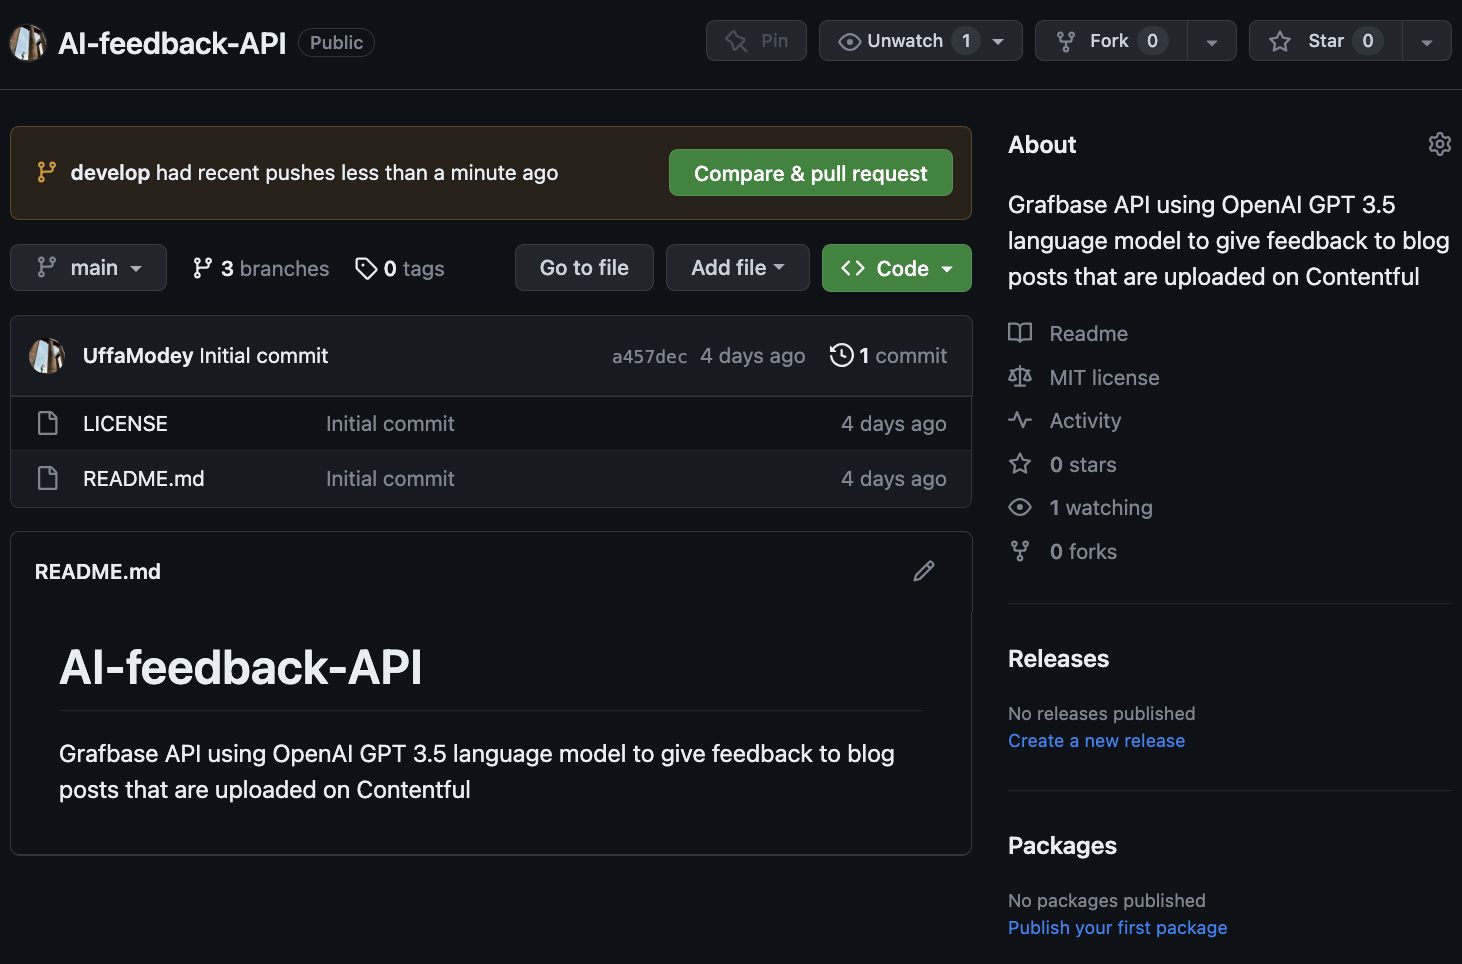
The
grafbase.config.tsfile is now visible on the repo's main branch.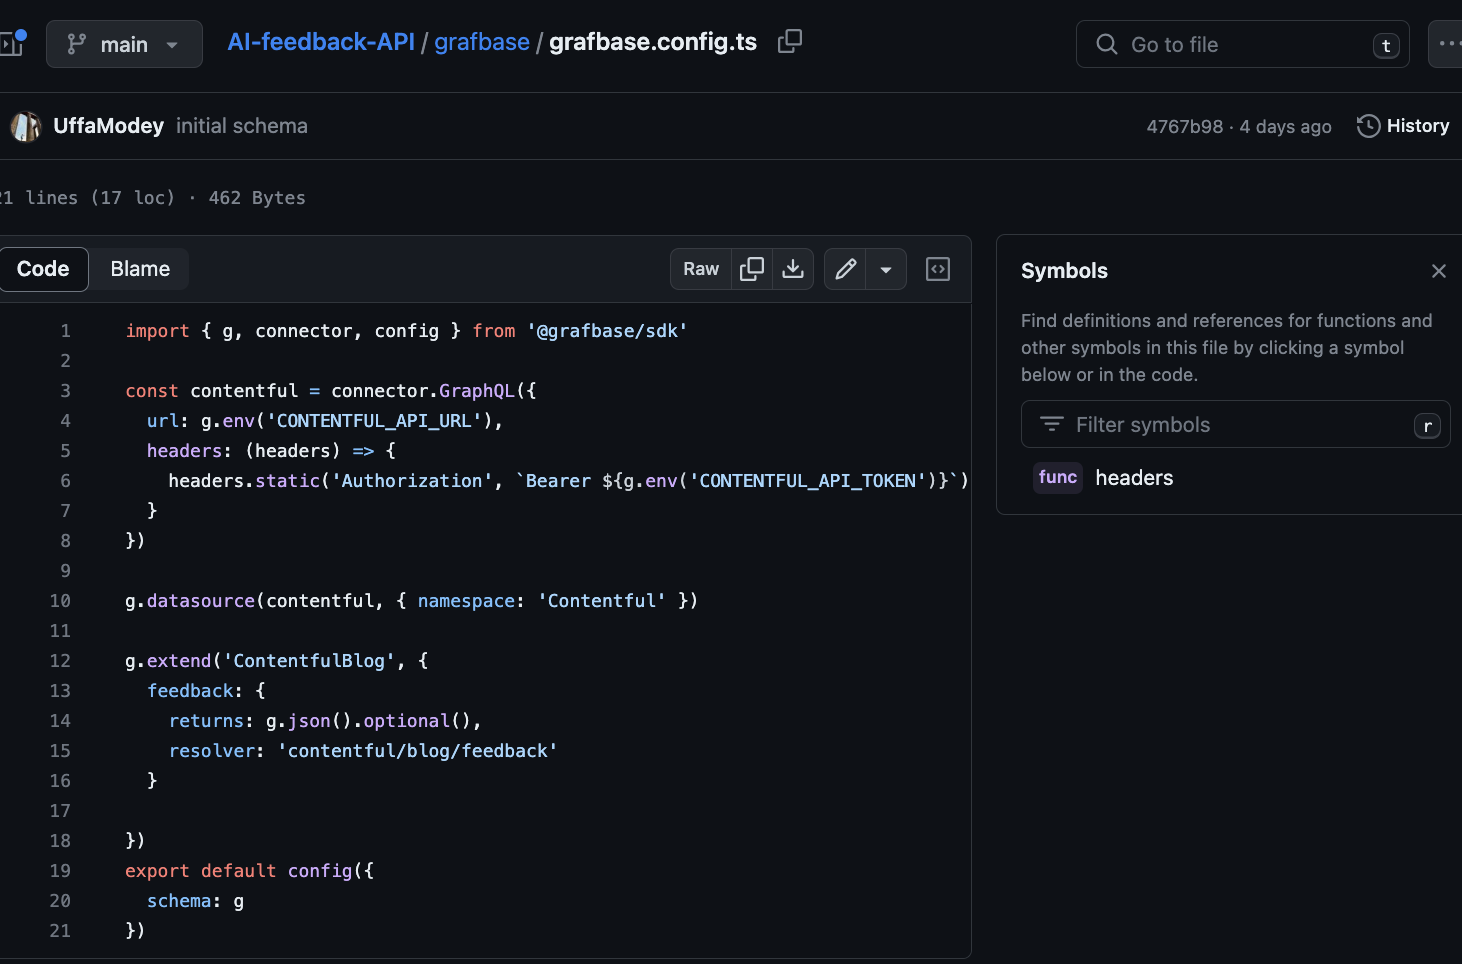
Deployment to a Grafbase Account
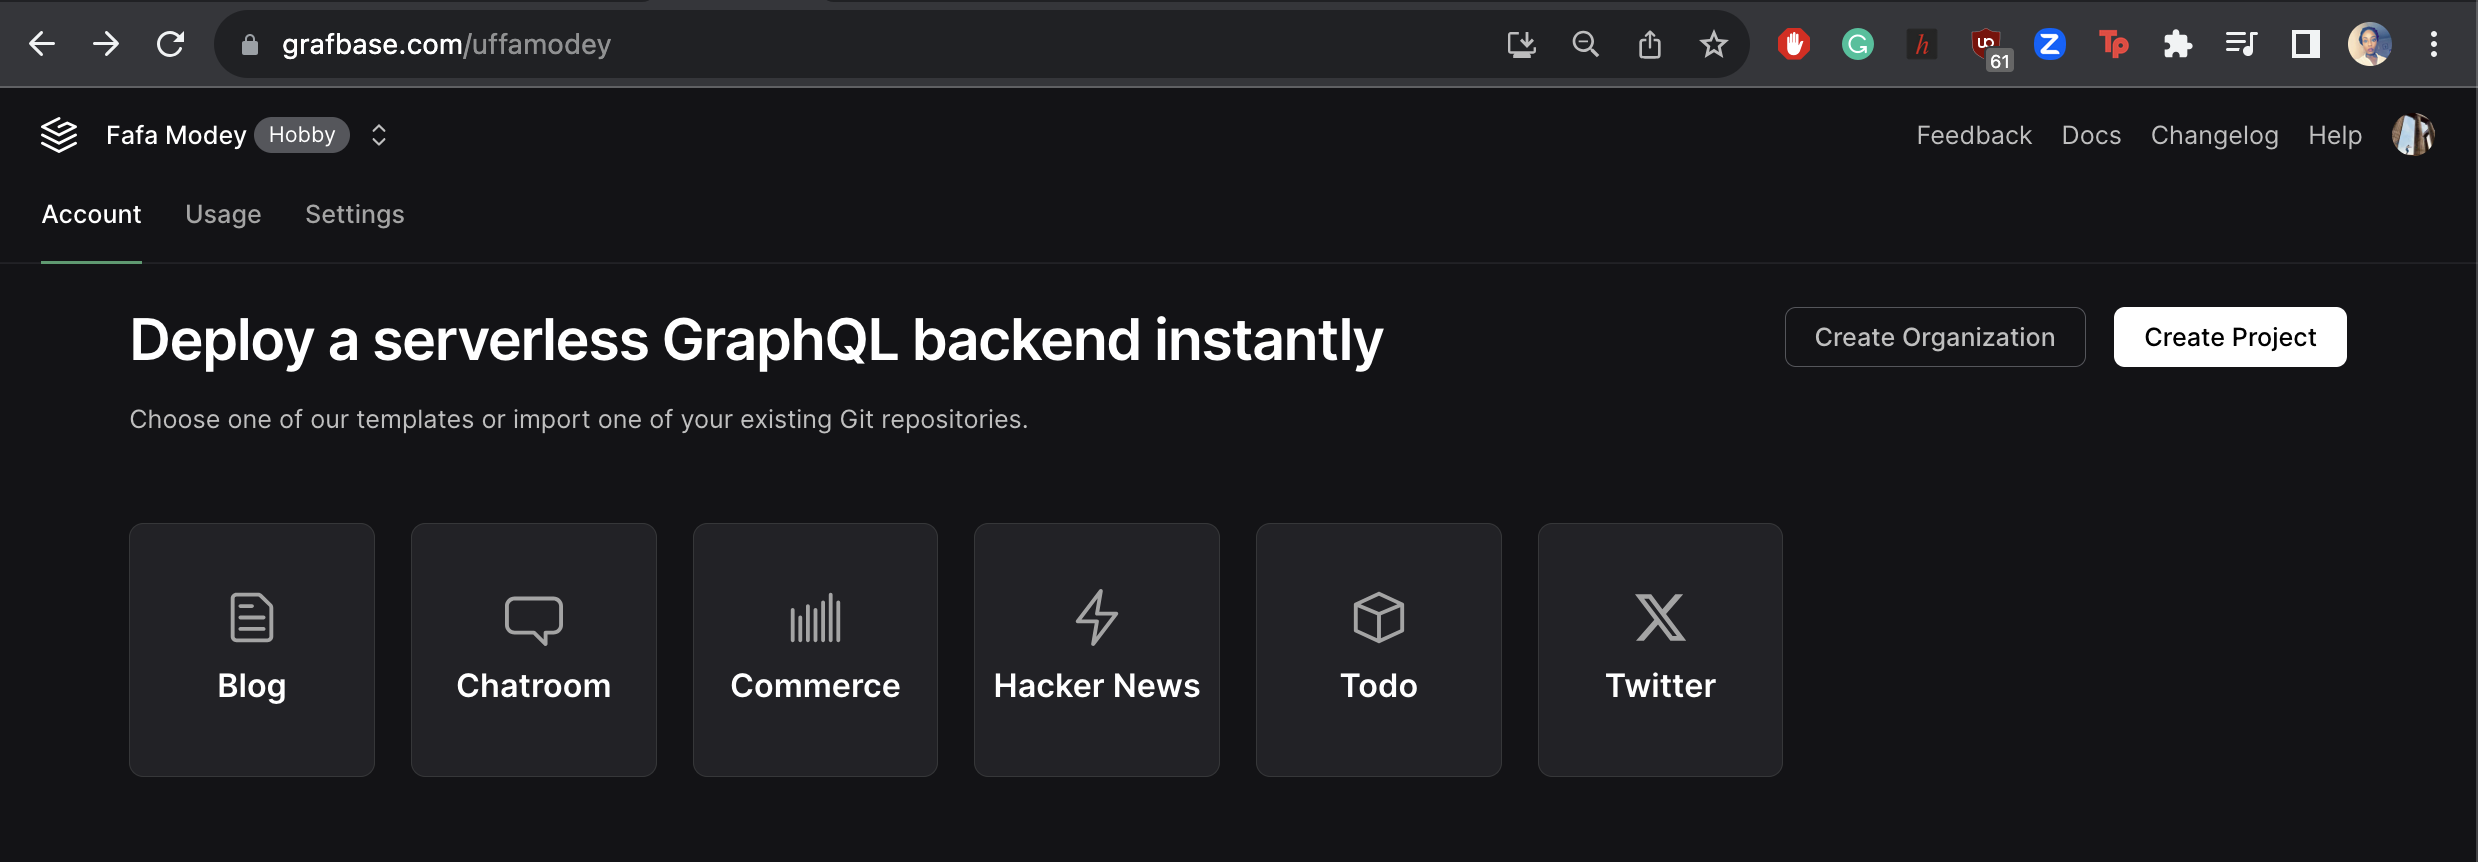
Sign in to your Grafbase account. Click on Create Project.
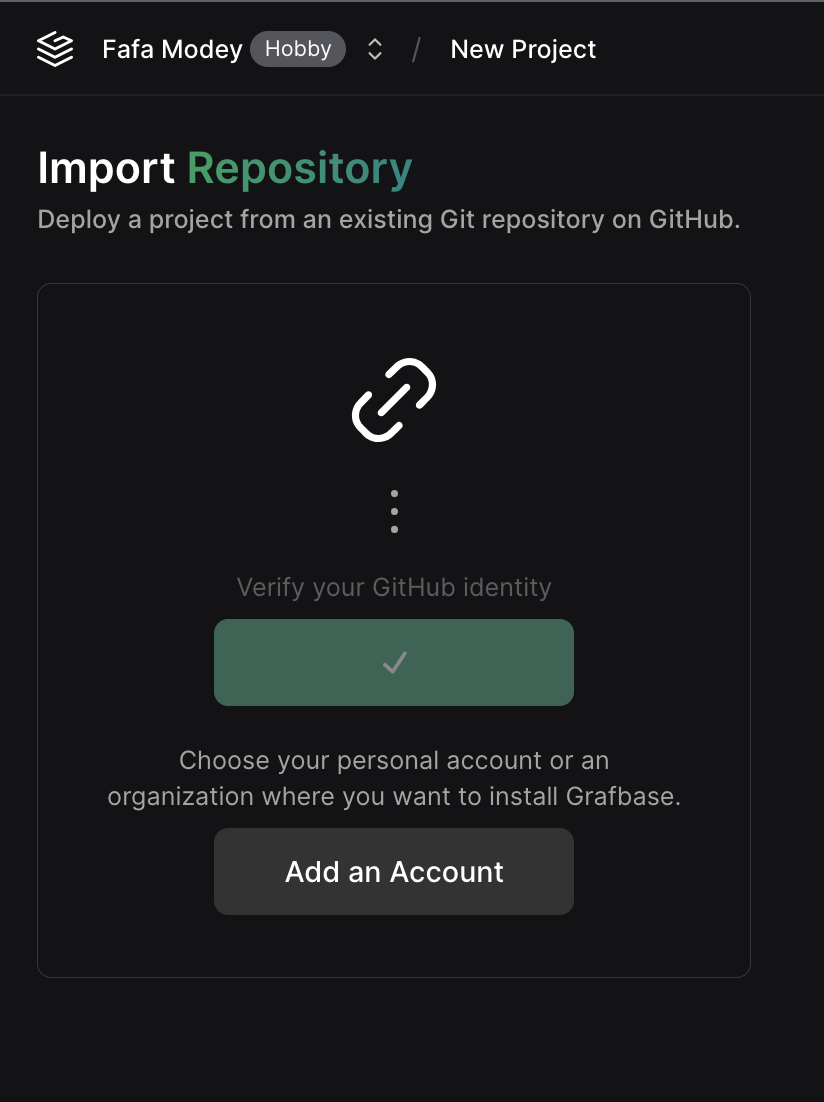
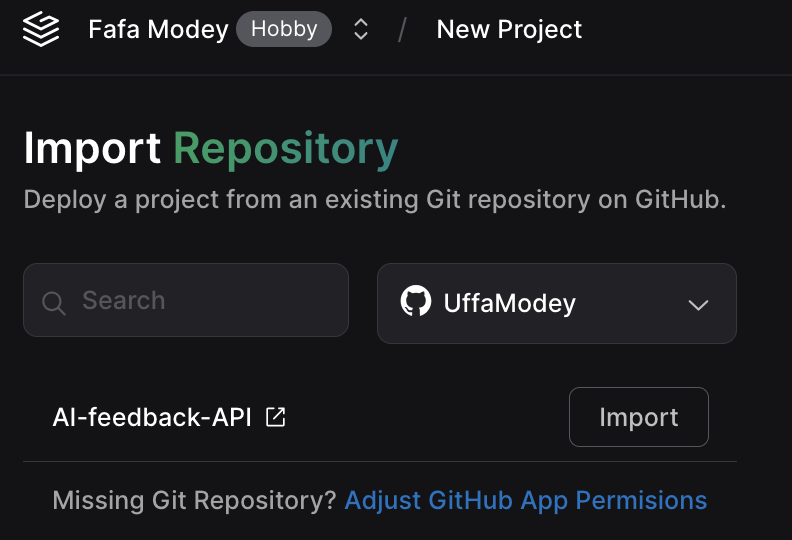
Connect with GitHub to import a repository.
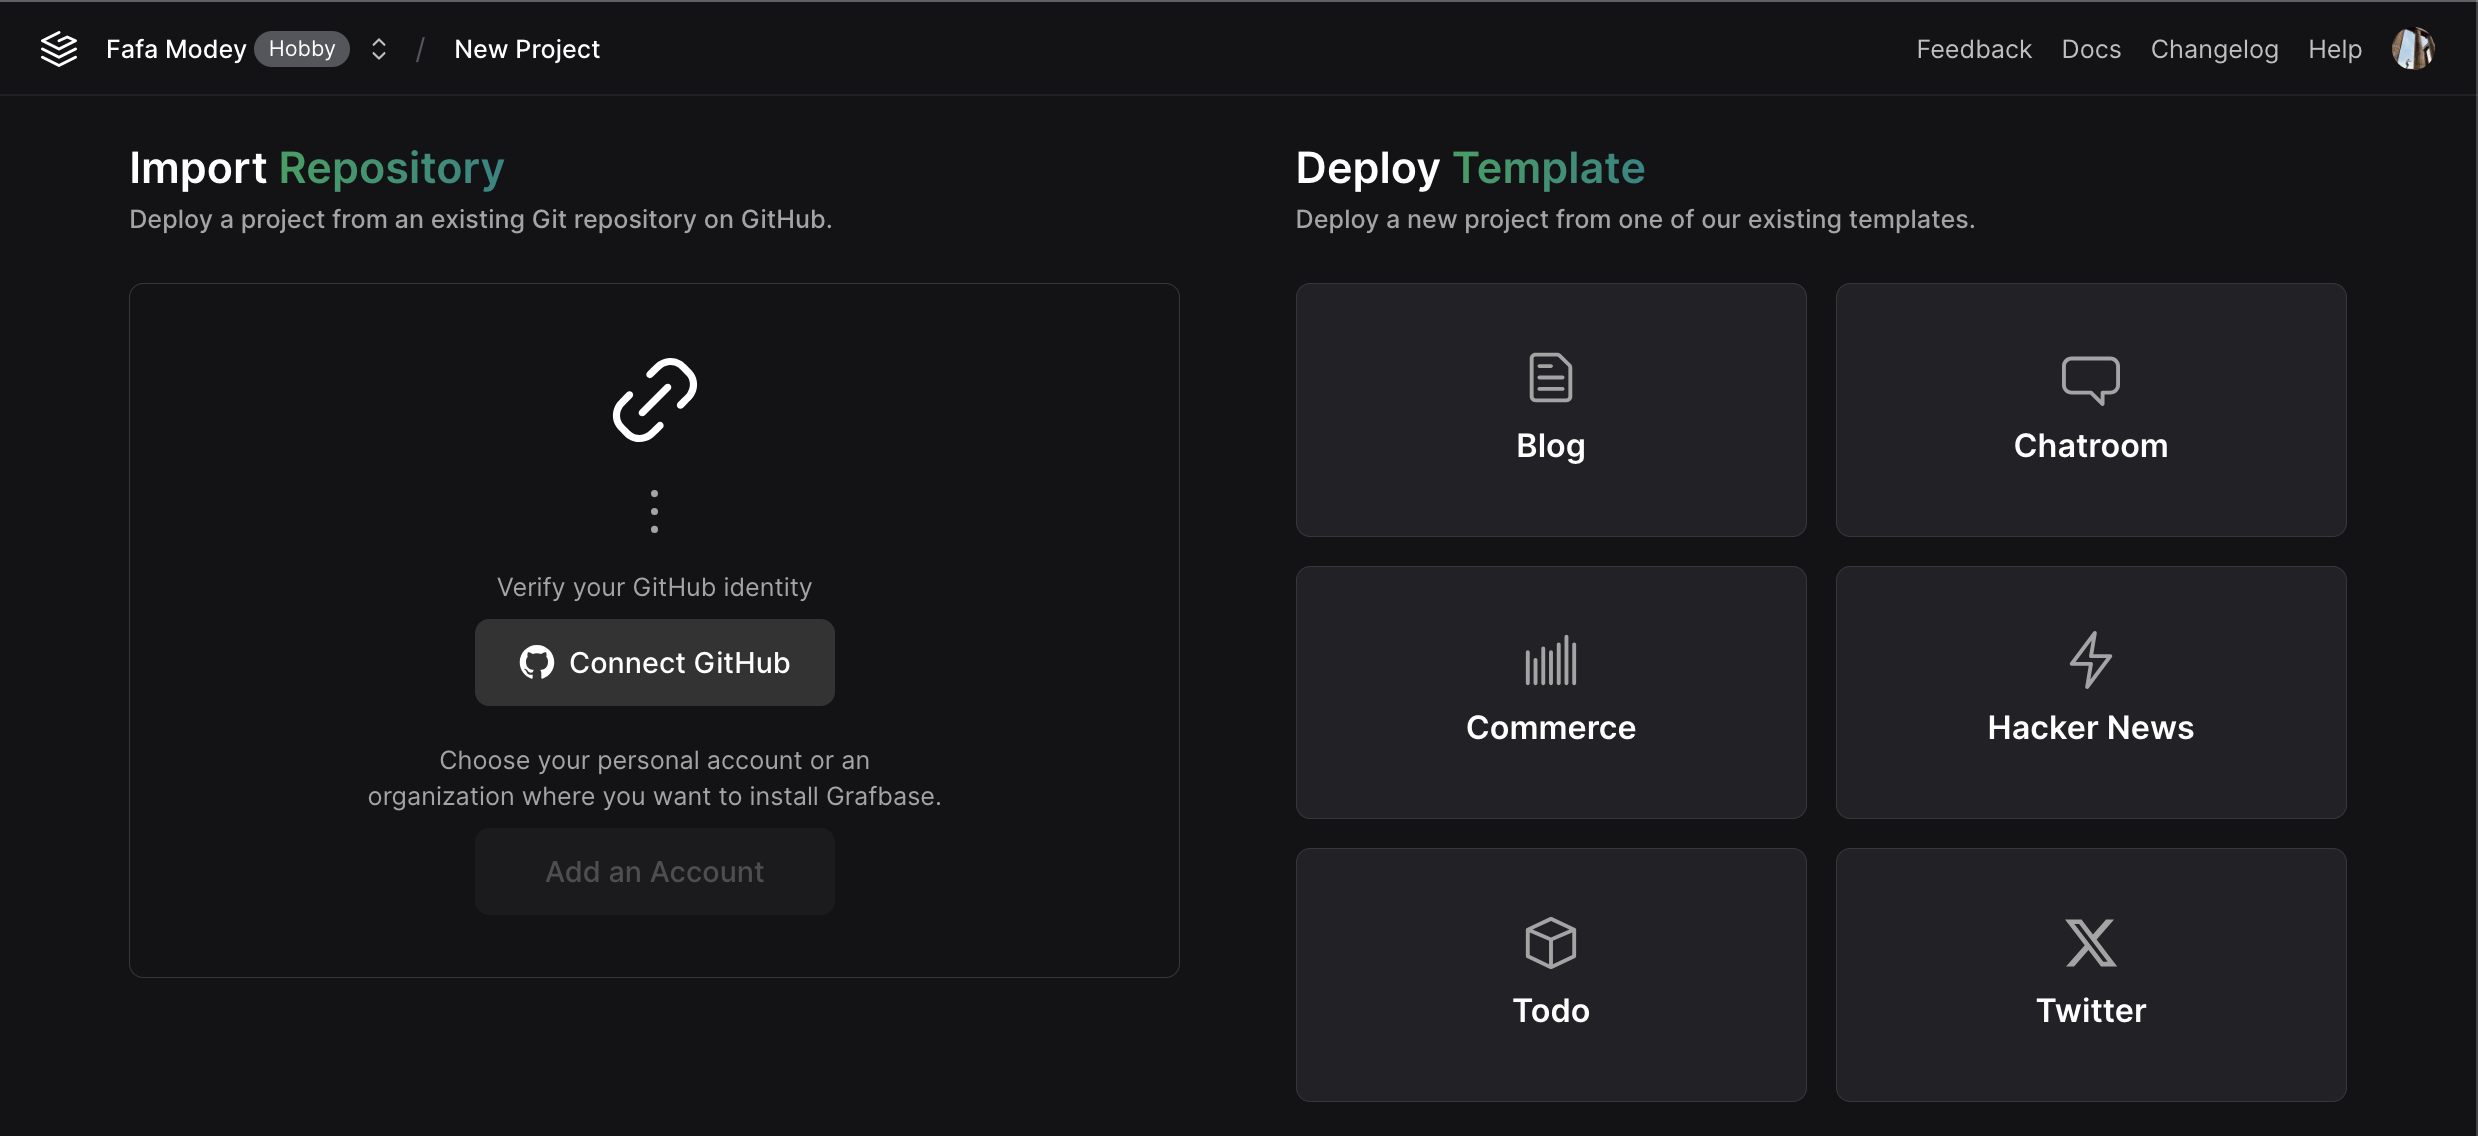
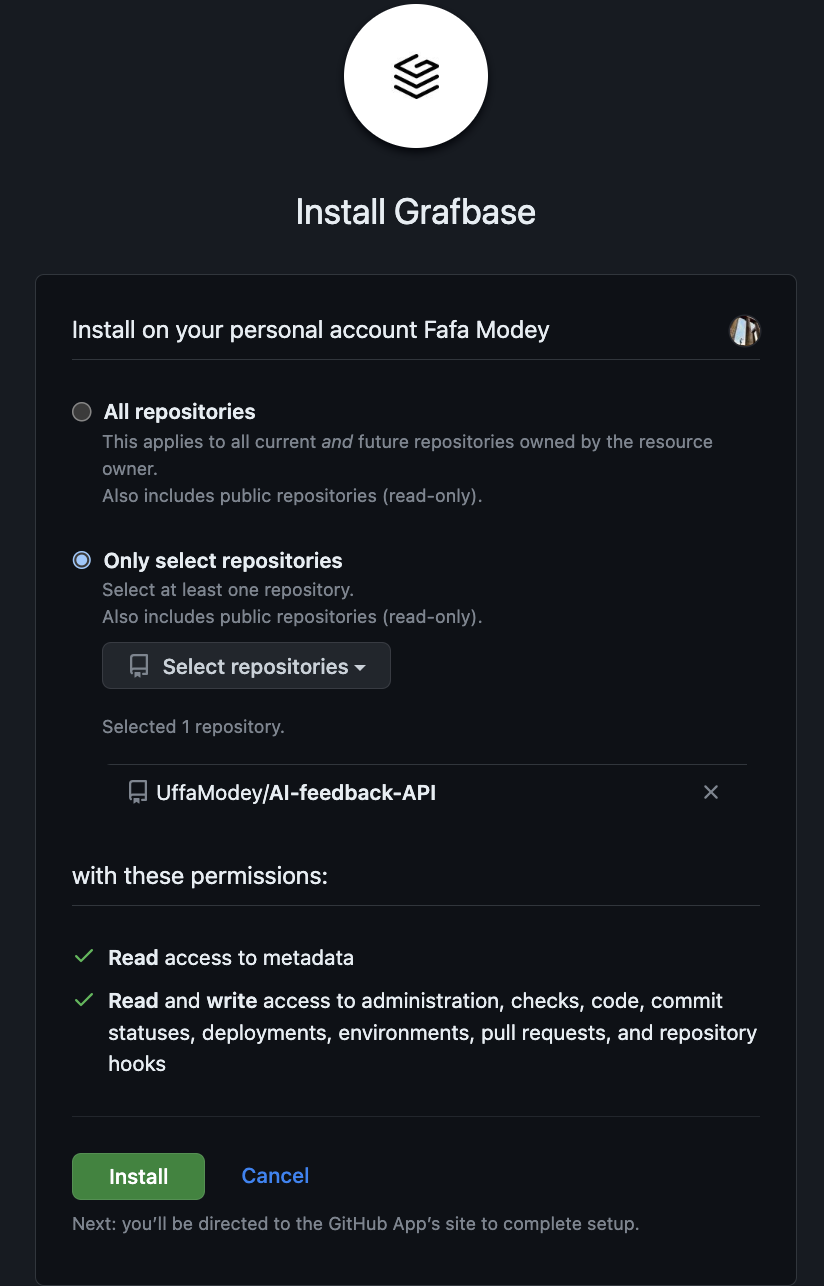
Click on Add an Account to bring up a UI where you will select your GitHub profile.
Next, select Only select repositories and choose the repository for our AI-feedback-API app. Click on Install and authenticate on GitHub as needed.
Click Import.
The Grafbase project name is automatically set as the name of the project GitHub repo. The branch for production deployment is also set as the main branch by default. Input environment variables for all the keys in the
.envfile. Click Deploy.
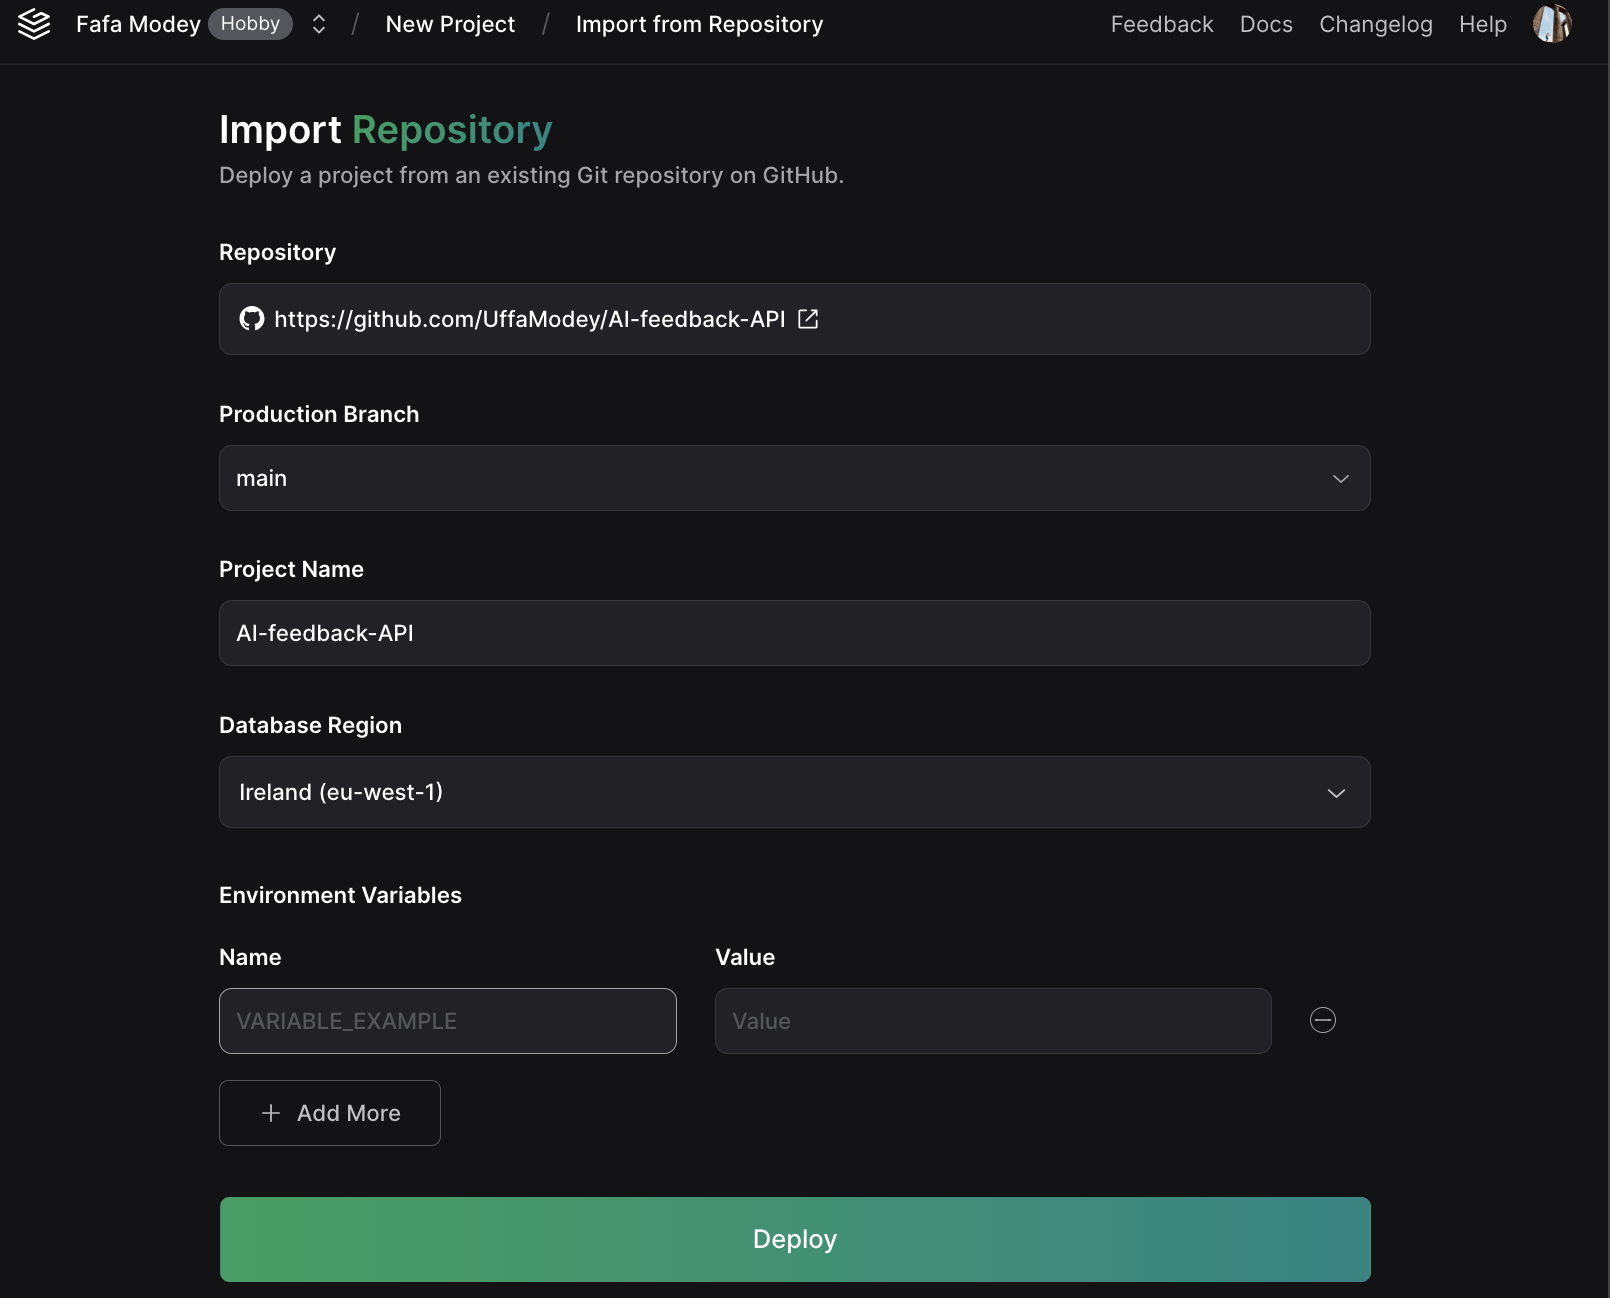
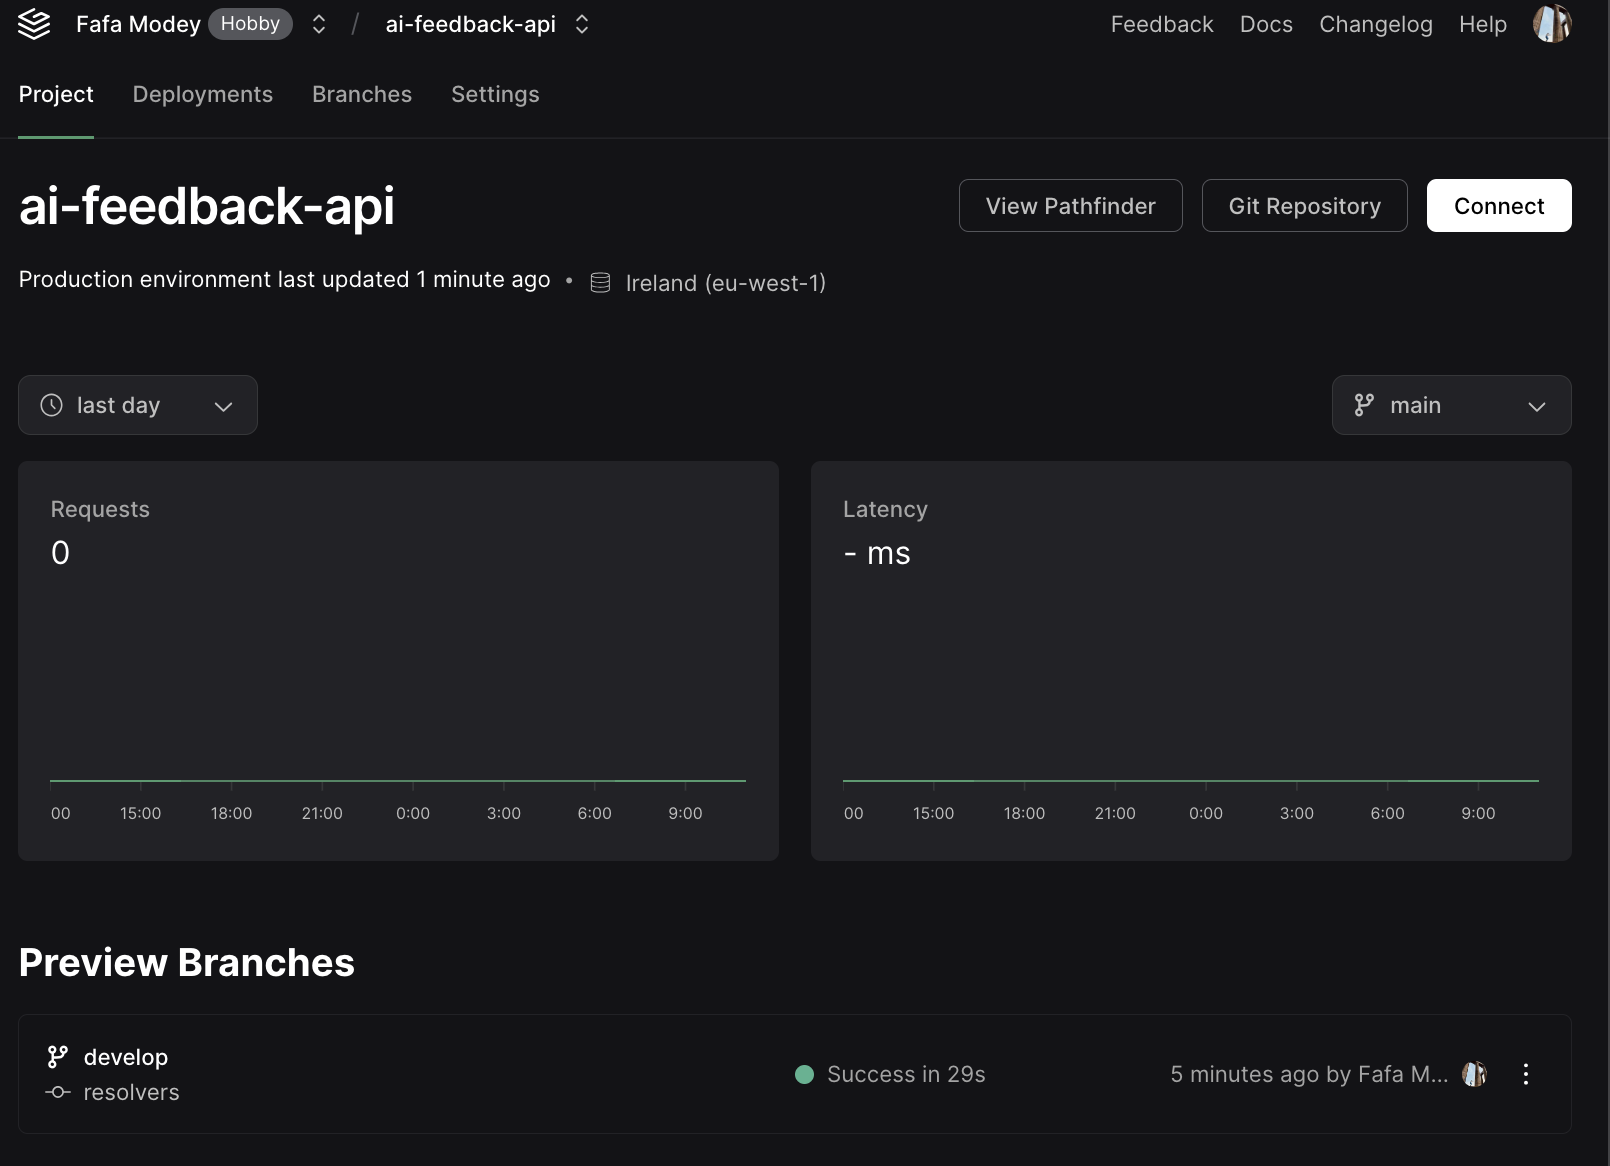
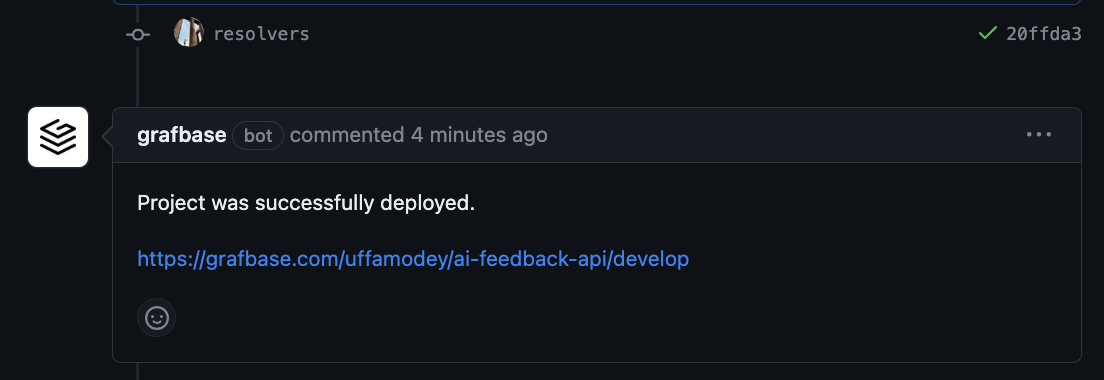
Congratulations your project has been successfully deployed to the Grafbase Edge on https://ai-feedback-api-develop-uffamodey.grafbase.app/graphql
Accessing the API on Grafbase Edge through Postman
From the project homepage on your Grafbase account, click on Connect to view the API URL, API Key and Admin API URL.

Copy the API URL and API Key.
We are using Postman to make the request.
Set the API URL as the request URL, and the API Key as a value in the request Headers with the key as
x-api-key. Set the request method as a POST request.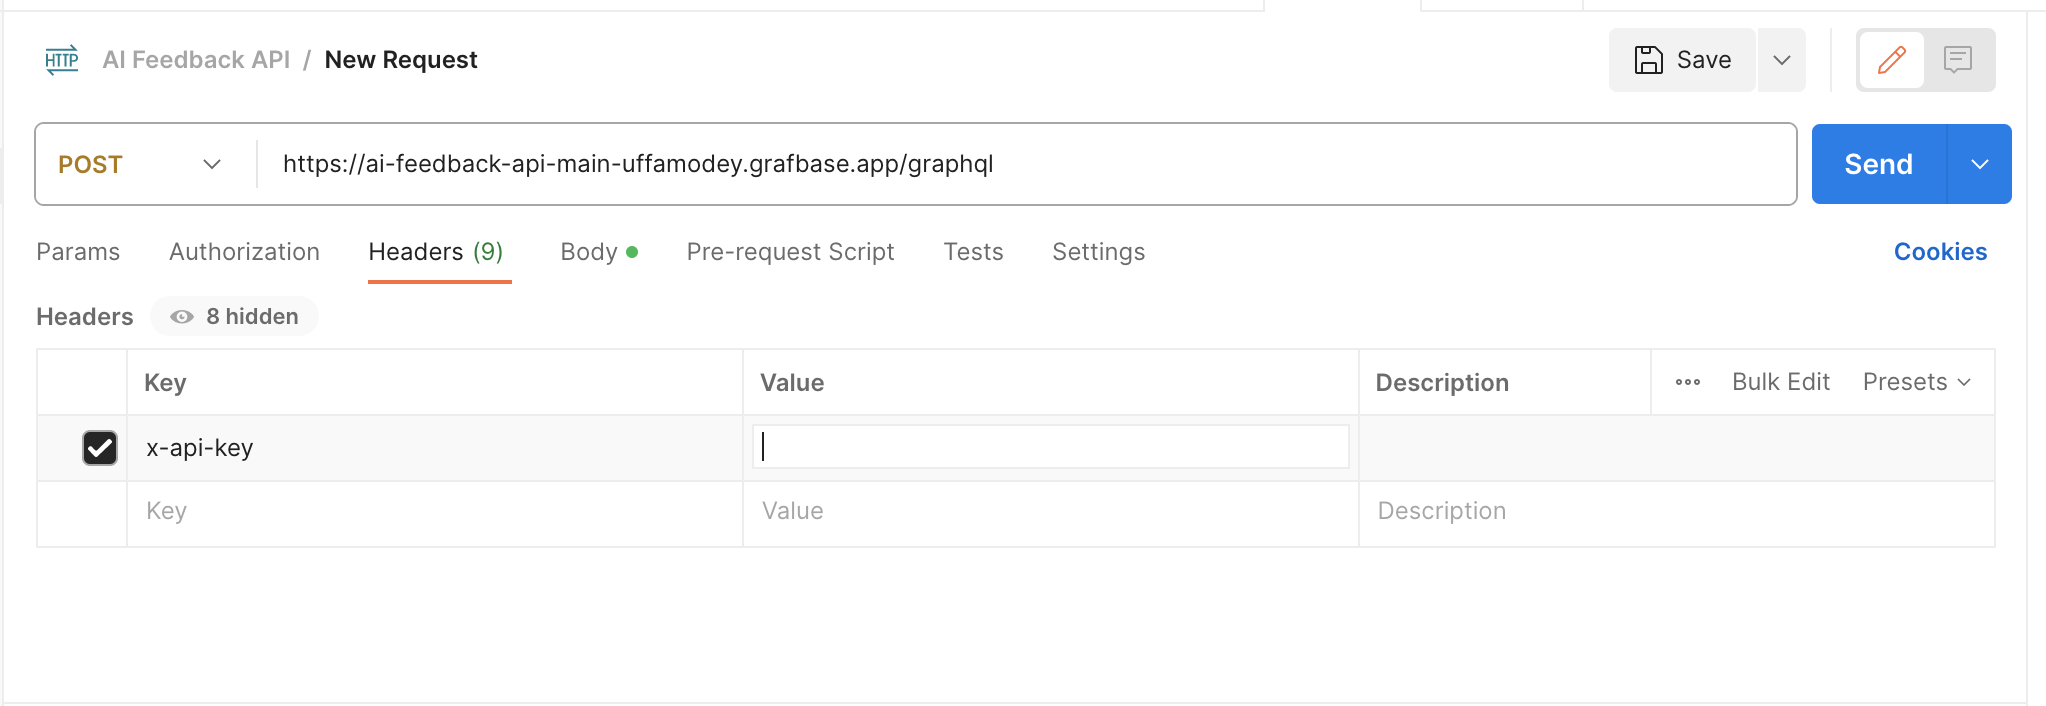
For the request body, put in the graphQL query and select Postman options accordingly.
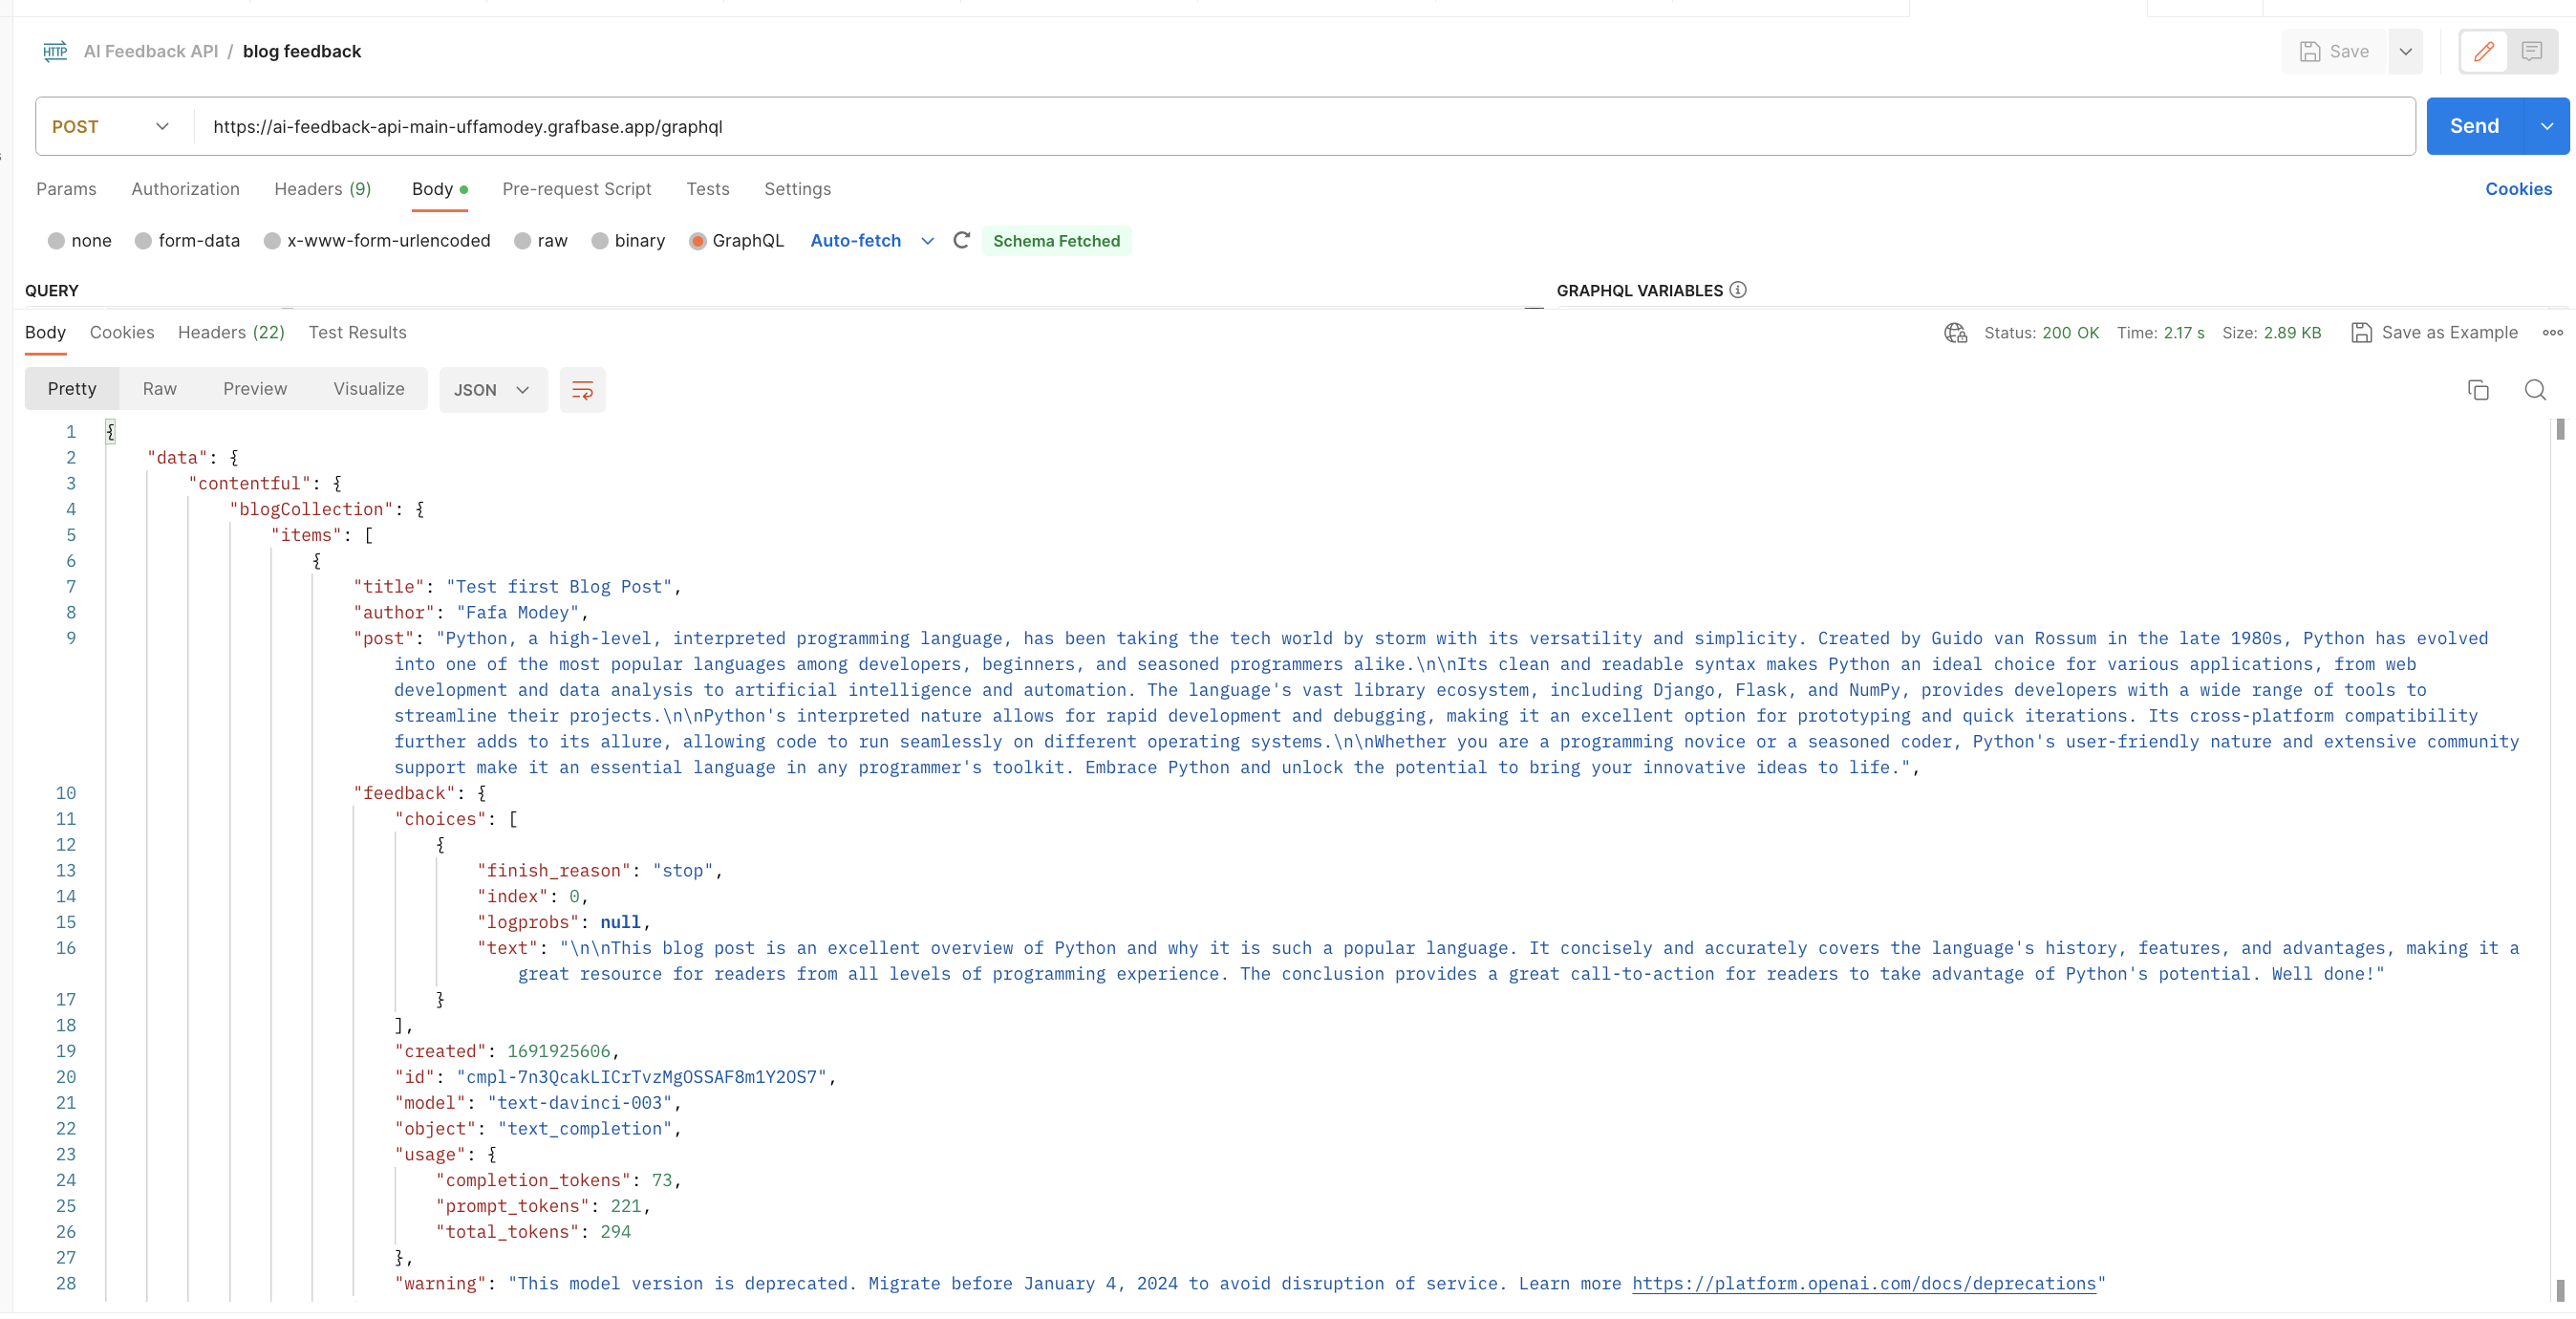
- Click on Send to view the API response listing the blog posts from Contentful and the feedback for each blog post using the OpenAI API. 🌟 🌟 🌟 🎊 🎊 🎊
{
    "data": {
        "contentful": {
            "blogCollection": {
                "items": [
                    {
                        "title": "Test first Blog Post",
                        "author": "Fafa Modey",
                        "post": "Python, a high-level, interpreted programming language, has been taking the tech world by storm with its versatility and simplicity.
                       Created by Guido van Rossum in the late 1980s, Python has evolved into one of the most popular languages among developers, beginners, and seasoned programmers alike.
                       \n\nIts clean and readable syntax makes Python an ideal choice for various applications, from web development and data analysis to artificial intelligence and automation.
                       The language's vast library ecosystem, including Django, Flask, and NumPy, provides developers with a wide range of tools to streamline their projects.
                       \n\nPython's interpreted nature allows for rapid development and debugging, making it an excellent option for prototyping and quick iterations.
                       Its cross-platform compatibility further adds to its allure, allowing code to run seamlessly on different operating systems.
                       \n\nWhether you are a programming novice or a seasoned coder, Python's user-friendly nature and extensive community support make it an essential language in any programmer's toolkit.
                       Embrace Python and unlock the potential to bring your innovative ideas to life.",
                        "feedback": {
                            "choices": [
                                {
                                    "finish_reason": "stop",
                                    "index": 0,
                                    "logprobs": null,
                                    "text": "\n\nThis is a great blog post about the advantages of Python!
                It covers the history of the language, its wide range of applications, and its user-friendly nature.
                It also gives an overview of the language's library ecosystem and cross-platform compatibility.
                The post does a great job of highlighting the benefits of using Python for developers of all levels."}],
    }
                            ],
                            "created": 1692127337,
                            "id": "cmpl-7ntuLEkin8TIY1i2Brax1UBHw32zr",
                            "model": "text-davinci-003",
                            "object": "text_completion",
                            "usage": {
                                "completion_tokens": 48,
                                "prompt_tokens": 221,
                                "total_tokens": 269
                            },
                            "warning": "This model version is deprecated. Migrate before January 4, 2024 to avoid disruption of service. Learn more https://platform.openai.com/docs/deprecations"
                        }
                    }
                ]
Costs 💰
Grafbase: This project was developed using the Grafbase Hobby account. This is Free for personal projects and simple backends and includes instant edge deploys, CI/CD, branching and community support.

Contentful: Contentful offers a FREE account for developers and marketers building individual projects. It includes a free space license that was used for this project.
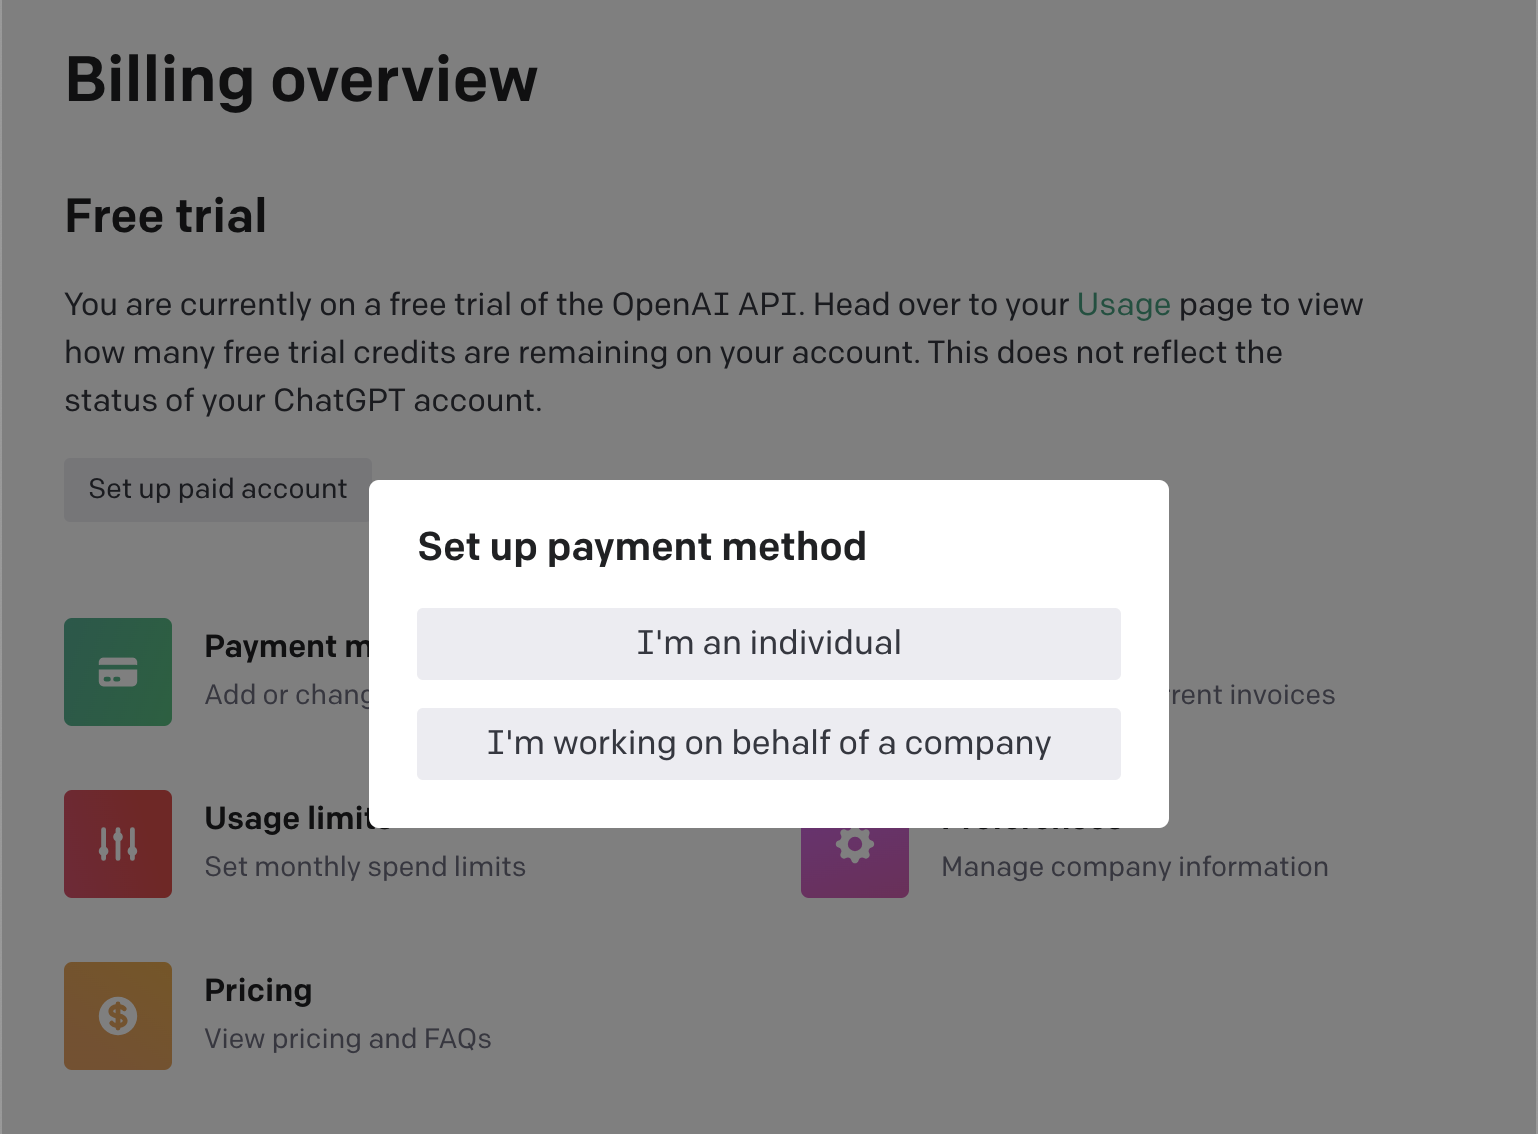
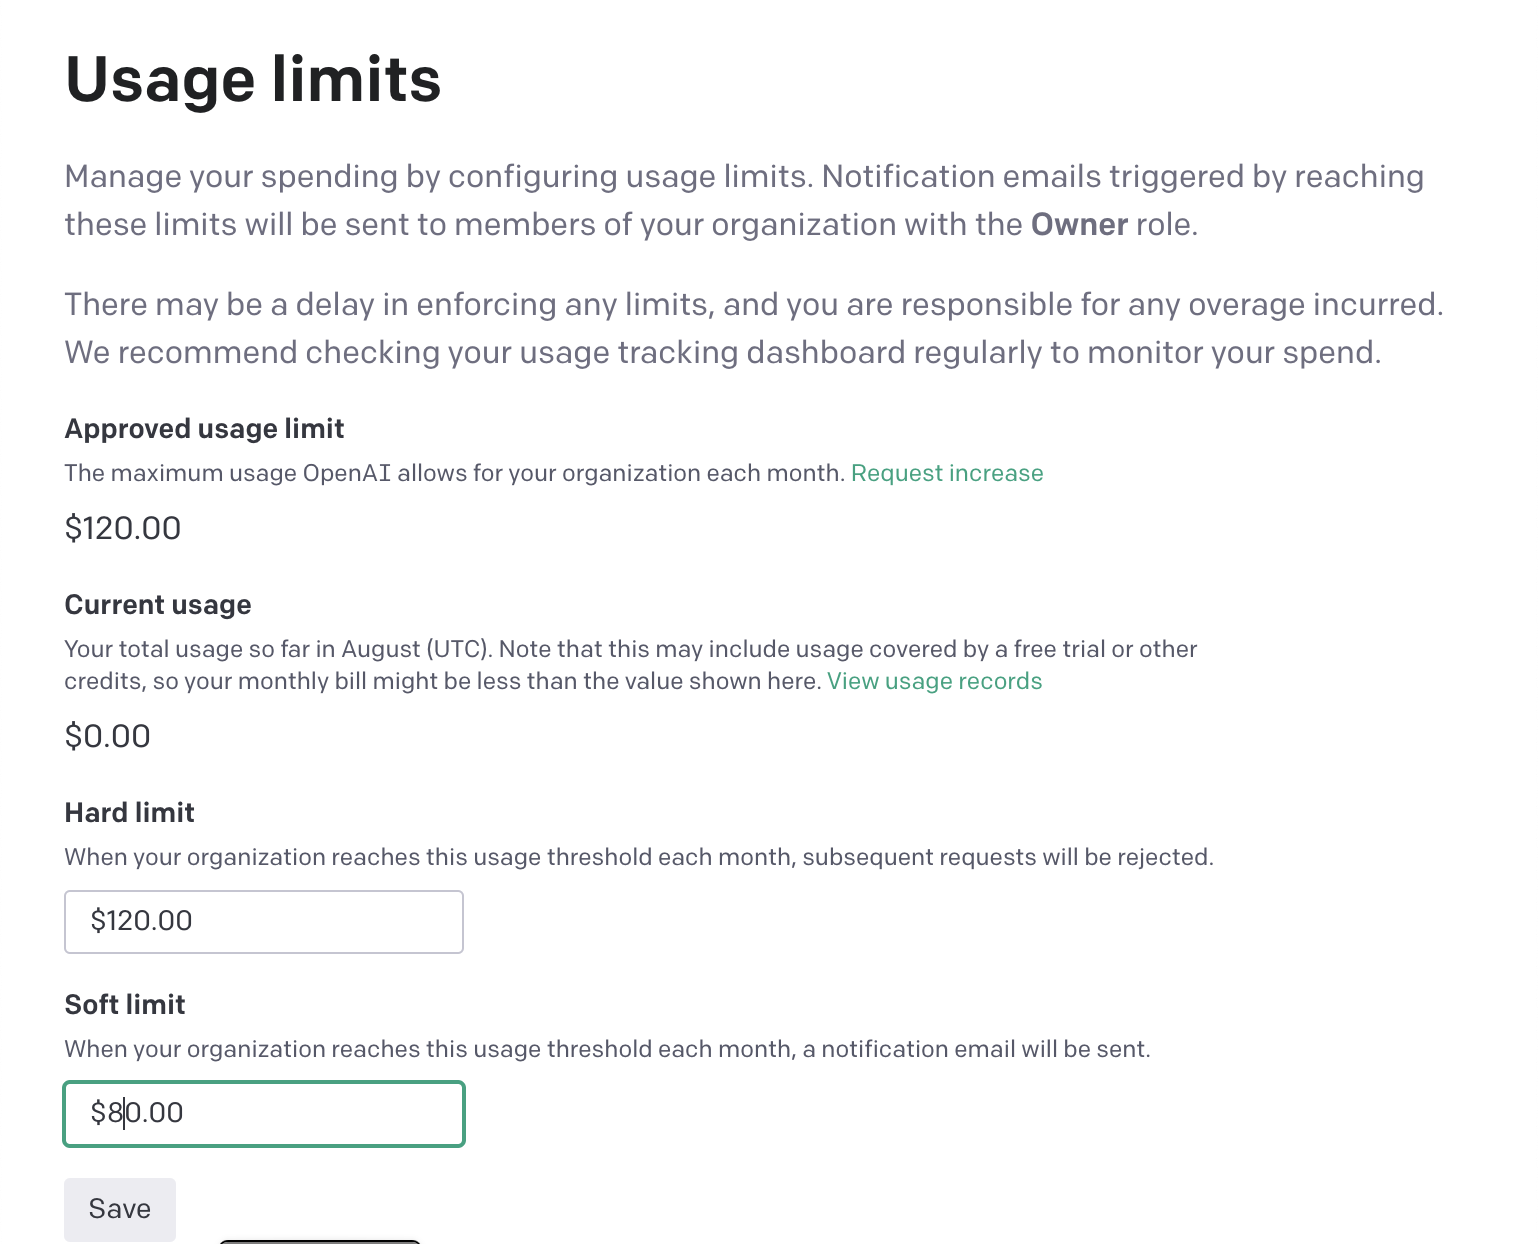
OpenAI API: I had used up my free trial on my OpenAI account so I was required to set up a paid account and set the usage limits for the account. OpenAI API pricing is currently estimated at about 10 tokens for $0.02.
Troubleshooting and Errors ❌
Git: During the step where we put our local branch to the remote branch on GitHub, if the git error below arises, use the subsequent command to override the error.
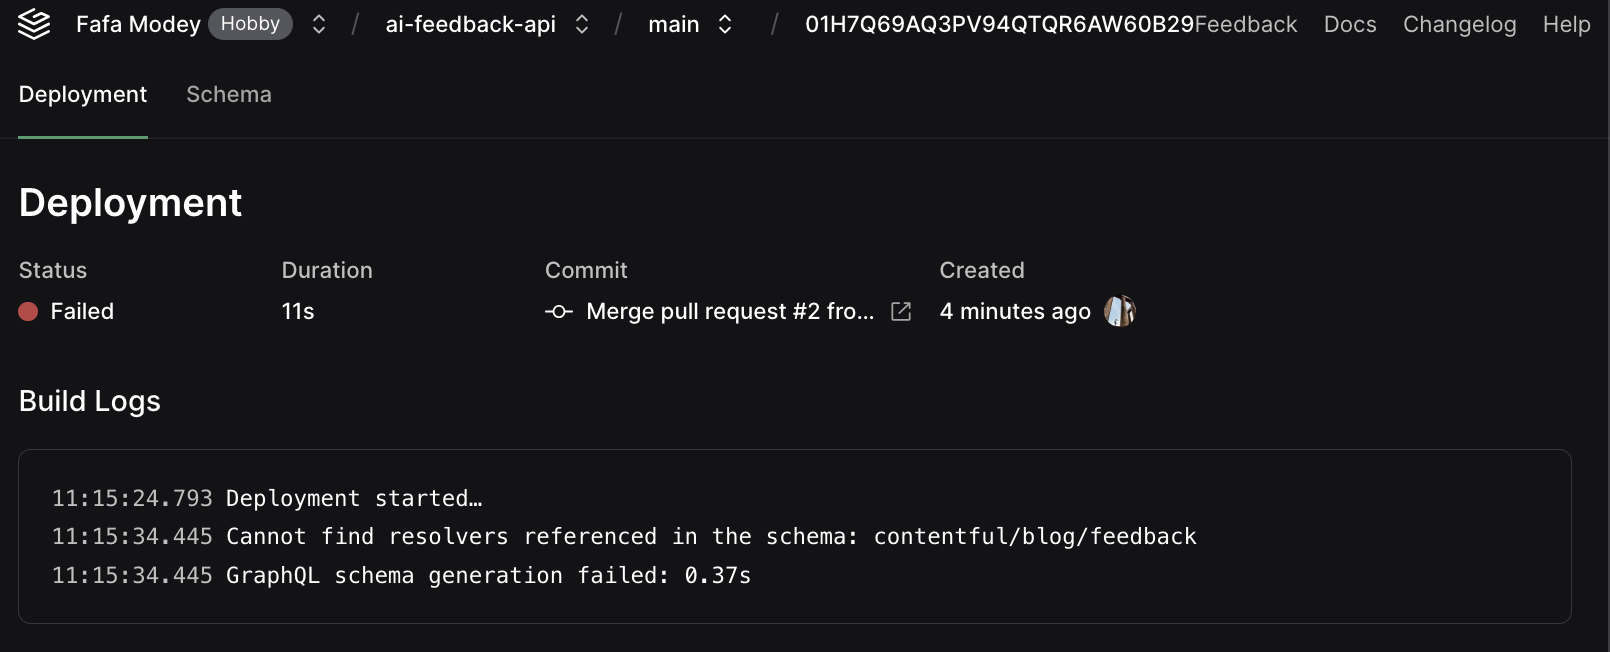
    * branch main -> FETCH_HEAD
    fatal: refusing to merge unrelated histories
git pull origin main --allow-unrelated-historiesGrafbase Deployment: The deployment to the Grafbase Edge from GitHub may fail for a number of reasons. The error message from failed deployment will be displayed on the build logs which is visible from the Grafbase account page.
Next Steps and Further Development 💯
Update the OpenAI model version used in the development. The version currently used in the project is no longer actively supported, and itis advisable to migrate to a newer version before (January 4, 2024) to avoid any disruptions in the service.

Enhance the capabilities of the Grafbase API to accommodate more logic in each API request such as specifying aspects of the work closer feedback and recommendations should be given of enabling the user to get feedback that is tailored to content from a specific sector.
References and Additional Reading 🚀
"Extend any GraphQL API with data from other APIs" https://grafbase.com/guides/extend-any-graphql-api-with-data-from-other-apis
"Working with query resolvers and OpenAI" https://grafbase.com/guides/working-with-query-resolvers-and-openai


