

Test-Driven Development (TDD) with Django REST Framework
Writing Python unit test cases to verify the functionality of API endpoints.


Introduction
Hello all 💙 😁 !
Test-driven development (TDD) is a software development practice in which unit test cases are incrementally written prior to code implementation (B George, L Williams, 2014). In this method of development, the developer sets up test cases to represent various features of an application, including the desired results for each of the features. This enables the developer to run the tests and ensure that every feature that has been implemented functions as expected.
TDD is particularly beneficial to developers as they refactor their code to implement further features on the app. By running tests that have been set up previously, and ensuring that the tests pass, the developer can be certain that the new changes made to the code base have not broken any feature that was previously implemented.
In this tutorial, we will set up unit tests for an employee-data application in order to verify that requests made to the application API endpoints return the appropriate data.
📌 See the full code of GitHub
Learning Objectives
- Set up and run Python unit tests using Django REST Framework Testing.
Prerequisites
- This tutorial is a follow-up to my previous blog post "Update Nested Serializers Fields with Django REST Framework". Here, the steps to build the employee-data application were explained in detail.
- To recreate this project, fork the repository from GitHub and pull a version you can run remotely.
- Activate a virtual environment to run the project. Install Django and Django rest framework in the virtual environment.
Development 💻
Step 1: Create a test directory and file
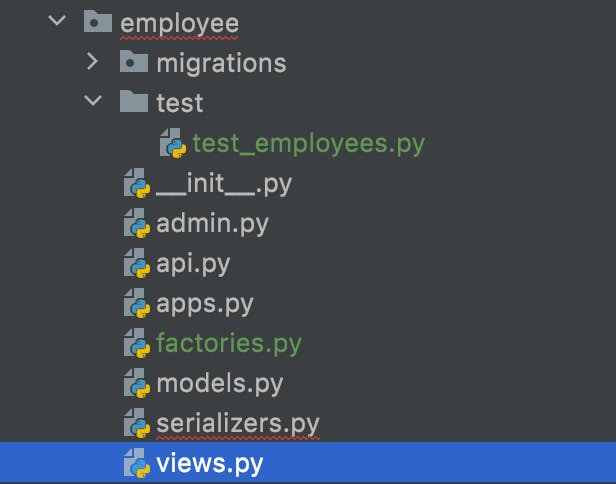
- In the employee app folder, make a new folder called test. This is where all the test python files for your application will reside.
- Create a new python file for the test called test_employees.py. Ensure that it is named with test as the first characters. This is because when the tests for the app are run, the test utility finds all the files named test*.py under the current working directory.
- The file structure inside your employee app should be similar to the screenshot below
Step 2: Create test factories using Factory Boy
Factory Boy is a Python library that generates dummy data. This is used to replicate the actual object instances that will be collected and stored in the application database according to the model fields. Further information about using the Factory Boy boy can be found in its documentation.
Install Factory Boy in your virtual environment
pip install factory_boyCreate a factorties.py file in the employee app folder
import factory.fuzzy
import datetime

from employee.models import (
    Certifications,
    Employees
)

class EmployeesFactory(factory.django.DjangoModelFactory):
    first_name = factory.fuzzy.FuzzyText(length=15)
    last_name = factory.fuzzy.FuzzyText(length=15)
    employment_date = factory.fuzzy.FuzzyDate(datetime.date(2008, 1, 1))

    class Meta:
        model = Employees


class CertificationsFactory(factory.django.DjangoModelFactory):
    name = factory.fuzzy.FuzzyText(length=255)
    expiry_date = factory.fuzzy.FuzzyDate(datetime.date(2028, 1, 1))
    employees = factory.SubFactory(EmployeesFactory)

    class Meta:
        model = Certifications
Step 3: Writing test cases in the test_employee file
View the full test_employee.py file in the project GitHub repo.
Import the relevant test libraries
- reverse - matches the API URL to the appropriate view using the URL name.
- APITestCase - extends the Django test case classes but uses APIClient instead of Django's default Client.
- APIClient - enables .get(), .post(), .patch(), .del() requests.
from django.urls import reverse

from rest_framework.test import APITestCase, APIClient

from employee.factories import (
    EmployeesFactory,
    CertificationsFactory
)
Define the EmployeesTestUtils class
In this class, the API URLs to be queried in the test are defined.
class EmployeesTestUtils(object):

    @staticmethod
    def get_employees_url():
        return reverse('employees')

    @staticmethod
    def get_employee_details_url(employee_id):
        return reverse('employees-details', kwargs={"pk": employee_id})
Test setUp
- Create 4 employee objects from the factories. 3 of the employee objects that are created are created as a batch and stored in a list while 1 is created as an individual object by specifying the field data for the factory models.
- Create 1 certification object that is related to an employee
class TestEmployees(APITestCase):

    def setUp(self):
        self.client = APIClient()
        self.employees = EmployeesFactory.create_batch(3)
        self.employees1 = EmployeesFactory.create(
            first_name="Test first name",
            last_name="Test last name",
            employment_date="2012-11-02"
        )
        self.certification1 = CertificationsFactory.create(
            name="test certification",
            expiry_date="2024-12-03",
            employees=self.employees1
        )
test_employees_list method
- response initiates a GET request to the get_employees_url() method
- self.assertEqual(response.status_code, 200) - Ensures that the query response status code equals 200 to signify that the GET request was successful.
- self.assertEqual(len(data), 4) - Asserts that the 4 objects for the employees we have created in the test setup are returned in this GET request.
- for employee in data: - Uses a for loop to check for an employee object with first_name as the first name of the employee object we defined in the test setup. Then it asserts that the employee object has a related certification as specified in the test setup.
    def test_employees_list(self):
        response = self.client.get(
            EmployeesTestUtils.get_employees_url()
        )
        self.assertEqual(response.status_code, 200)
        data = response.data
        self.assertEqual(len(data), 4)
        for employee in data:
            if employee['first_name'] == str(self.employees1.first_name):
                self.assertEqual(employee['certifications'][0]['name'], str(self.certification1.name))
test_employees_create method
- data defines the payload in JSON format that will be sent in the POST request for creating a new employee object.
- response initiates a POST request to the get_employees_url() method.
- self.assertEqual(response.status_code, 201) - Ensures that the query response status code equals 201 to signify that the POST request was successful and the employee object was created in the test database.
- self.assertEqual(data['first_name'], "Test first name 2") - Assert that the employee first_name for the created object is the desired first name.
- self.assertIn('last_name', data) - Assert that the employee object created was created with a field for last_name.
- self.assertEqual(len(data["certifications"]), 2) - Assert that the employee object created has 2 certifications related to it.
    def test_create_employee(self):
        data = {
            "first_name": "Test first name 2",
            "last_name": "Test last name 2",
            "employment_date": "2022-07-04",
            "certifications": [
                {
                    "name": "Test Certification Name 1",
                    "expiry_date": "2022-07-04"
                },
                {
                    "name": "Test Certification Name 2",
                    "expiry_date": "2022-07-04"
                }]
        }
        response = self.client.post(
            EmployeesTestUtils.get_employees_url(),
            data=data,
            format='json'
        )
        self.assertEqual(response.status_code, 201)
        data = response.data
        self.assertEqual(data['first_name'], "Test first name 2")
        self.assertIn('last_name', data)
        self.assertEqual(len(data["certifications"]), 2)
test_employee_details method
- response initiates a GET request to the get_employee_details_url() method. The id for the employee objects we want to fetch is provided as a parameter to this method.
- self.assertEqual(data['first_name'], str(self.employees1.first_name)) - Asserts that the first_name of the object returned in the response data is equal to the first_name of the employee object we desire to retrieve.
- self.assertIn('certifications', data) - Asserts that the related certifications for the employee object are retrieved as well.
    def test_employee_details(self):
        response = self.client.get(
            EmployeesTestUtils.get_employee_details_url(self.employees1.id)
        )
        self.assertEqual(response.status_code, 200)
        data = response.data
        self.assertEqual(data['first_name'], str(self.employees1.first_name))
        self.assertIn('certifications', data)
test_employee_update method
In this test case, we desire to update the first_name, last_name, and employemnet_date fields for an employee object. For the certifications that are related to the employee object, we want to update the name field for an existing certification and add a new certification.
- data defines the payload in JSON format that will be sent in the PATCH request for updating an existing employee object.
- response initiates a PATCH to the get_employee_details_url() method. The id for the employee object we want to update is provided as a parameter to this method.
- Assertions are used to test that the fields of the query data response deliver the desired updates for the employee object fields.
    def test_employee_update(self):
        data = {
            "first_name": "Updated test first name",
            "last_name": "Updated test last name 2",
            "employment_date": "2021-07-04",
            "certifications": [
                {
                    "id": self.certification1.id,
                    "name": "updated test certification name",
                    "expiry_date": "2022-07-04"
                },
                {
                    "name": "New Test Certification Name",
                    "expiry_date": "2022-07-04"
                }]
        }
        response = self.client.patch(
            EmployeesTestUtils.get_employee_details_url(self.employees1.id),
            data=data,
            format='json'
        )
        self.assertEqual(response.status_code, 200)
        data = response.data
        self.assertEqual(data['first_name'], "Updated test first name")
        self.assertIn('last_name', data)
        self.assertEqual(len(data["certifications"]), 2)
        for certification in data['certifications']:
            if certification['id'] == str(self.certification1.id):
                self.assertEqual(certification['name'], "updated test certification name")
Step 4: Running test cases from the terminal
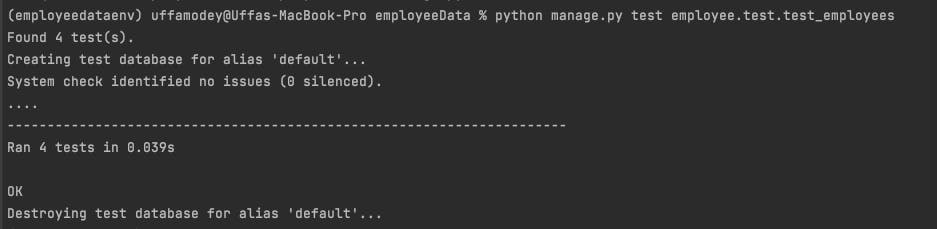
- Navigate to the project folder and run the command below to run all of the 4 tests cases we have defined in the test_emplyees file
python manage.py test employee.test.test_employees
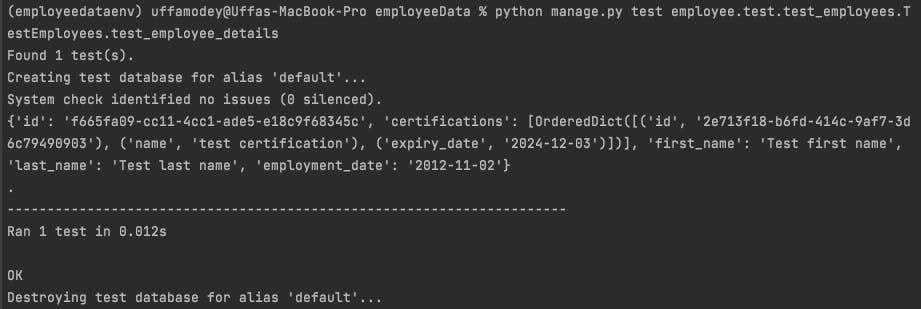
- To run a specific test case (the test_employees_list test case for example), extend the command above to specify the test class and the desired test method
python manage.py test employee.test.test_employees.TestEmployees.test_employees_list

- To view the response from a request (for example the test_employee_details method) insert a print statement for the response data after the response data is defined in the test method. The retrieved employee object is displayed in the terminal when the test is run.
data = response.data
print(data)
- You may also view the fuzzy data generated from the test factories that are used to replicate objects in the test_employee_list method. Insert another print statement for the response data after the response data is defined in the test method.
data = response.data
print(data)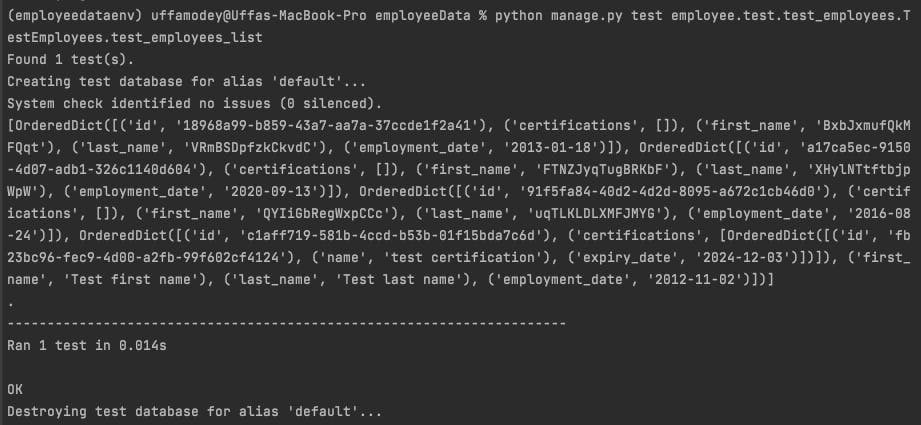
Conclusion 💃 💃
In this tutorial we have;
- Explained why test-driven development is beneficial for developers.
- Demonstrated how to setUp test cases using Django REST Framework APITestCase, APIClient modules.
- Showcased how to write test cases for asserting the functionality of API endpoints used to create, fetch or update objects from a database.
Next steps
- View the full project code on GitHub.
- Write a test case for DELETE to test if an API request can successfully delete an object that exists in the application database.
- Comments, questions or suggestions related to this tutorial? Please share them with me. I'll be delighted to hear from you.
Cheers! 🎊 🍻 🎊 🍻 🎊 🍻