

Gratitude Journal App with AWS Amplify, AWS Cognito and Figma
A full stack Figma to Code project for AWS Amplify x Hashnode Hackathon


📌 See the full code of GitHub 🔥
Introduction 💓 💓
As an early career software developer, participating in a hackathon was basically a new year resolution for me. I was extremely excited about learning how to build and deploy apps on the AWS cloud. This hackathon was a great opportunity for me to learn about AWS Amplify and how it makes deploying web applications more accessible for developers.
Project Inspiration. Why is the project relevant? 😇
A gratitude journal because why not? Studies have shown that expressing gratitude can be directly linked to improved well-being for individuals. Continually identifying and acknowledging the positive aspects of one's life can help people sleep better, lower stress and improve interpersonal relationships
This gratitude journal app may be scaled to be widely used among individuals who are highly stressed emotionally or mentally.
Summary of the App Features 📠
- Figma - To design all of the frontend UI components used in the app. These include a nav bar, a home page banner, elements for displaying the journal entry objects and a form for creating journal entry objects.
- AWS Amplify - For deploying the app backend environment on Amplify Studio.
- AWS Hosting - For making the app publicly accessible on this URL main.d30jwjhy0i9u1e.amplifyapp.com
- AWS Cognito - For authentication of users on the app.
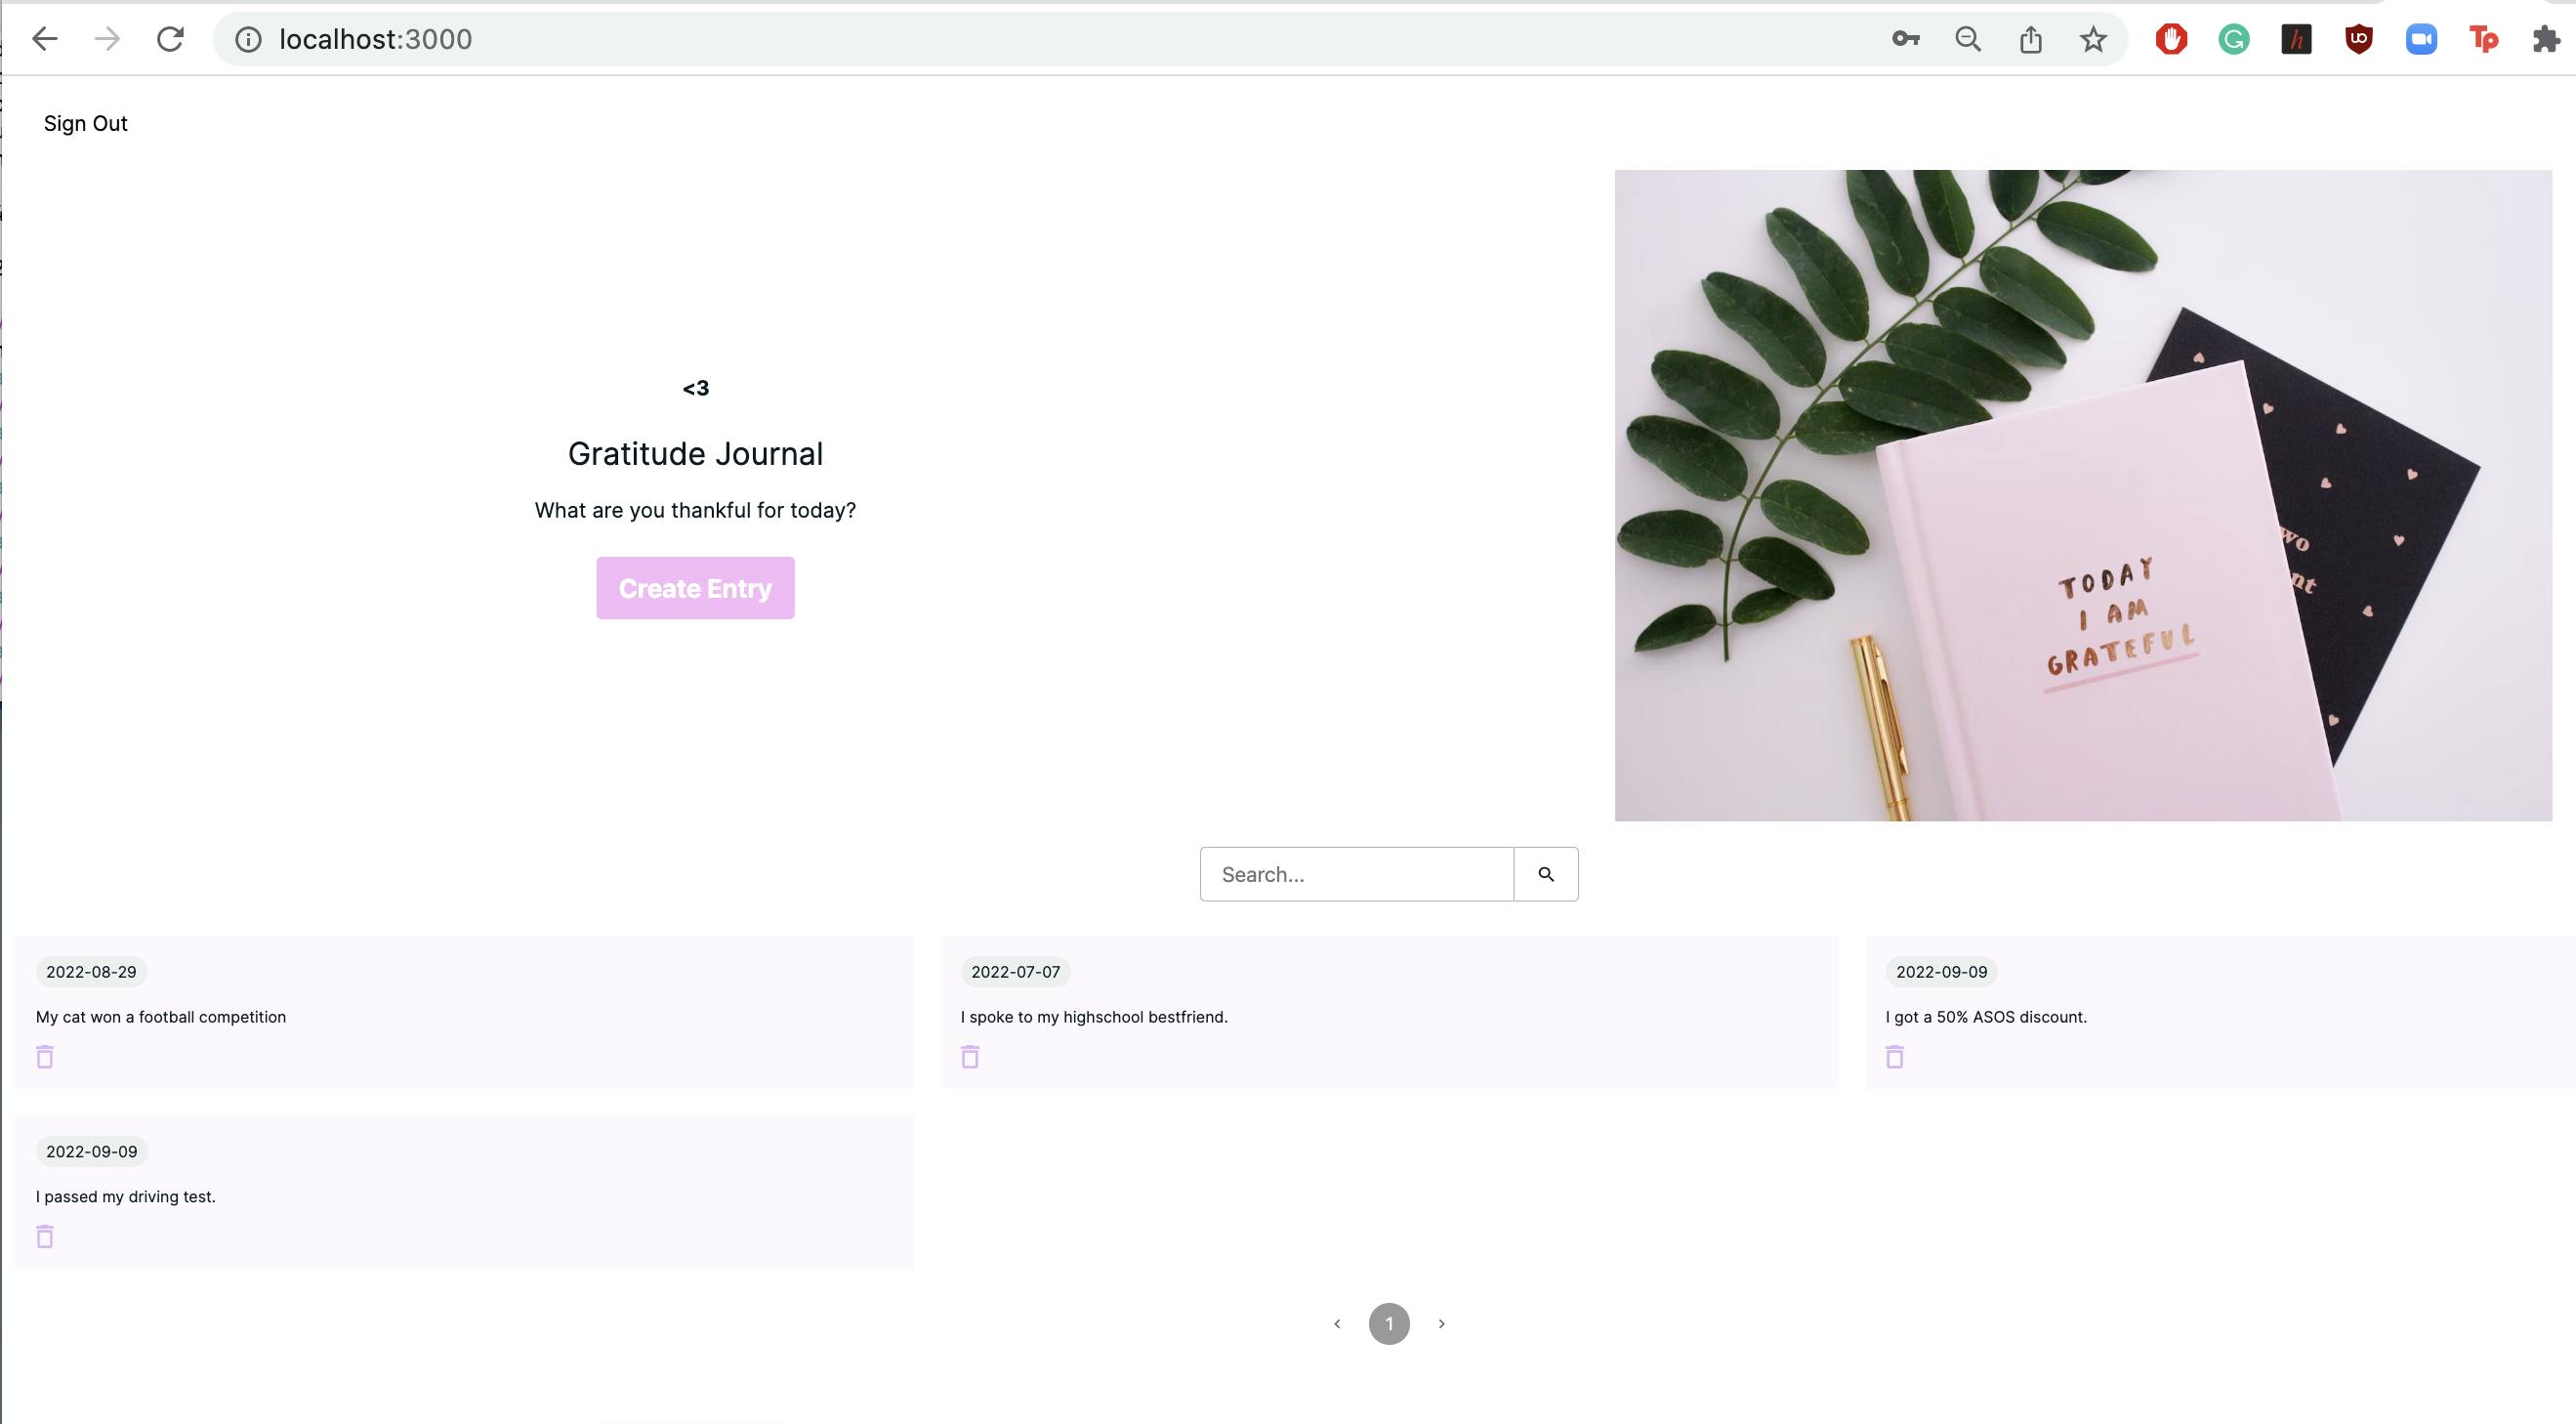
Gratitude Journal app allows authenticated users to create, view and delete journal entries. Each journal entry has a date and the entry text. The user is also able to search for a particular entry using characters that are contained in the entry text.
Getting Set ⏰ 🏃
- Install npm on your pc.
- Sign up for an AWS account: Follow through with the steps for providing personal information, card payment details and account verification.
- Enable MFA to enhance security on the account.
- Create an IAM user account. Instructions for this can be here. Ensure that you take note of the login credentials. Log into the AWS Management Console using the newly created IAM user.
The Development 💻 💻
Launch App on AWS Amplify Studio and Create Data Models 🌝
- Open AWS Management Console and search for AWS Amplify under services.
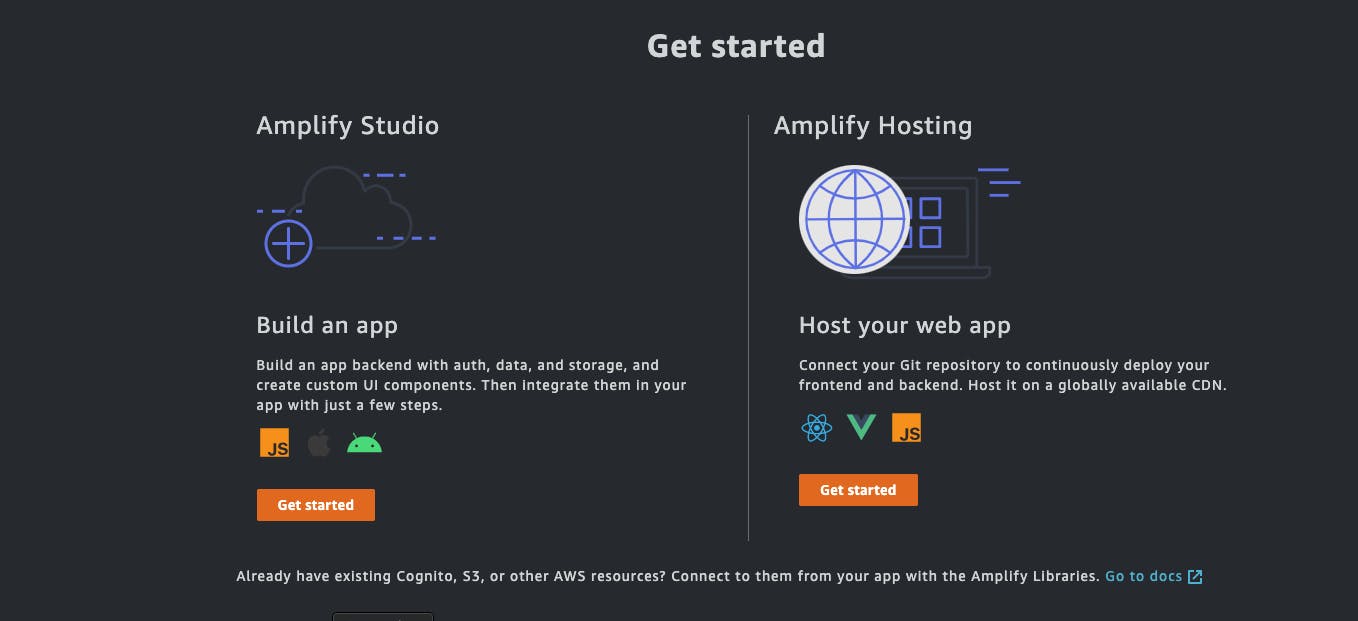
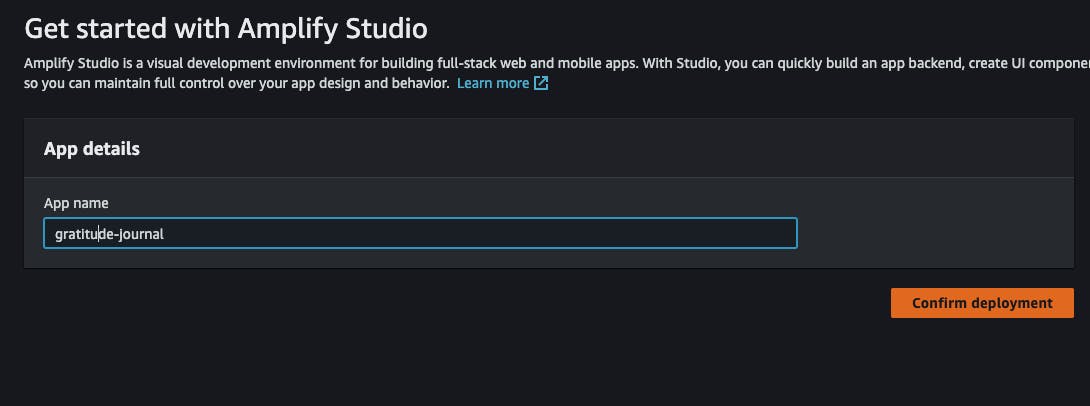
- Click Build an app and give the app a name. Confirm deployment.
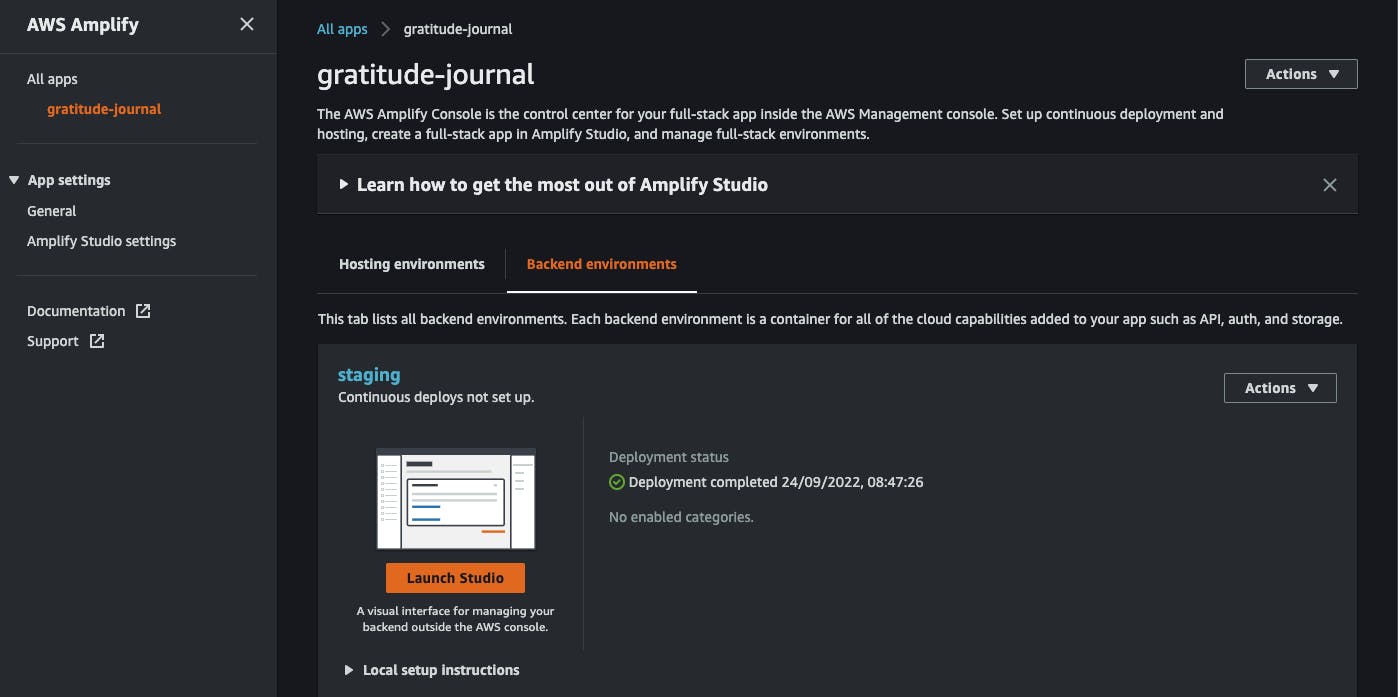
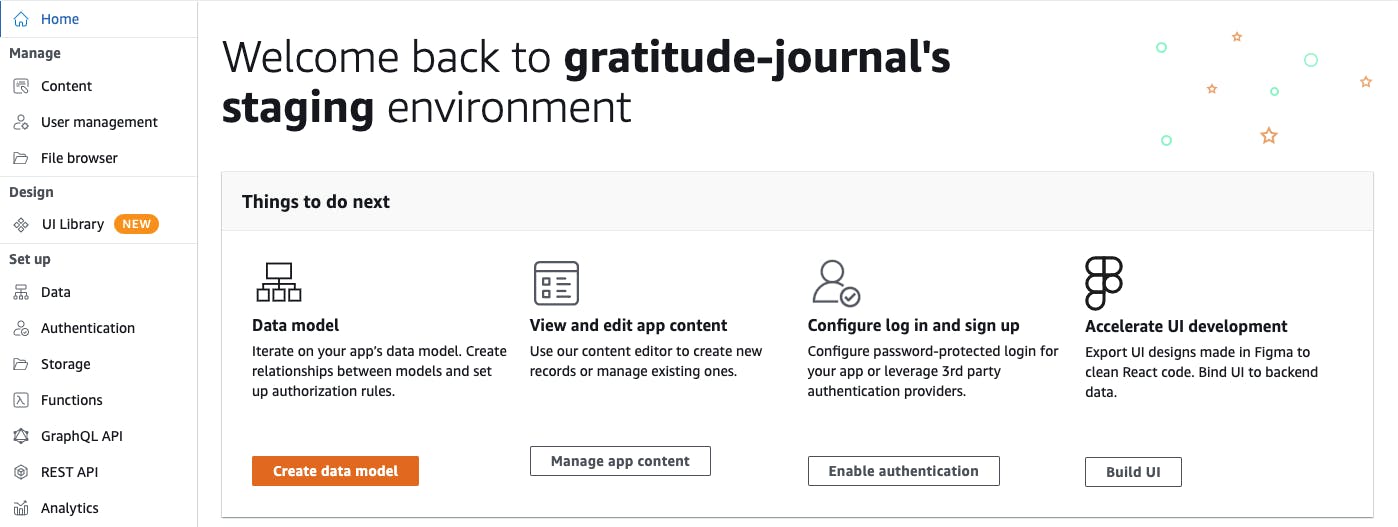
- Click Launch Studio when the studio instance has been created.
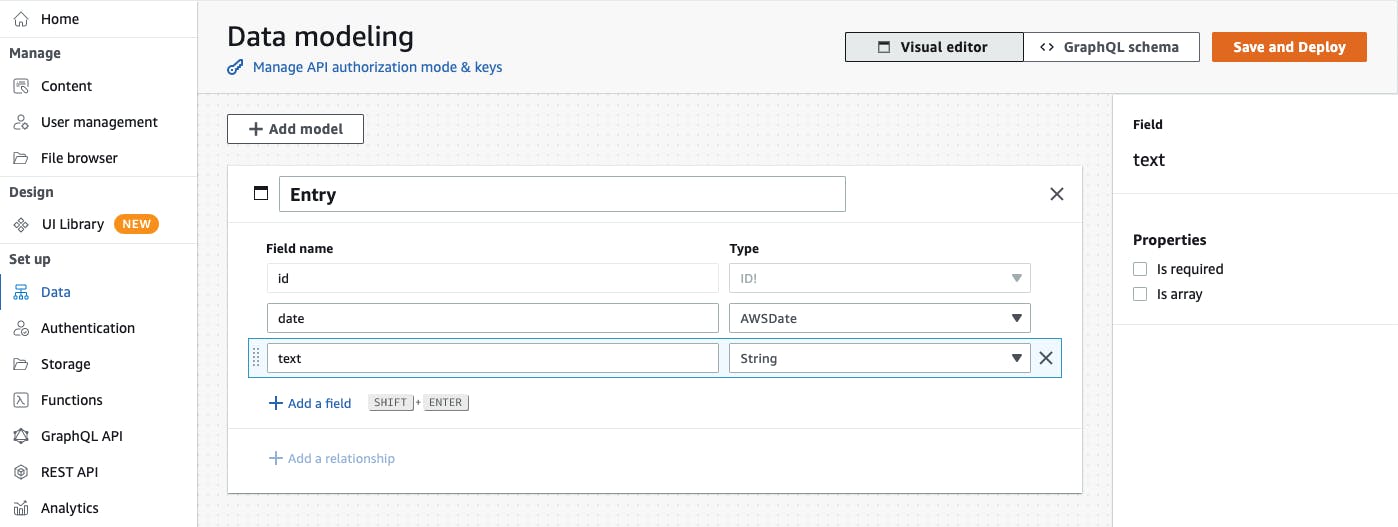
- Click Create data model to add a model. For this Gratitude Journal app, each journal entry is called an entry. Each entry will have a date as well as some text. The date field has and AWSDate type while the text field has a string type. Click Save and Deploy after creating this model.
Add App User Interface Components using Figma 🌸 🌷
- Once the data model for the app has been deployed, click on UI Library in the Design tab. Click Get Started.
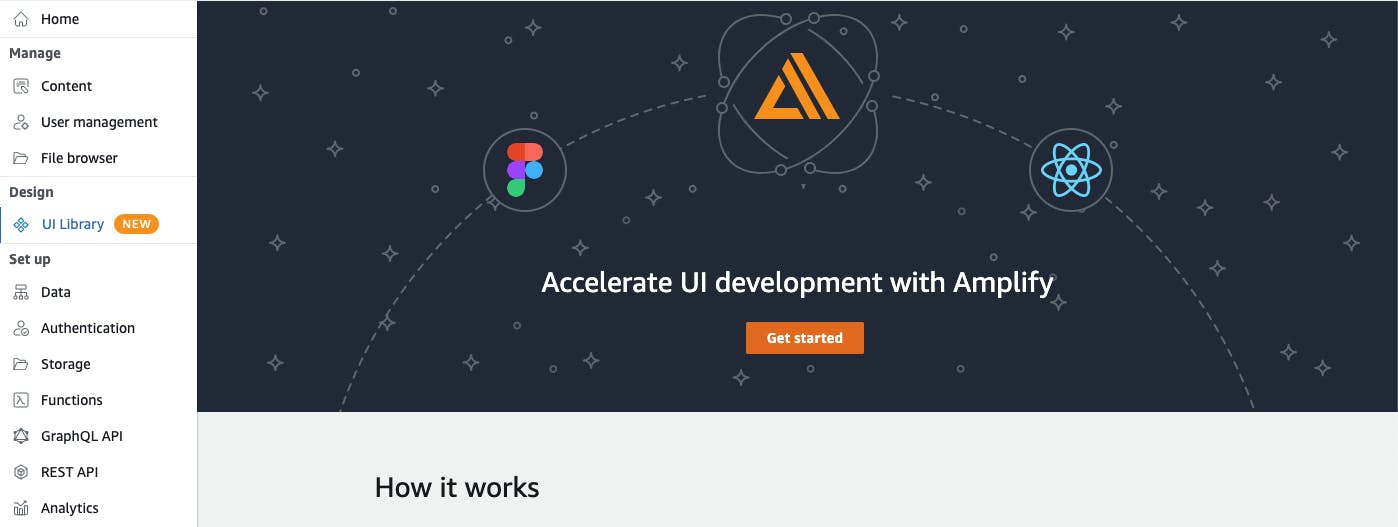
- Click Use our Figma template to get started. Click Get a copy to create a duplicate of the file for editing. Please read the instructions on the README to familiarise yourself with how to create UI components.
Creating the App UI Components 💡
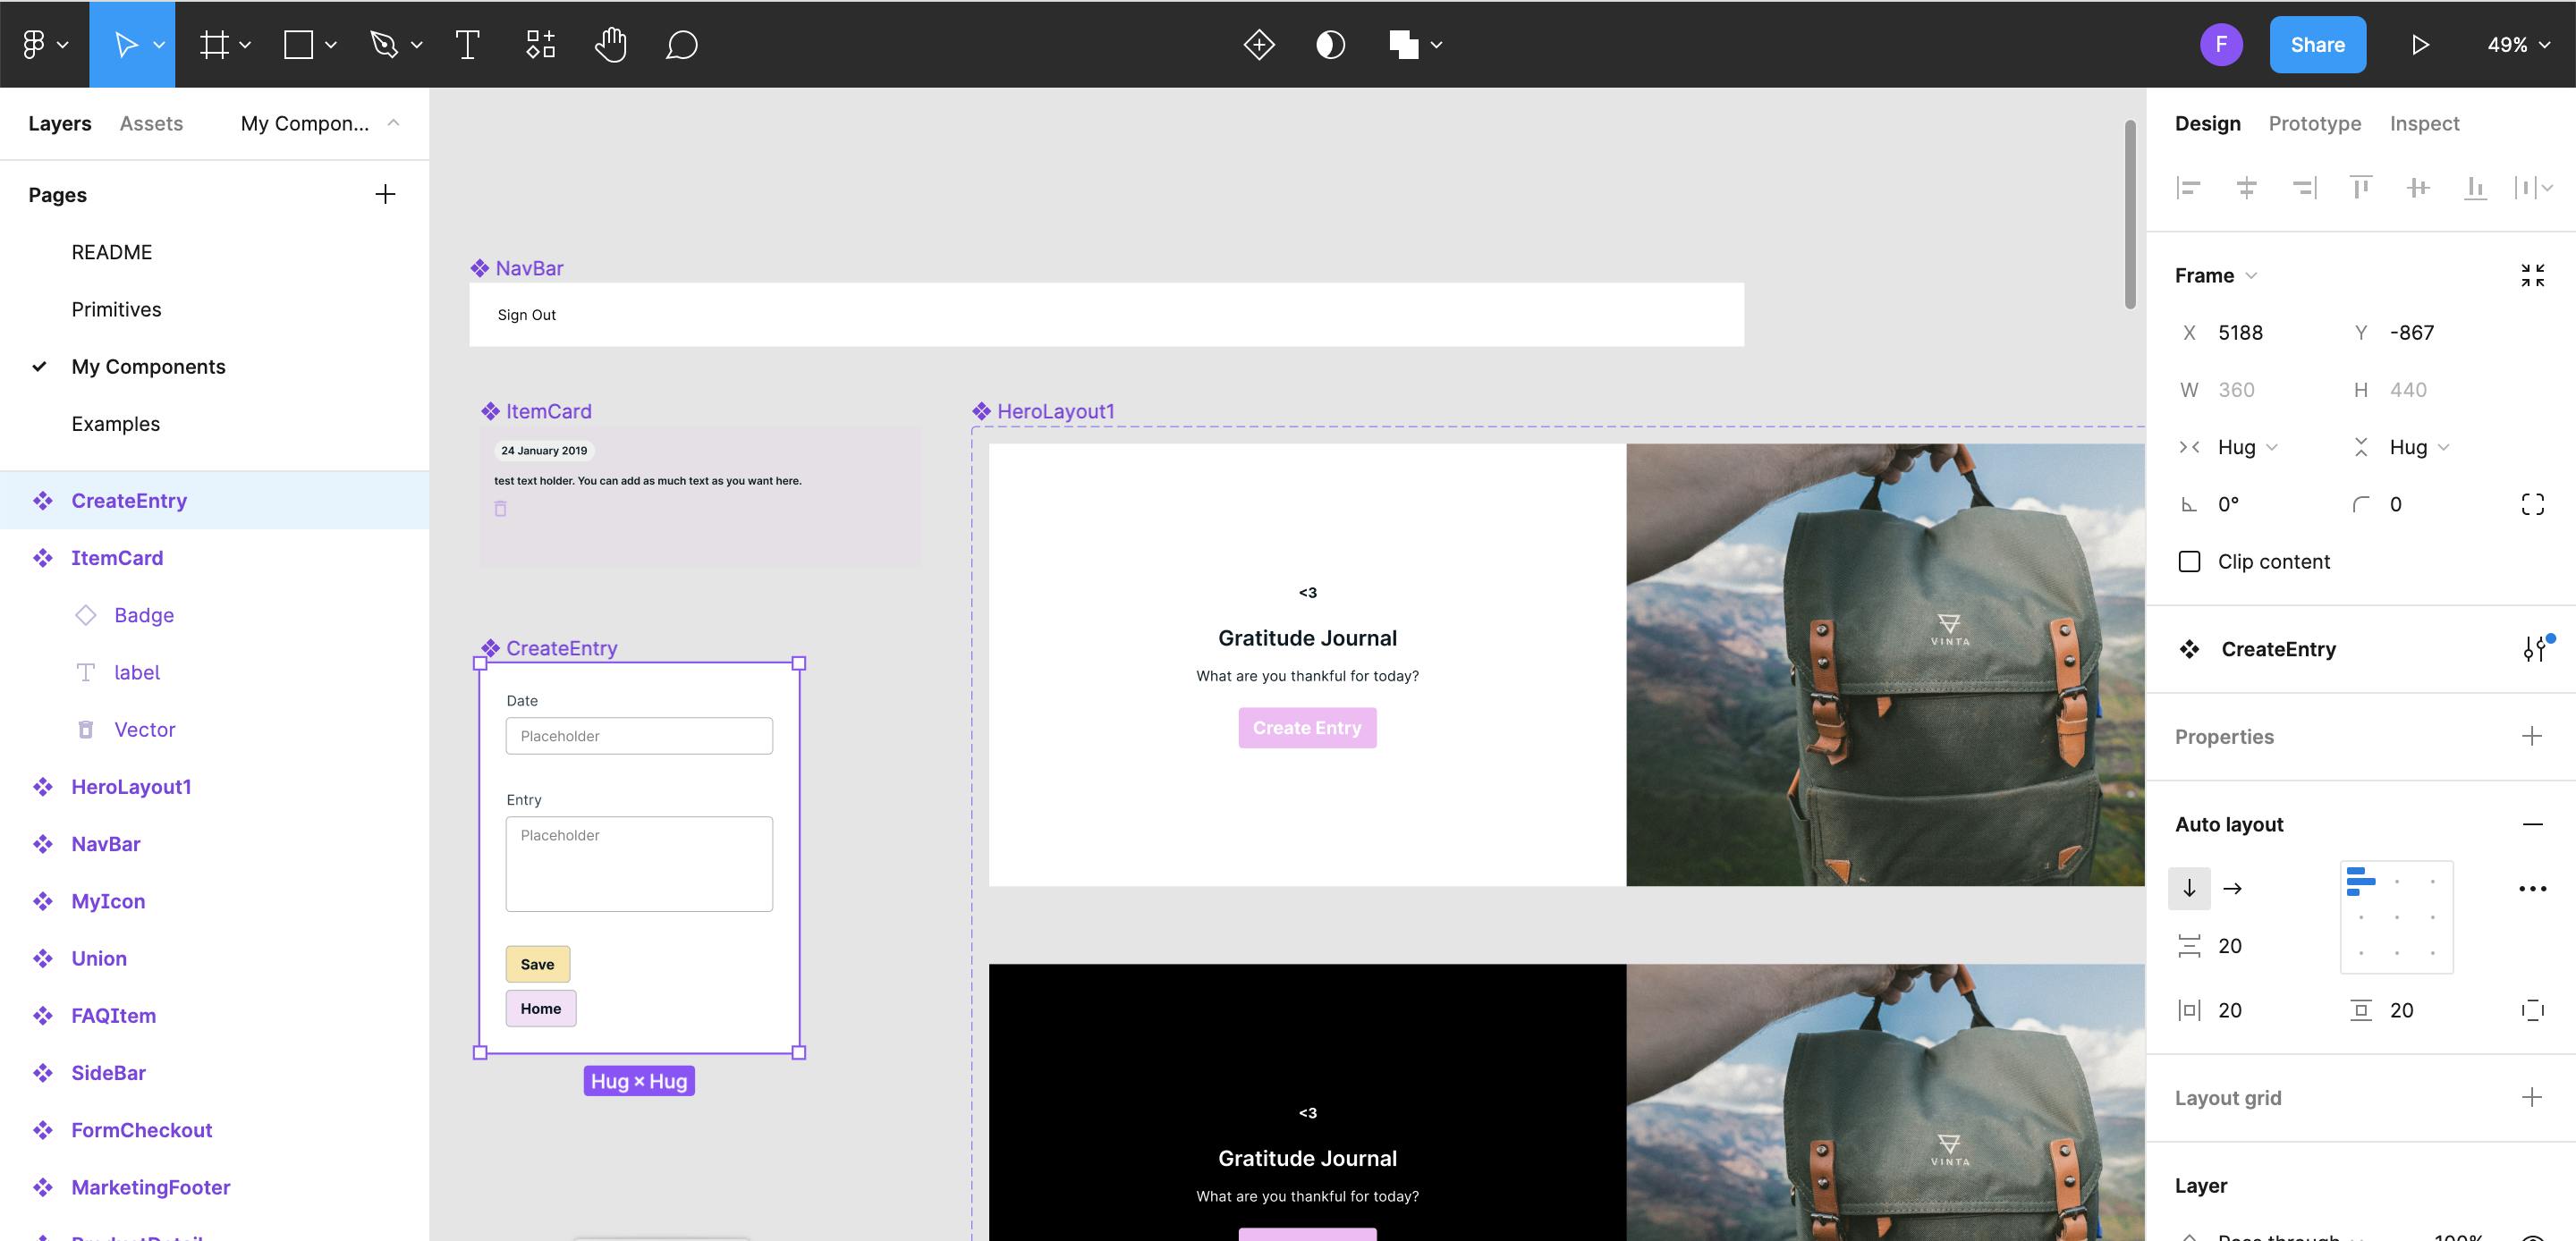
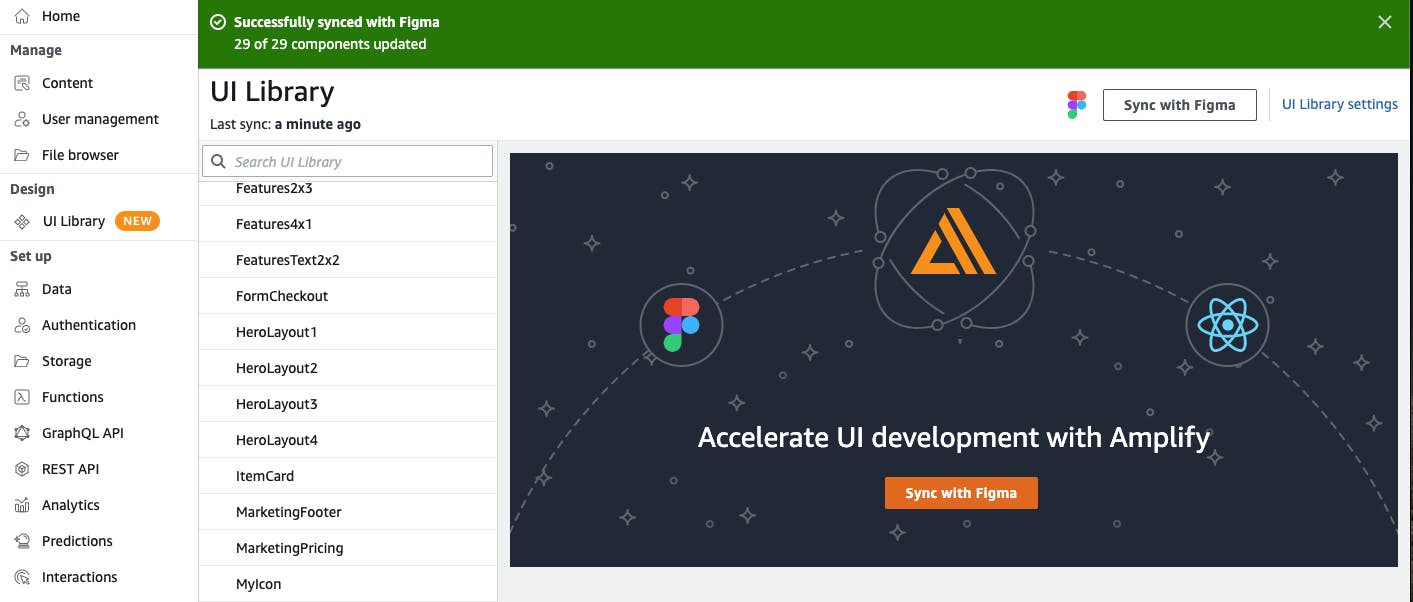
- Clicking on My Components shows you all of the premade components that you can include in your application. For this Gratitude Journal app we will customise three components
- ItemCard: Represents each journal entry object. It has a date field and text area field with placeholders in them. It also contains a delete icon.
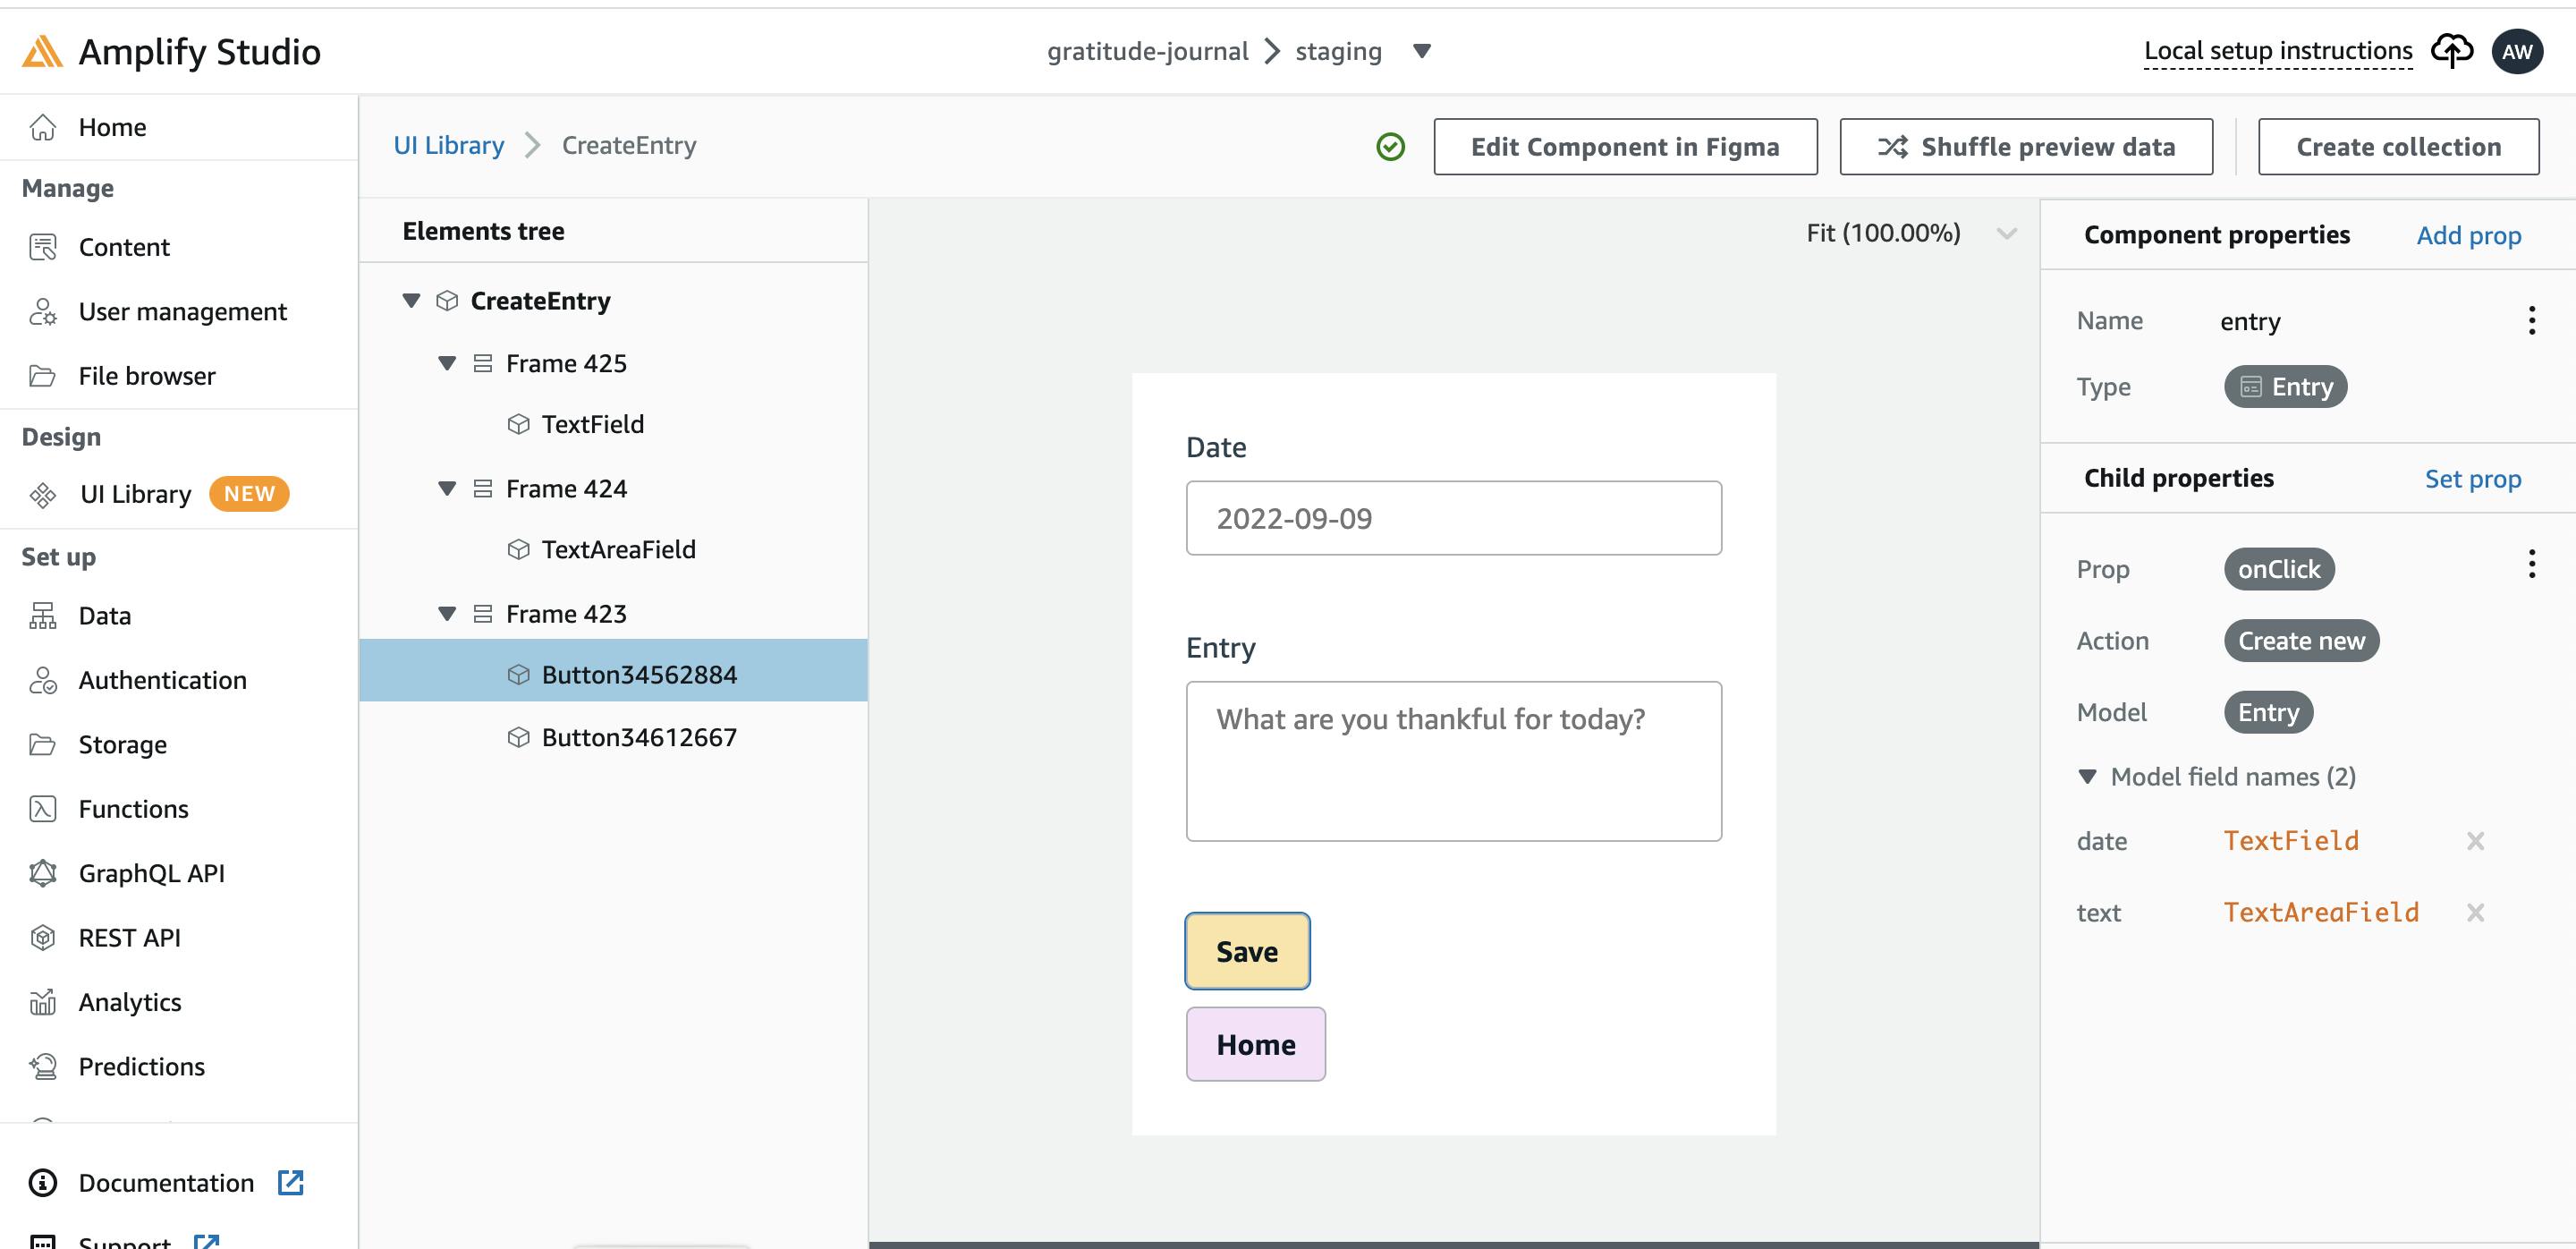
- CreateEntry: A form for creating a journal entry. It has a save button and a button to return to the home screen.
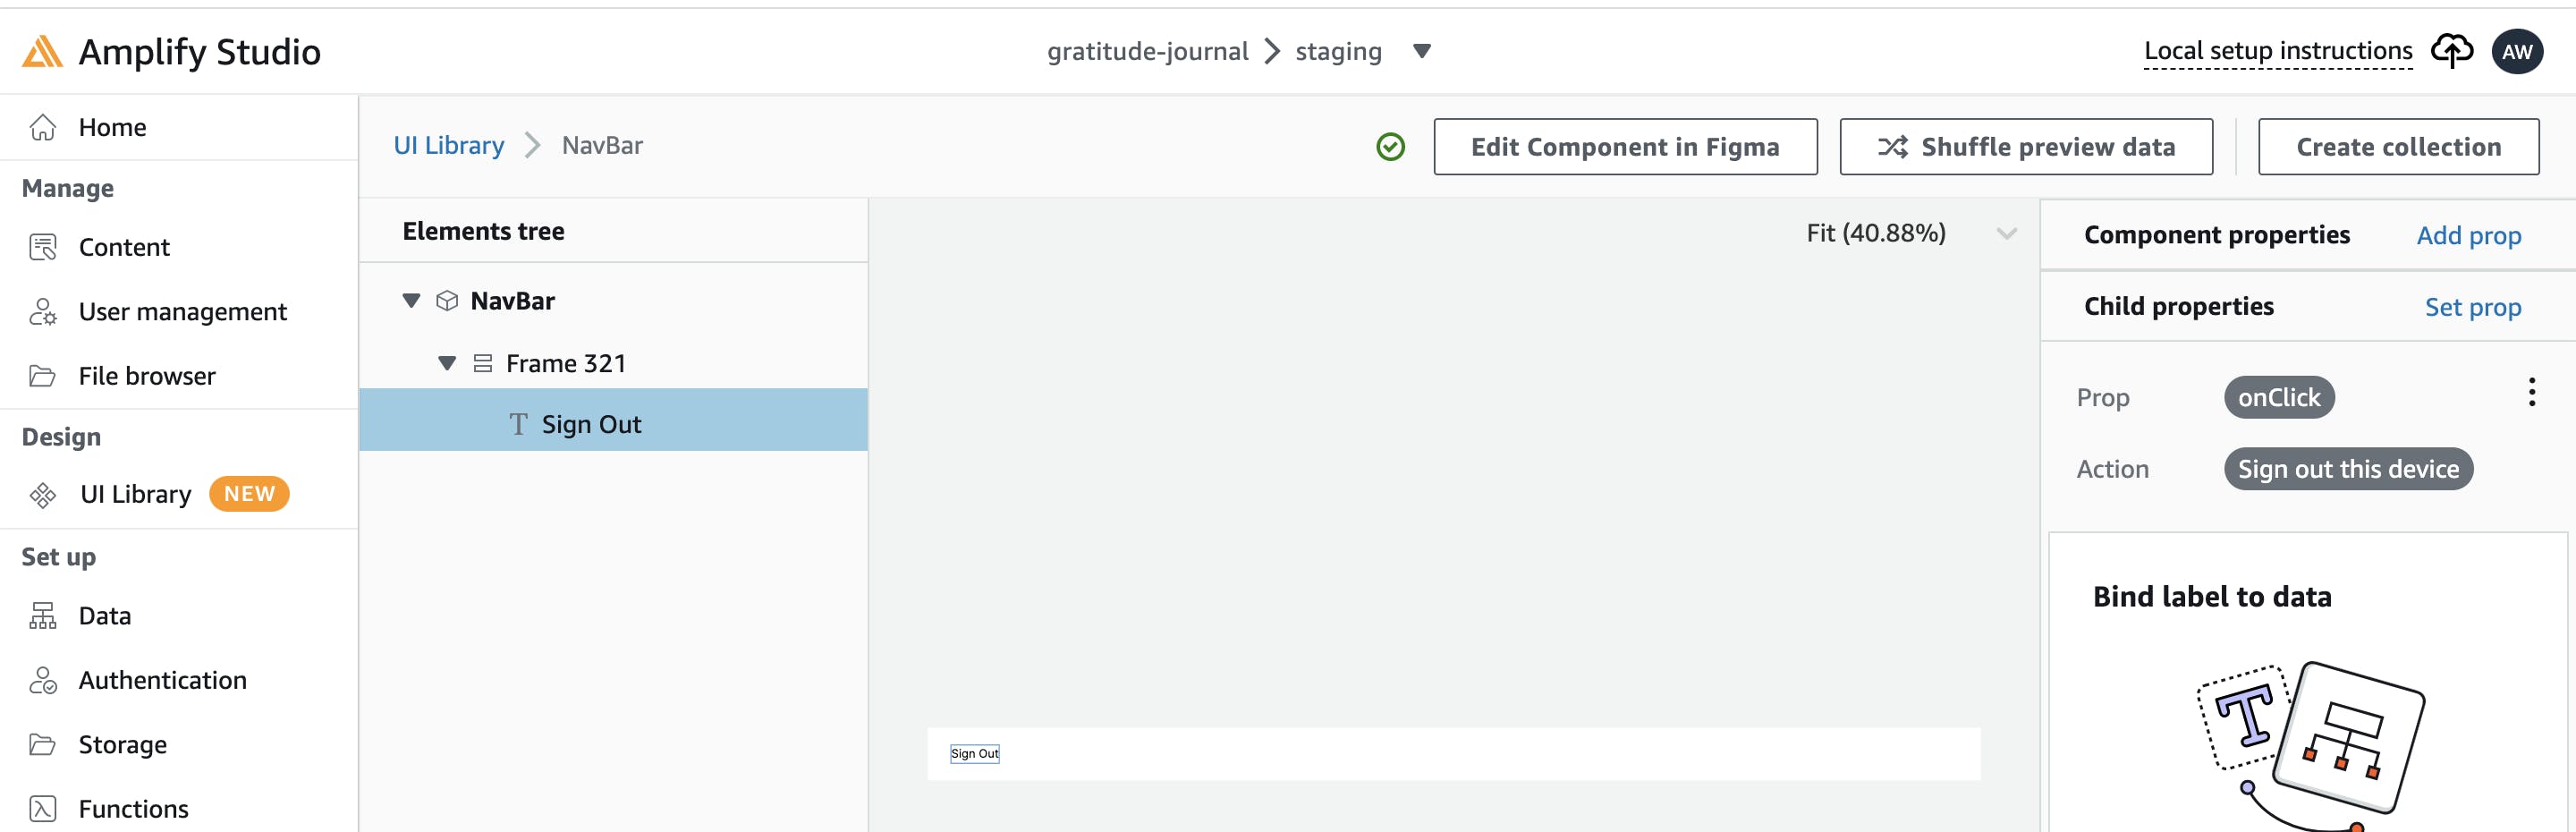
- NavBar: A navigation bar at the top of the app pages to facilitate signout.
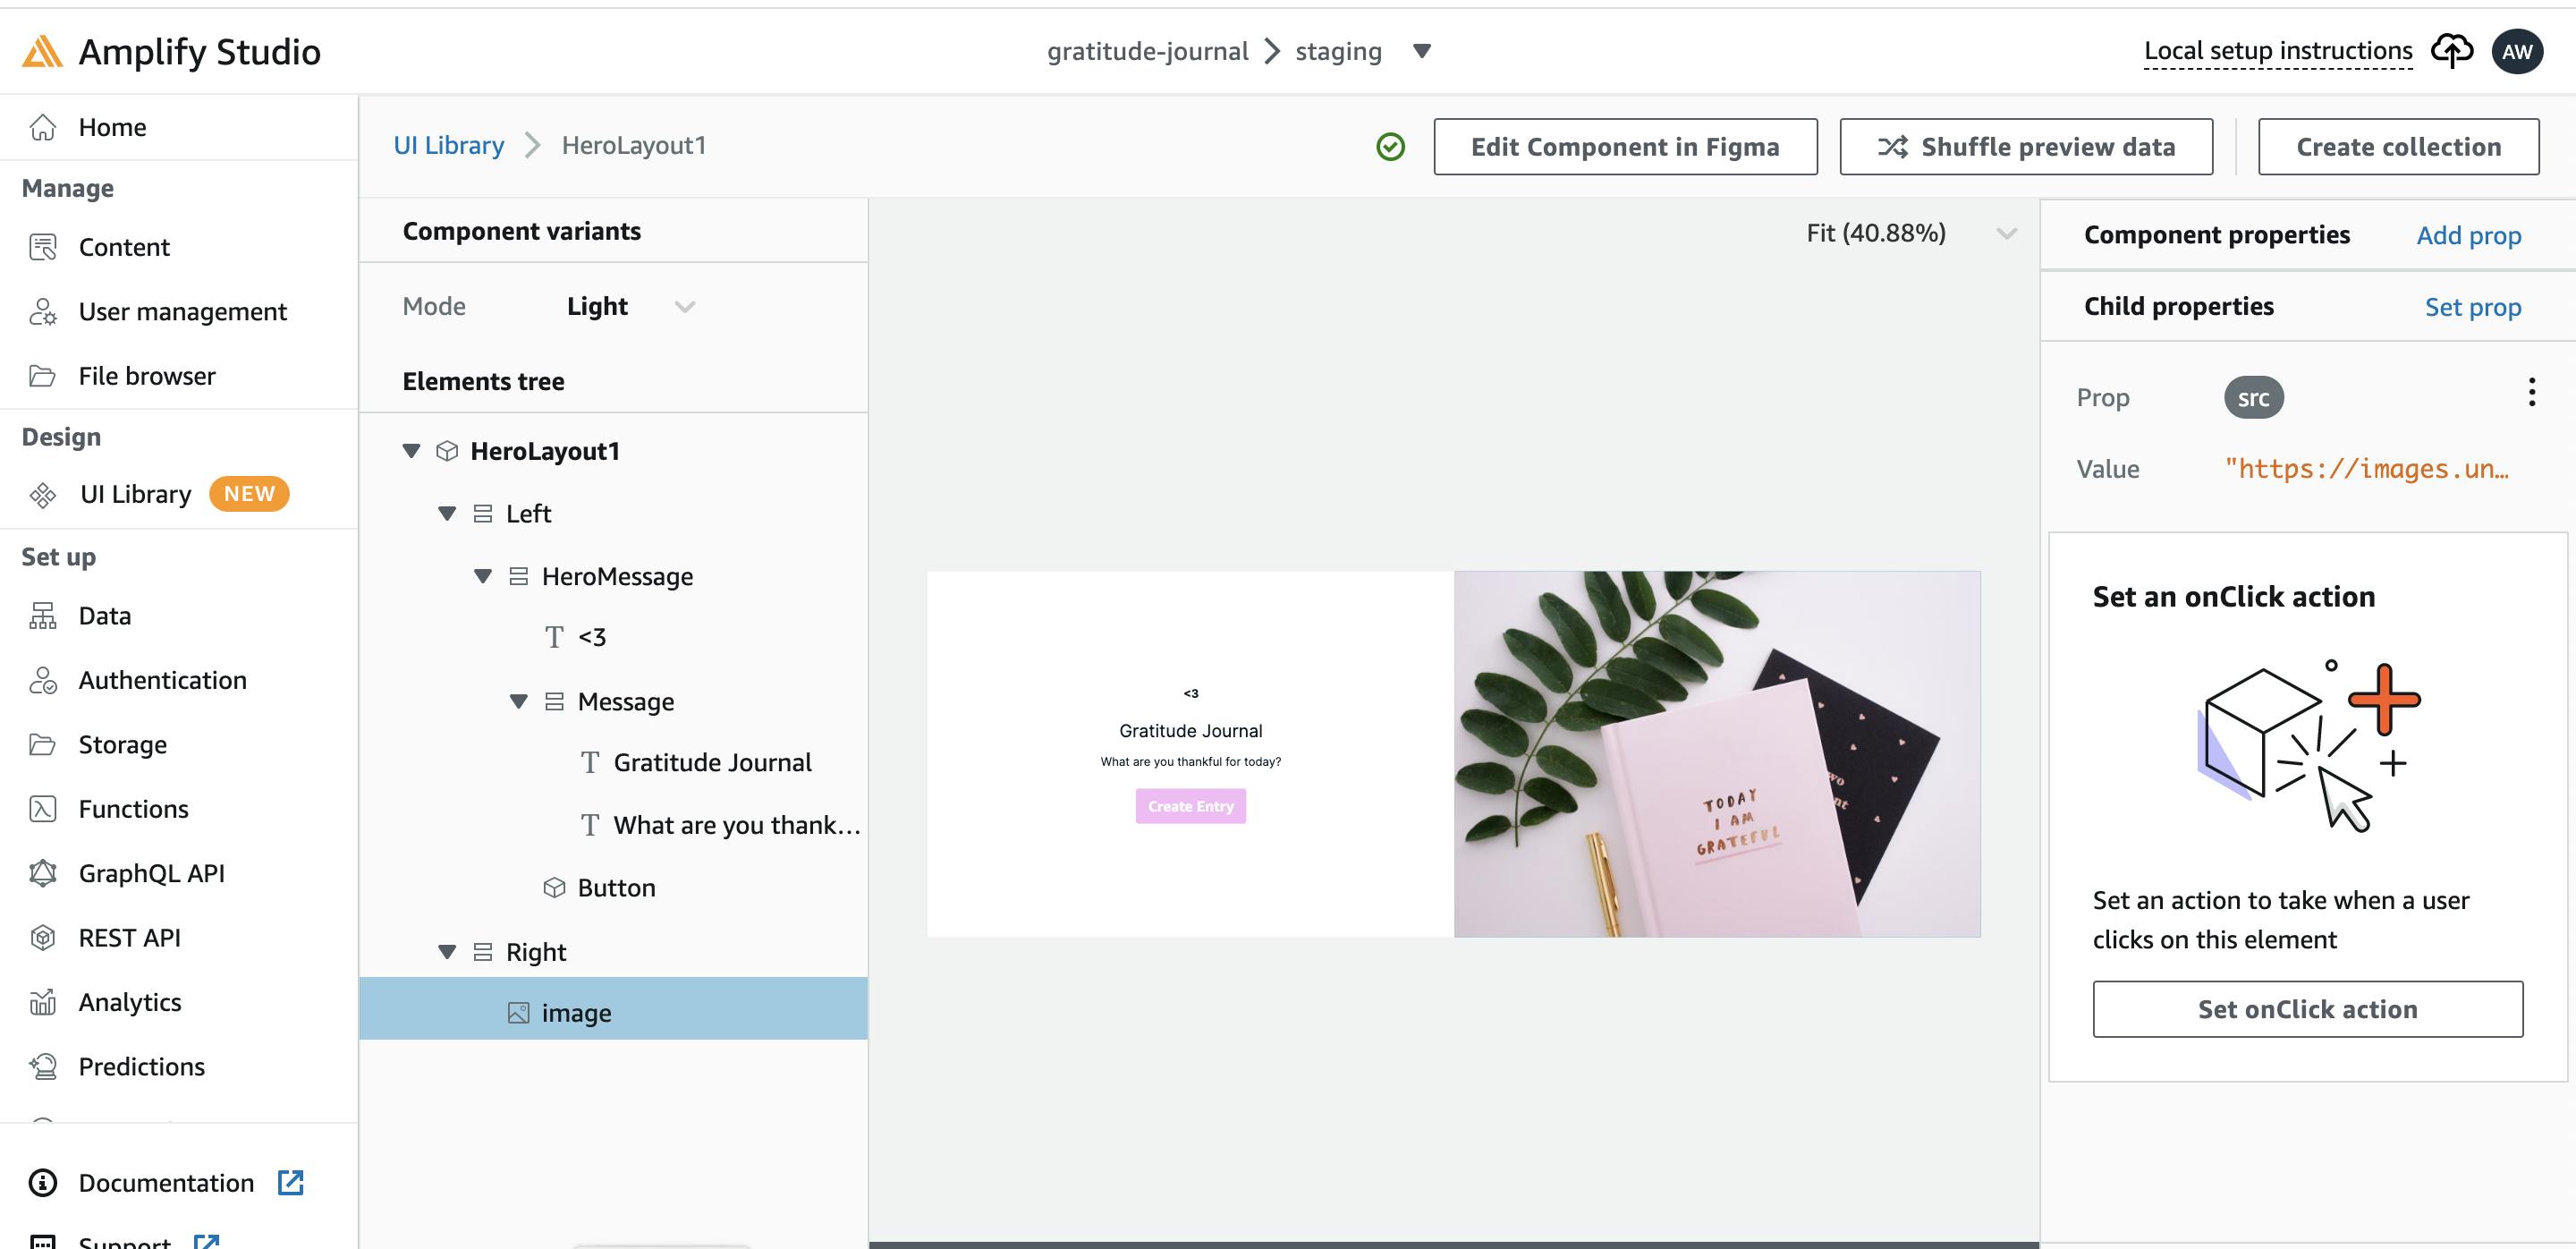
For the final application component, we will adopt the premade HeroLayout1 Component. This will be used for the home page banner. It contains a button for linking to the create entry form.
Use the AWS Theme Editor plugin to update the branding for the app. This ensures that all the UI components have the appropriate colours.
Copy the Figma file URL and paste it as shown below. Give Amplify Studio permissions to access Figma.
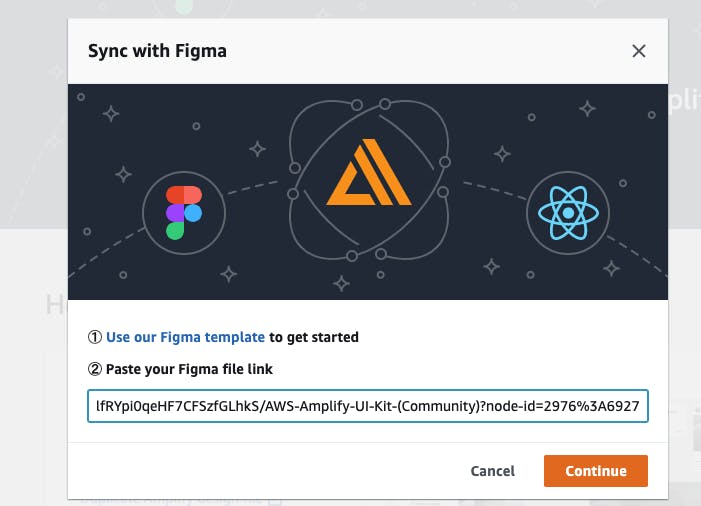
- After the Figma file loads in Amplify Studio, you will be prompted to accept or reject components. Accept all Components.
Configuring the App UI Components 🔩 🔧
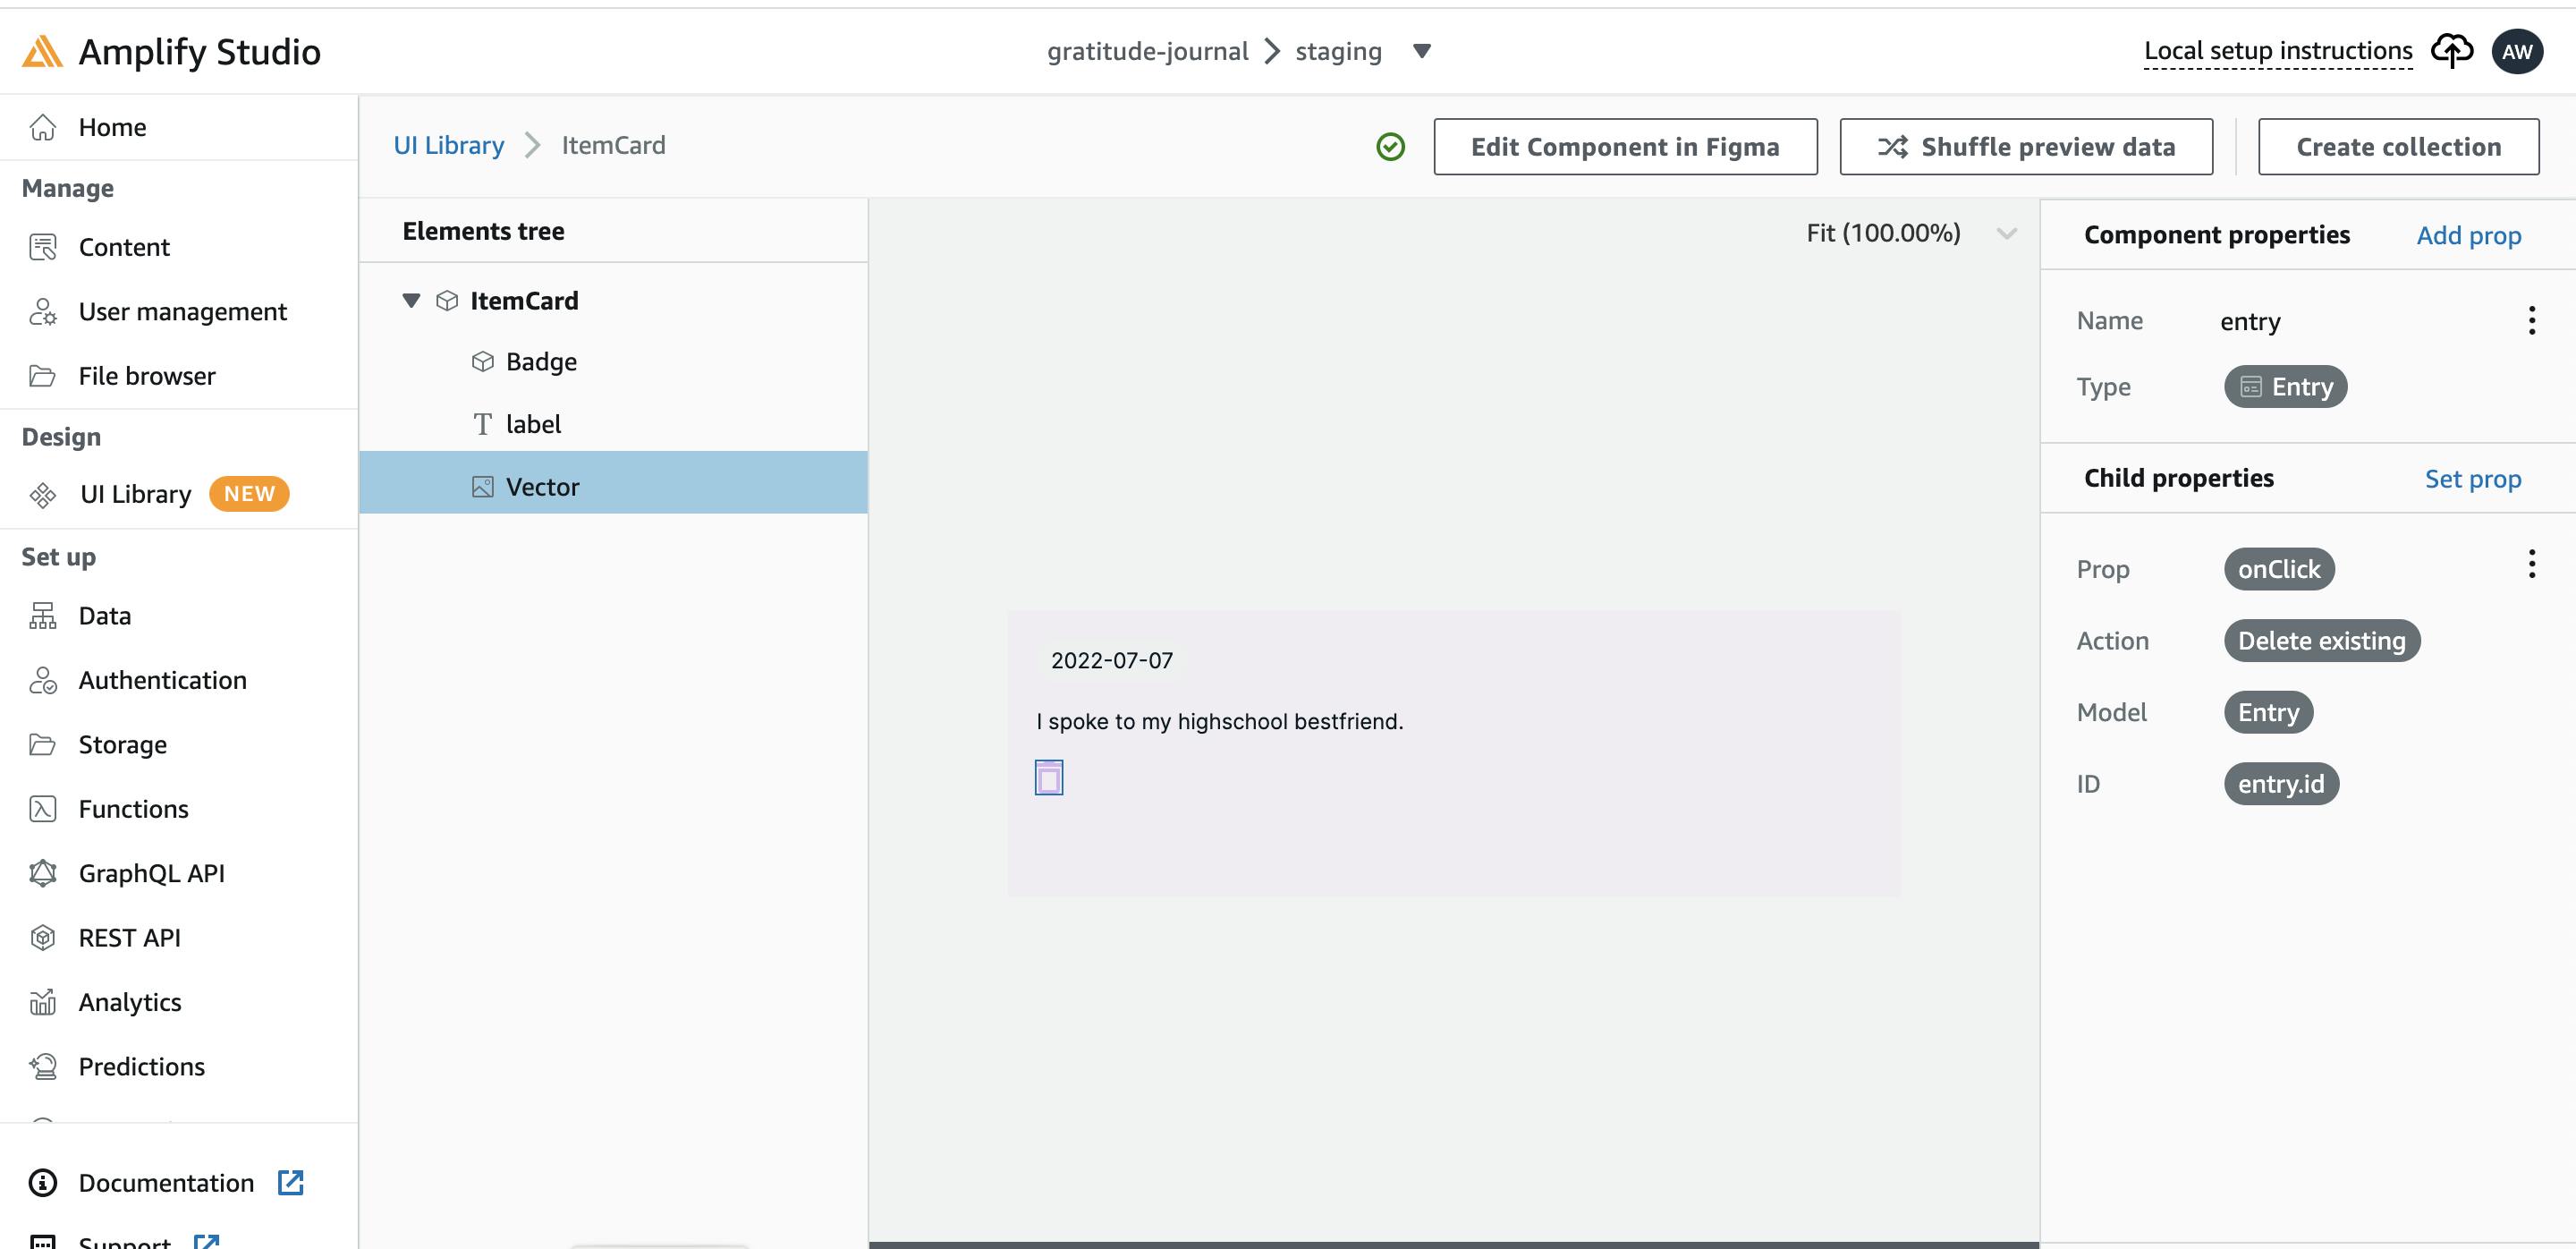
Click on ItemCard and click Configure. Click on each element on the frame to set the property and the value for the element. For the date element, the value will be entry.date. For the text label element, the value is entry.text. The delete icon property is set to onClick and the action is Delete. Random values are automatically generated and populated on the frame if you have not yet created entry objects for the Entry model.
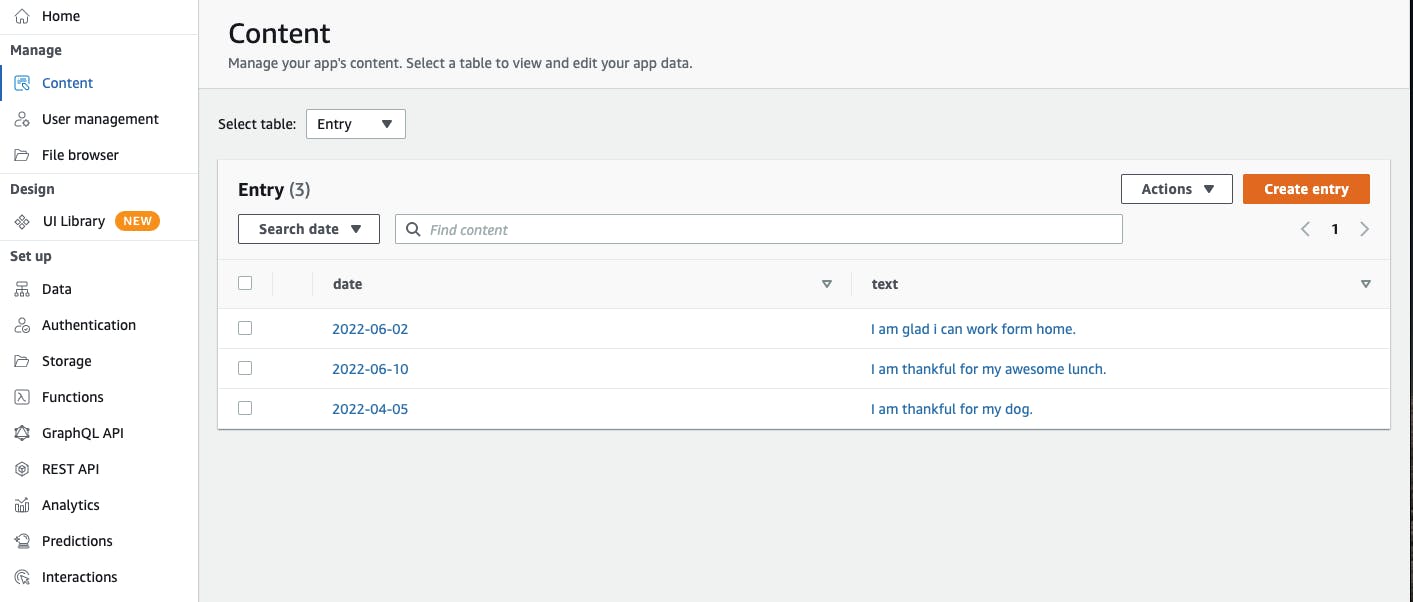
Click Content on the left menu bar to manually generate data for the application.
- Back in UI Library, click Create Collection on ItemCard configuration. Rename your collection to Entries. Add a search function and pagination for more than 6 entries. Include a grid view with 3 columns and set the padding to 10px on all sides.
- For the CreateEntry component, click on each component element and set the Child properties. Set placeholder values to assist the user in completing this form. On the Save button, set an onClick action to create a new instance of the Entry model. Set the model field names to be the date field and the entry field accordingly. Give the Home button an onClick action of GoToURL and a constant value of "/".
Configure the HeroLayout1 component, to set an onclick GoToURL for the CreateEntry button. Set the URL link to be a constant value of "/create-entry". The image source is updated at well.
For the NavBar component, set an onClick action for the Sign Out text. Set the action as "Sign out from this device"
Deploying the App Locally 🏡
- From your terminal, in the appropriate project directory, create a Next.js app using the command below. Once you have created the app, change into the directory you have just created.
npx create-next-app gratitude-journal
- Install the Amplify CLI in your project directory.
sudo npm install -g @aws-amplify/cli --unsafe-perm=true
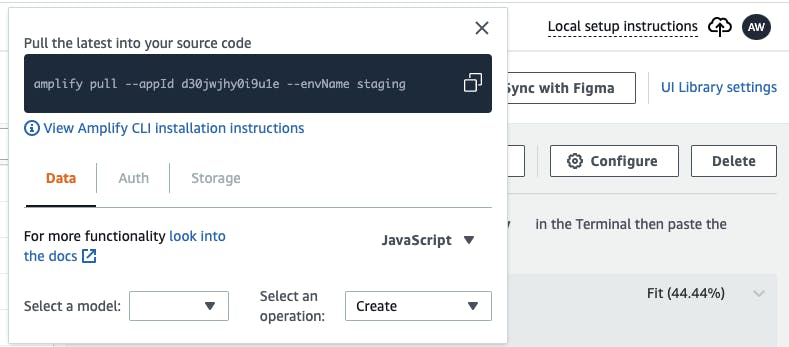
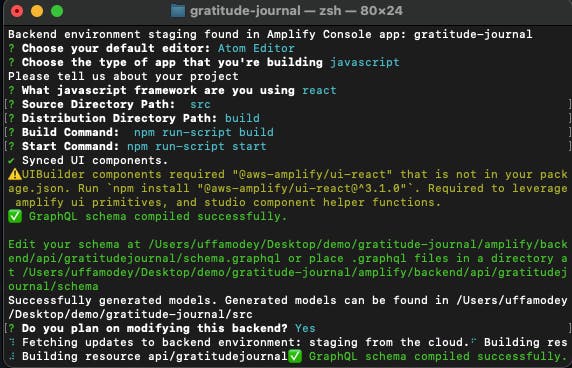
- Click Local Setup Instructions on the top right corner of the screen, copy the command shown and paste it into your terminal. This opens up your browser for you to confirm access to your app via the Amplify CLI
- Choose your preferred IDE (I am using Atom Editor) and select all the default settings in the setup.
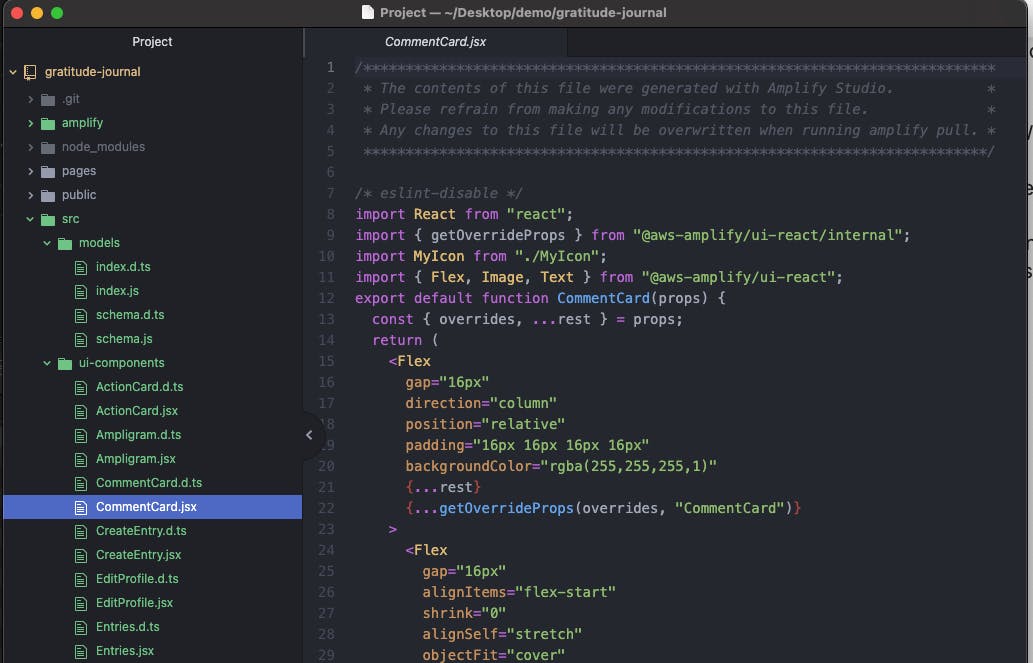
- Open the code in the editor. Under src you can view all of the Figma components that have been created just as a developer would have created them.
- In the terminal, install the Amplify Library and UI components.
npm i aws-amplify
npm i @aws-amplify/ui-react
- Go into the _app.js file to configure amplify. aws-exports is a configuration file with all the information about the backend on AWS.
- Next, open the index.js file. Remove the default head and footer tags to begin. Input the NavBar and HeroLayout1 components from the page. Ensure that you import them from the UI components.
- Start the development server to view the changes using the command below. If you are using Atom Editor, don't forget to save the changes for them to be visible.
npm run dev
- You can now view your app on localhost:3000
- Visit ui.docs.amplify.aws to add styling for your font. Click Get Started and scroll down to the Font section. Paste the snippet at the top of the styles/global.css file on the editor.
@import url('https://fonts.googleapis.com/css2?family=Inter:slnt,wght@-10..0,100..900&display=swap');
- Input the Entries component below the HeroLayout1 component on the index.js file. Add a 20px margin to the bottom of the HeroLayout1 component to add some space between both of the components.
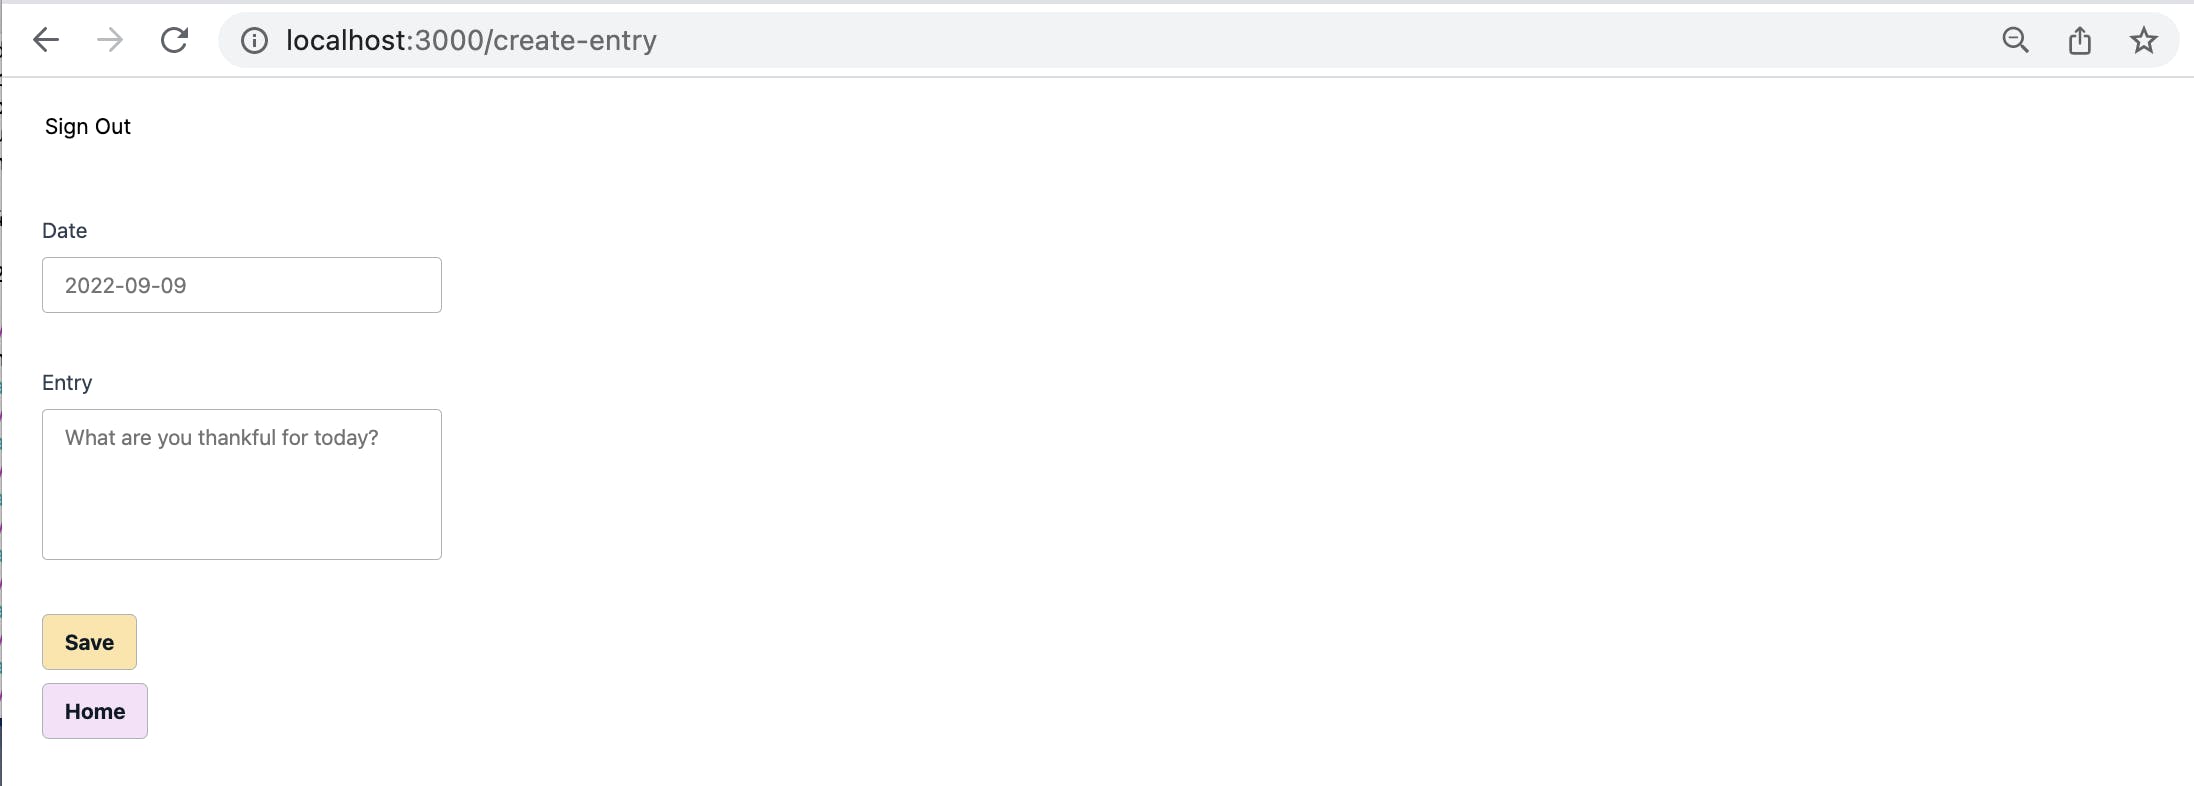
- Clicking on Create Entry button does nothing at the moment. To implement the form, create a Next.js route for this. Create a new file in the pages folder called create-entry.js and import the CreateEntry component within it. Now clicking on the Create Entry button will render the form to create a new journal entry. Fill in the form data in the appropriate format and click Save. Click the Home button to return to the home page. Your newly created journal entry should be visible.
Authentication with AWS Cognito 🚧 🏁
AWS Cognito is used in this App to provide authentication on every request. This enables only signed-up and verified users to make use of the application. Users who have successfully logged into the app using their email and password will be able to create journal entries, view entries that they have created and delete journal entry objects. This adds a layer of security and privacy to the app.
Getting started with AWS Cognito 💪
What is Cognito? "With Cognito User Pools, you can easily and securely add sign-up and sign-in functionality to your mobile and web apps with a fully-managed service that scales to support hundreds of millions of users. " - AWS Cognito
- Add Authentication to your app from the Authentication tab on Amplify Studio. For this app, we want only the user's email address and password to be collected and used for authentication.
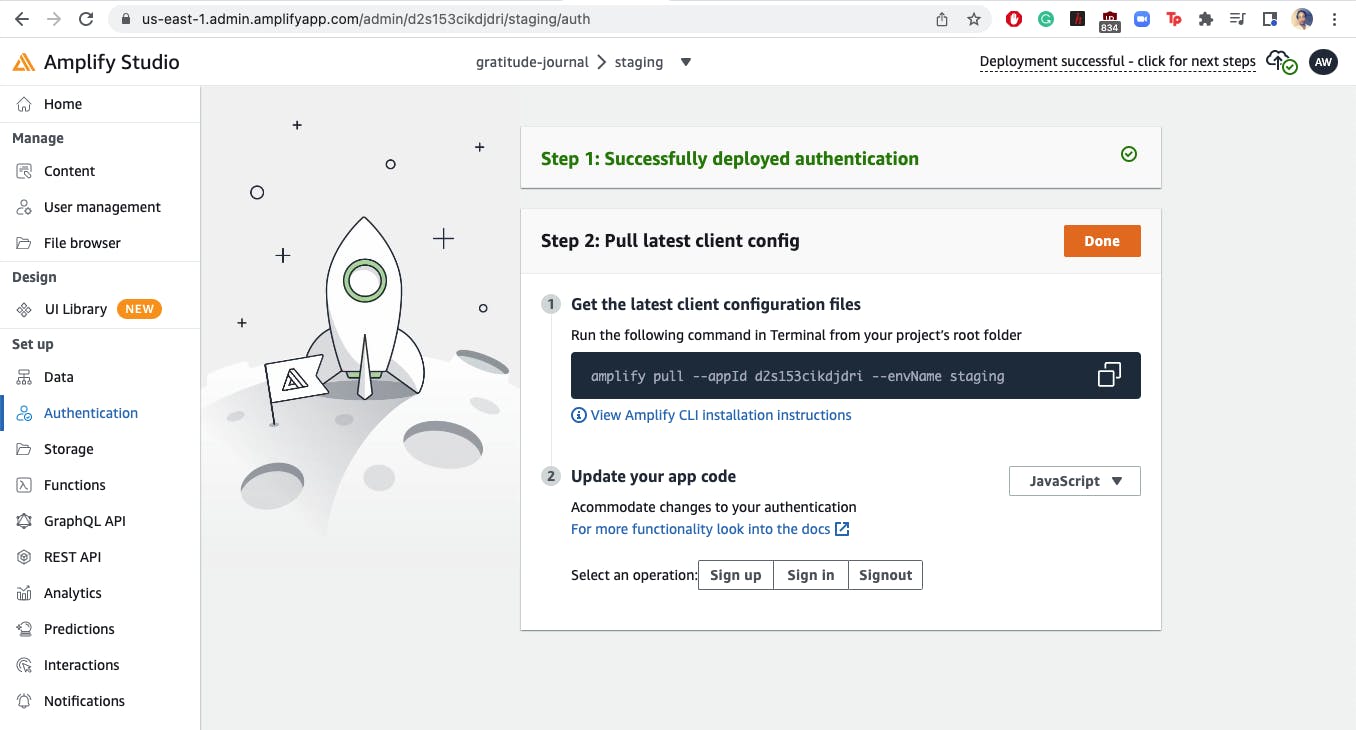
- Edit the _app.js file to add Authentication to your app.
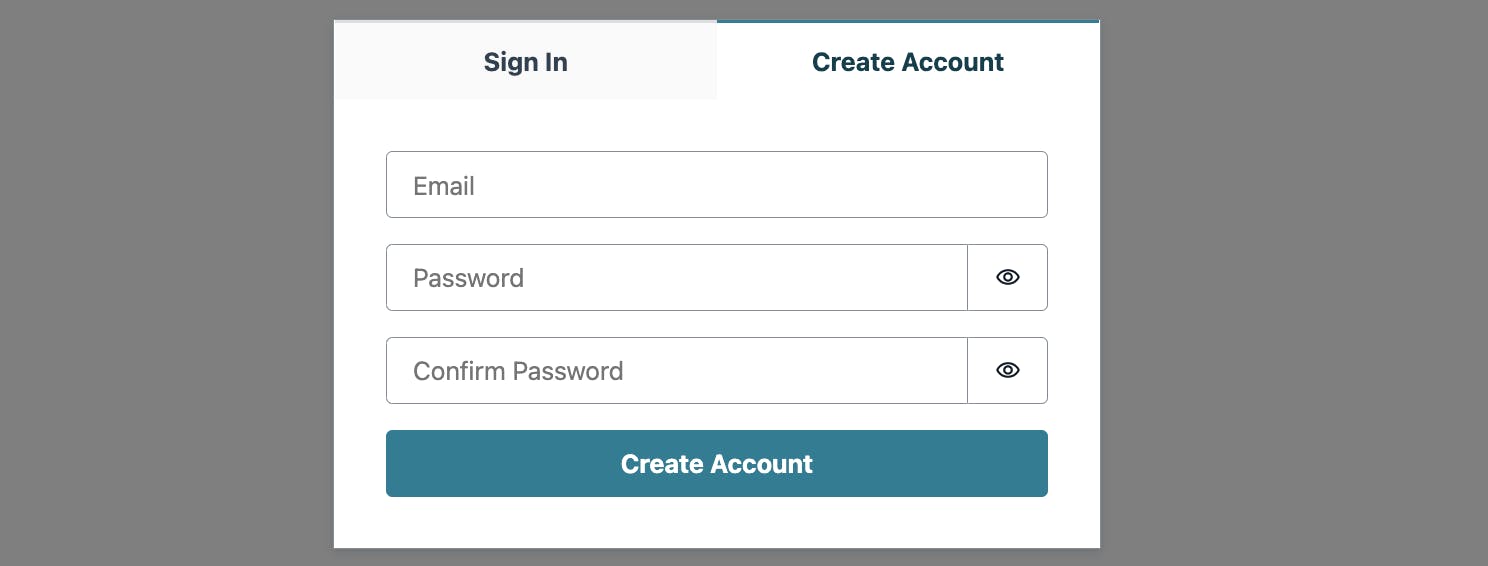
- Save your changes and refresh the app. You will now be prompted to sign in before accessing the app. The sign-in tab also has a signup section for new users to be created. When a new user is created, they are sent a 6-digit pin to their email address to verify the validity of the email provided. Click Sign Out from the nav bar to sign out of the application.
Cloud Deployment using AWS Amplify Hosting ⛅ 🌐
- Create a repository for the app on GitHub. From your project directory run each of the following commands in turn to push the code files in your project directory to the newly created repo.
git init
gh repo create
git remote add origin <link to your gh repo>
git branch -M main
git push -u origin main
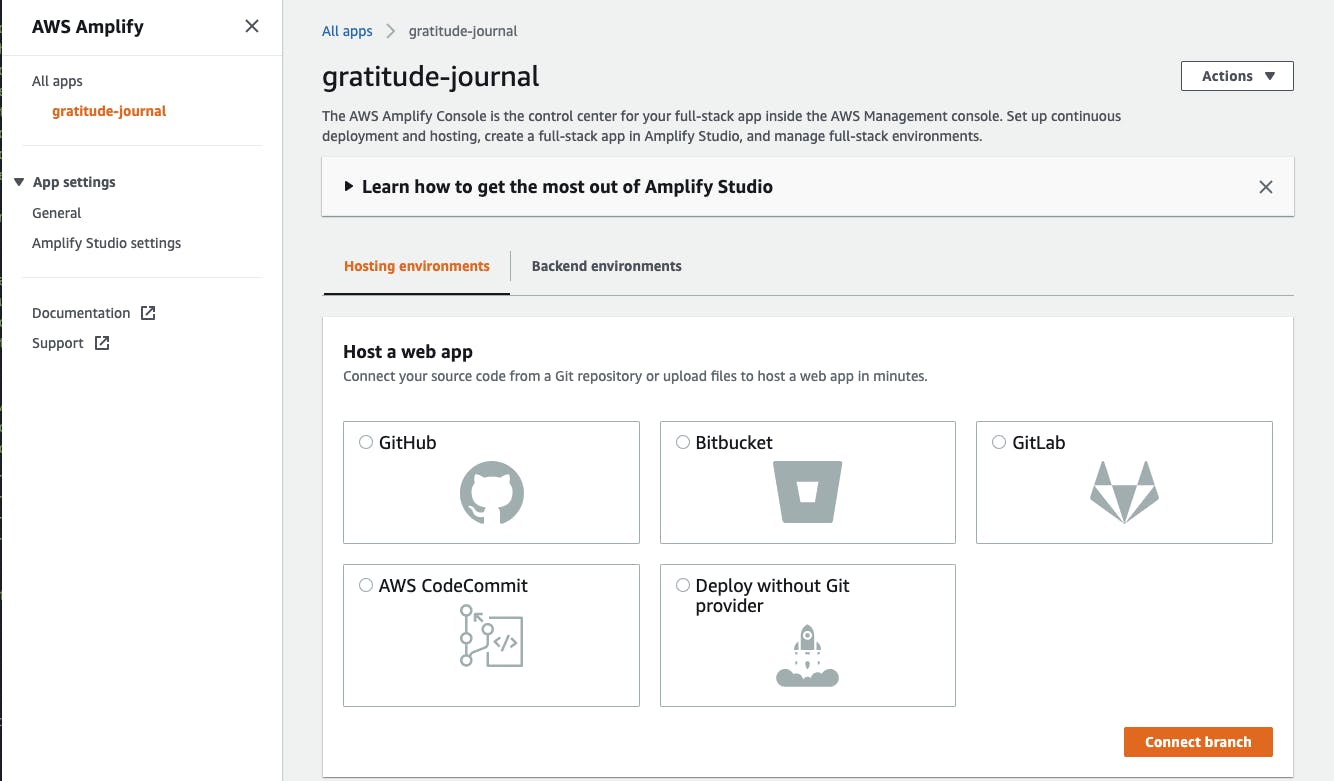
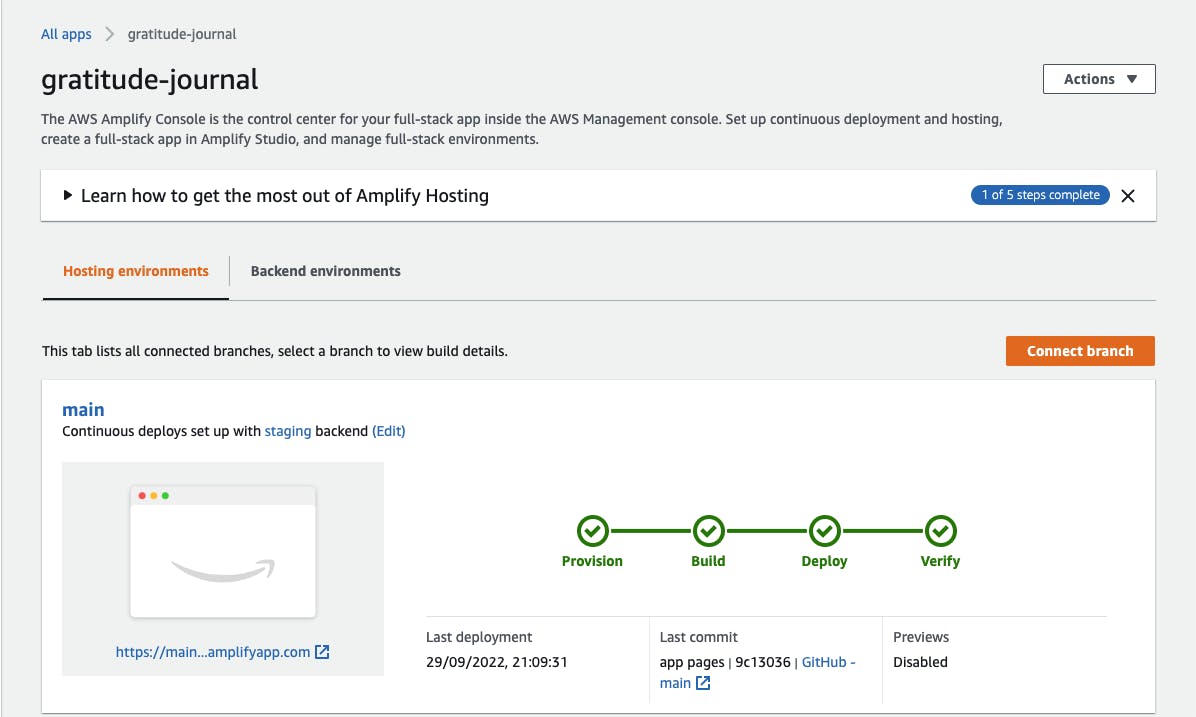
- Open the gratitude-journal app from the AWS Management Console and Click Hosting Environment. Select GitHub. You will be promoted to authorize a connection to your GitHub account from AWS Amplify.
- Add a repository and branch.

Configure build settings including setting a role through which Amplify Hosting may access your resources.
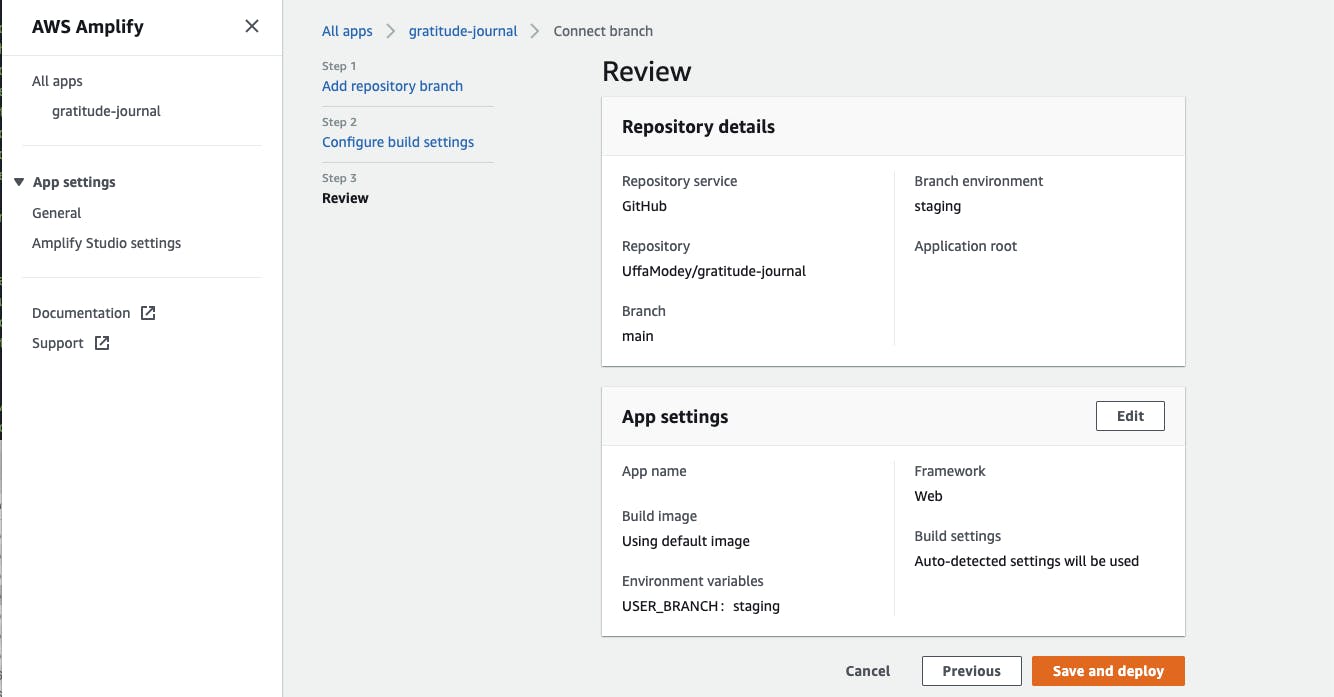
Once the deployment is completed app is will now be publicly available via Amplify Hosting on main.d30jwjhy0i9u1e.amplifyapp.com. This may take quite a while to complete. Be patient 😫.
- You need to commit all of your local changes to the GitHub repo to view them. Once this is carried out, another build and deployment will be triggered on the app.
git init
git add .
git commit -m "commit message"
git push origin main
Conclusion ✨ ✨
Costs 💰
 This app was developed and deployed under AWS Free Tier Costs. Although this was already mentioned in the Hackathon blog post, it was very important for me to confirm what potential costs could be incurred by running this app on AWS Amplify Studio and using AWS Cognito.
- AWS Amplify Hosting: AWS has a 12-month Free Tier term which is automatically assigned to you after creating your AWS account. This app currently uses the AWS Free Tier for hosting on AWS Amplify Hosting. "With the AWS Free Usage Tier, you can get started for free. Upon sign-up, new AWS customers receive 1,000 build minutes per month for the build and deploy feature, 15 GB served per month and 5 GB data storage per month **for the hosting feature."
- AWS Cognito: "The Cognito Your User Pool feature has a free tier of 50,000 MAUs for users who sign in directly to Cognito User Pools."
Lessons Learned 📚
Building this application and participating in the Hashnode Hackathon have particularly exciting me. This is the first hackathon I have participated in and it was not as scary as I imagined. Some of my core technical skills that I have improved by participating in the hackathon are;
- Experience in developing and hosting an app using AWS Amplify.
- Experience in implementing user authentication using AWS Cognito.
- Documentation writing for implementing app features.
- Designing reusable app components on Figma.
What I liked about participating in the Hackathon
- AWS Cognito made the process of implementing user authentication for the app really seamless.
- The participation instructions for the Hackathon were very clear and beginner friendly.
Comments on developing and deploying with AWS Amplify
- The available documentation for AWS Amplify is really great. It is properly curated although there is a lot of content to go cover.
- AWS Amplify works with specific code editors. This can be quite limiting if you are not used to any of the available editors. However, the available editors are all commonly used editors so engaging with anyone for even the first time will not be too complex.
Useful Resources 📣 🔈
Some helpful resources that I leveraged for this development include;
- [Tutorial] - How to Host AWS Amplify Project Using GitHub
- Figma to Code | Build a Fullstack App with AWS Amplify Studio | Amazon Web Services
- How to Create an Authenticated REST API on AWS with API Gateway, Lambda, Cognito, & AWS Amplify
Future work and App Improvement 🍻
Some areas of the app that can be improved in a future release are;
- Include a success message when an Entry object is successfully created
- Add another layer of authentication so that the app users may only view or delete the entries they have created.
Thanks a lot for reading this blog post. I hope it was useful to you. Kindly leave any questions, feedback or suggestions in the comment section below. I will really love to hear from you.
Cheers! 🎊 🍻 🎊 🍻 🎊 🍻